Biometric Authentication Integration
Integration guide
Web SDK guide
This guide provides step-by-step instructions on how to integrate Biometric Authentication with the Web SDK.
Before you begin, make sure you have completed the following:
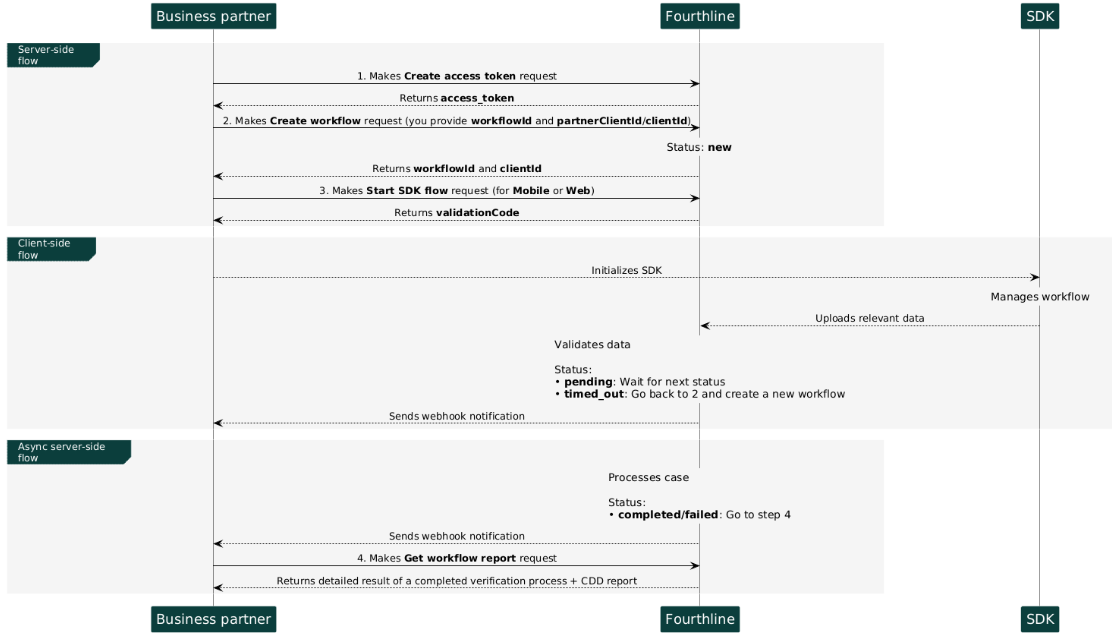
Flow
Click to magnify

Biometric Authentication Web SDK flow
1. Authenticate
Create an access token to authenticate in our API:
- You provide your Fourthline API key.
- You receive an
access_token.
API Reference – Create access token
If your token expires, make another Create access token request.
2. Create workflow
Create a Biometric Authentication workflow:
- You specify the name of the workflow.
- You specify either
partnerClientIdorclientId, but not both.
API Reference - Create workflow
After the workflow has been created, you can request a workflow status at any time.
- You provide the
workflowId. - A successful response includes
workflowStatusand product-specificstatus.
See Workflow Statuses
API Reference - Get workflow status
3. Start SDK flow
Request a validation code for the App Drop-in or Web SDK:
- You provide the
workflowId. - Depending on your integration, set the value for
target:Web. - You receive a
validationCodeto pass to the SDK in your backend.
API Reference - Start SDK flow
• If the client stops in the middle of the workflow, you need to create a new SDK session.
• When the client closes the app, the validationCode is invalidated and cleared from the cache.
4. Request workflow report
When the case status is completed, you can request the report of the workflow, including the CDD report.
- You provide the
workflowId. - A successful response includes the CDD report and workflow and product-specific statuses.
API Reference – Get workflow report
Updated 17 days ago