AD FS Federation
Integration guide
This page sets out how to integrate the Case Review Portal with the self-service or hybrid model with single sign-on.
AD FS Federation
To set up AD FS Federation to manage access to the Case Review Portal, follow these steps:
Prerequisites
Your Fourthline delivery manager provides you the following:
| Prerequisite | Description |
|---|---|
| Service provider entity ID | urn:amazon:cognito:sp:<UserPoolID> |
| SAML endpoint | https://<cognitoUrl>/saml2/idpresponse |
After you have successfully set up the federation with AD FS, you must send us your Federation Metadata XML file.
Make sure your organization has set up relevant user management security groups.
1. Create new relying party
1.1 Add new relying party trust
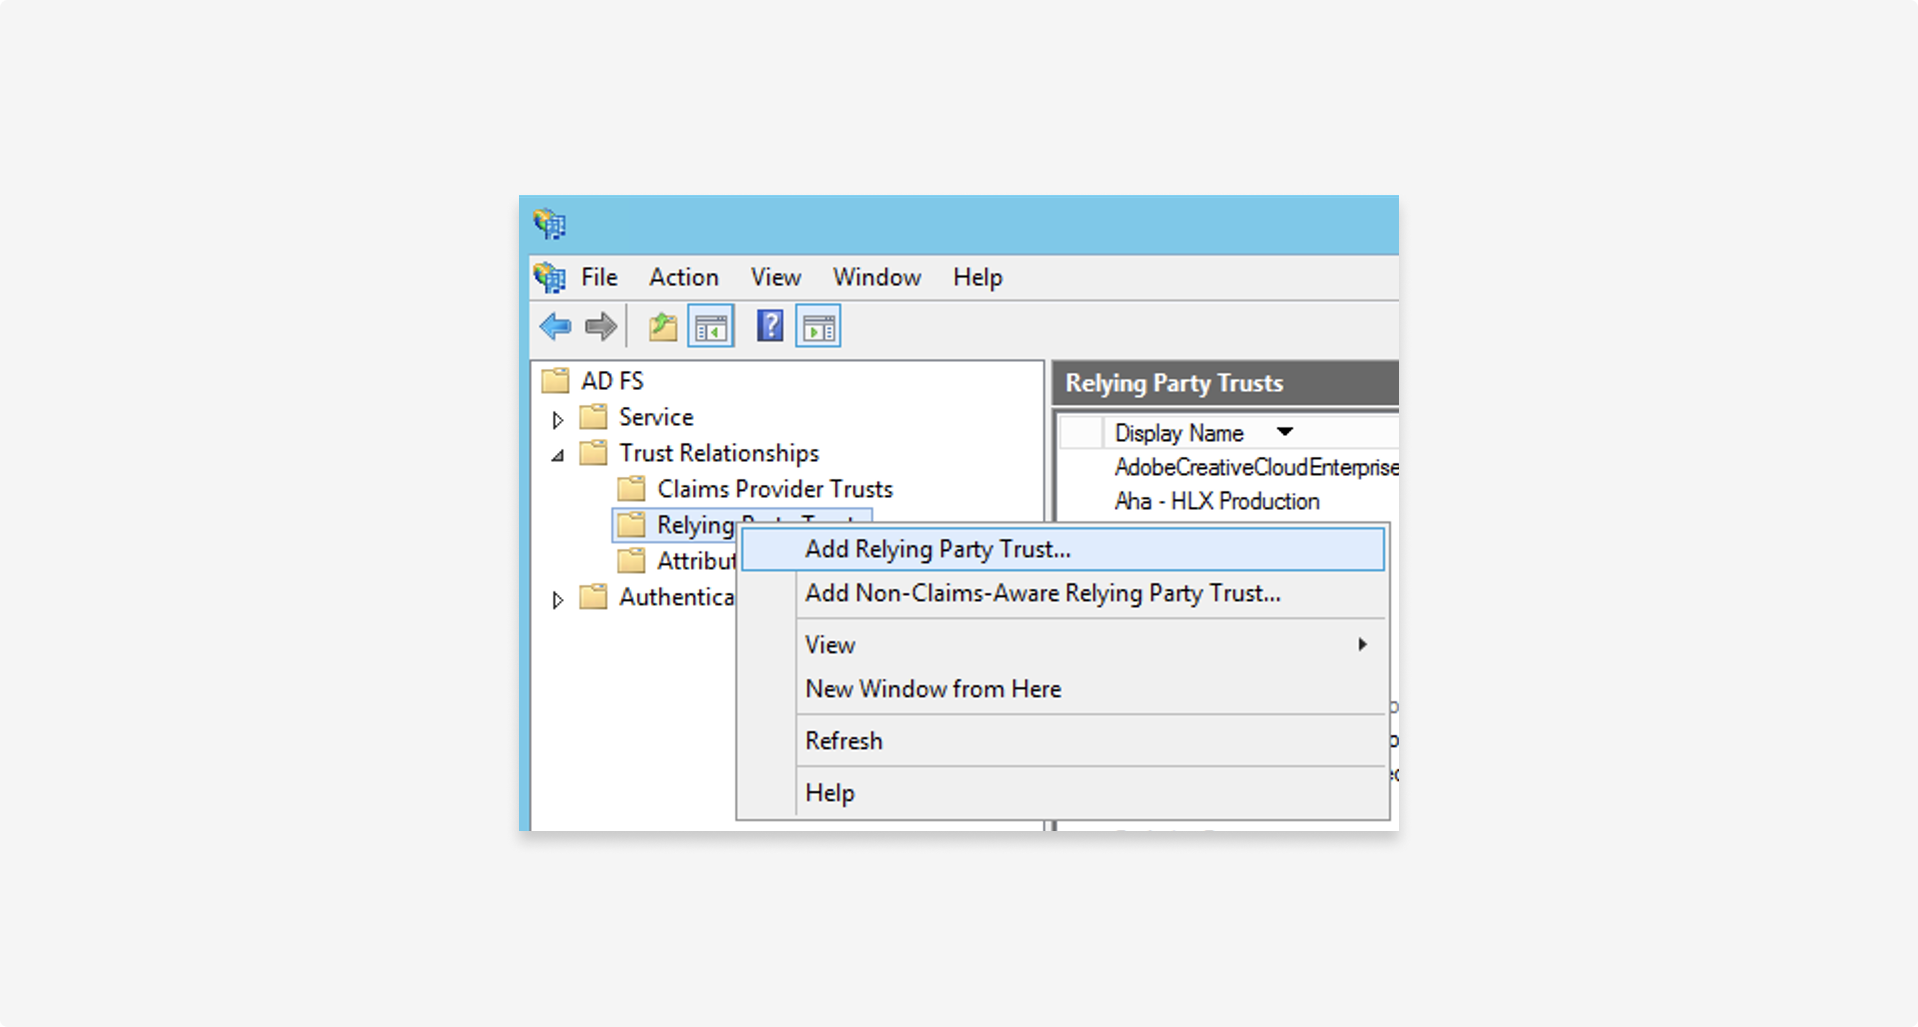
To create a new relying party, in the AD FS management console, right click AD FS > Trust relationships > Relying party trust > Add relying party trust.
1.2 Configure
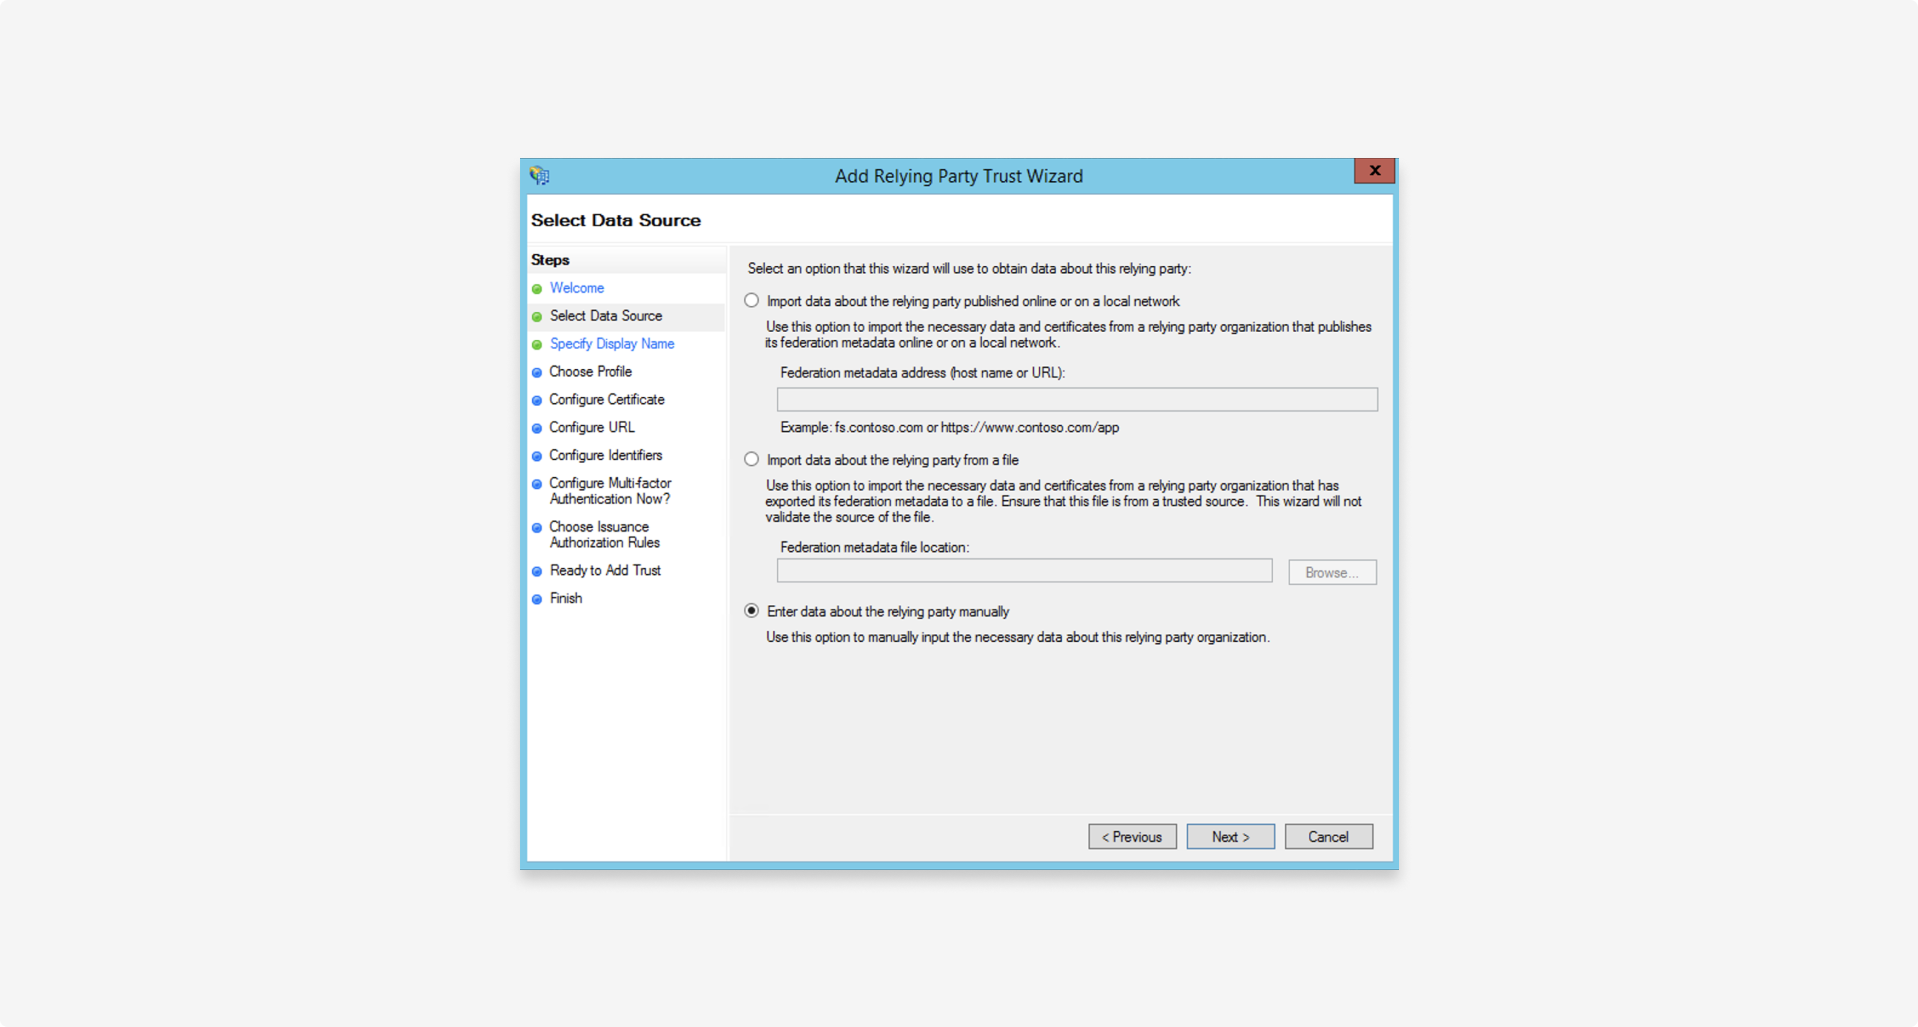
Select Enter data about the relying party manually:
1.3 Use default settings
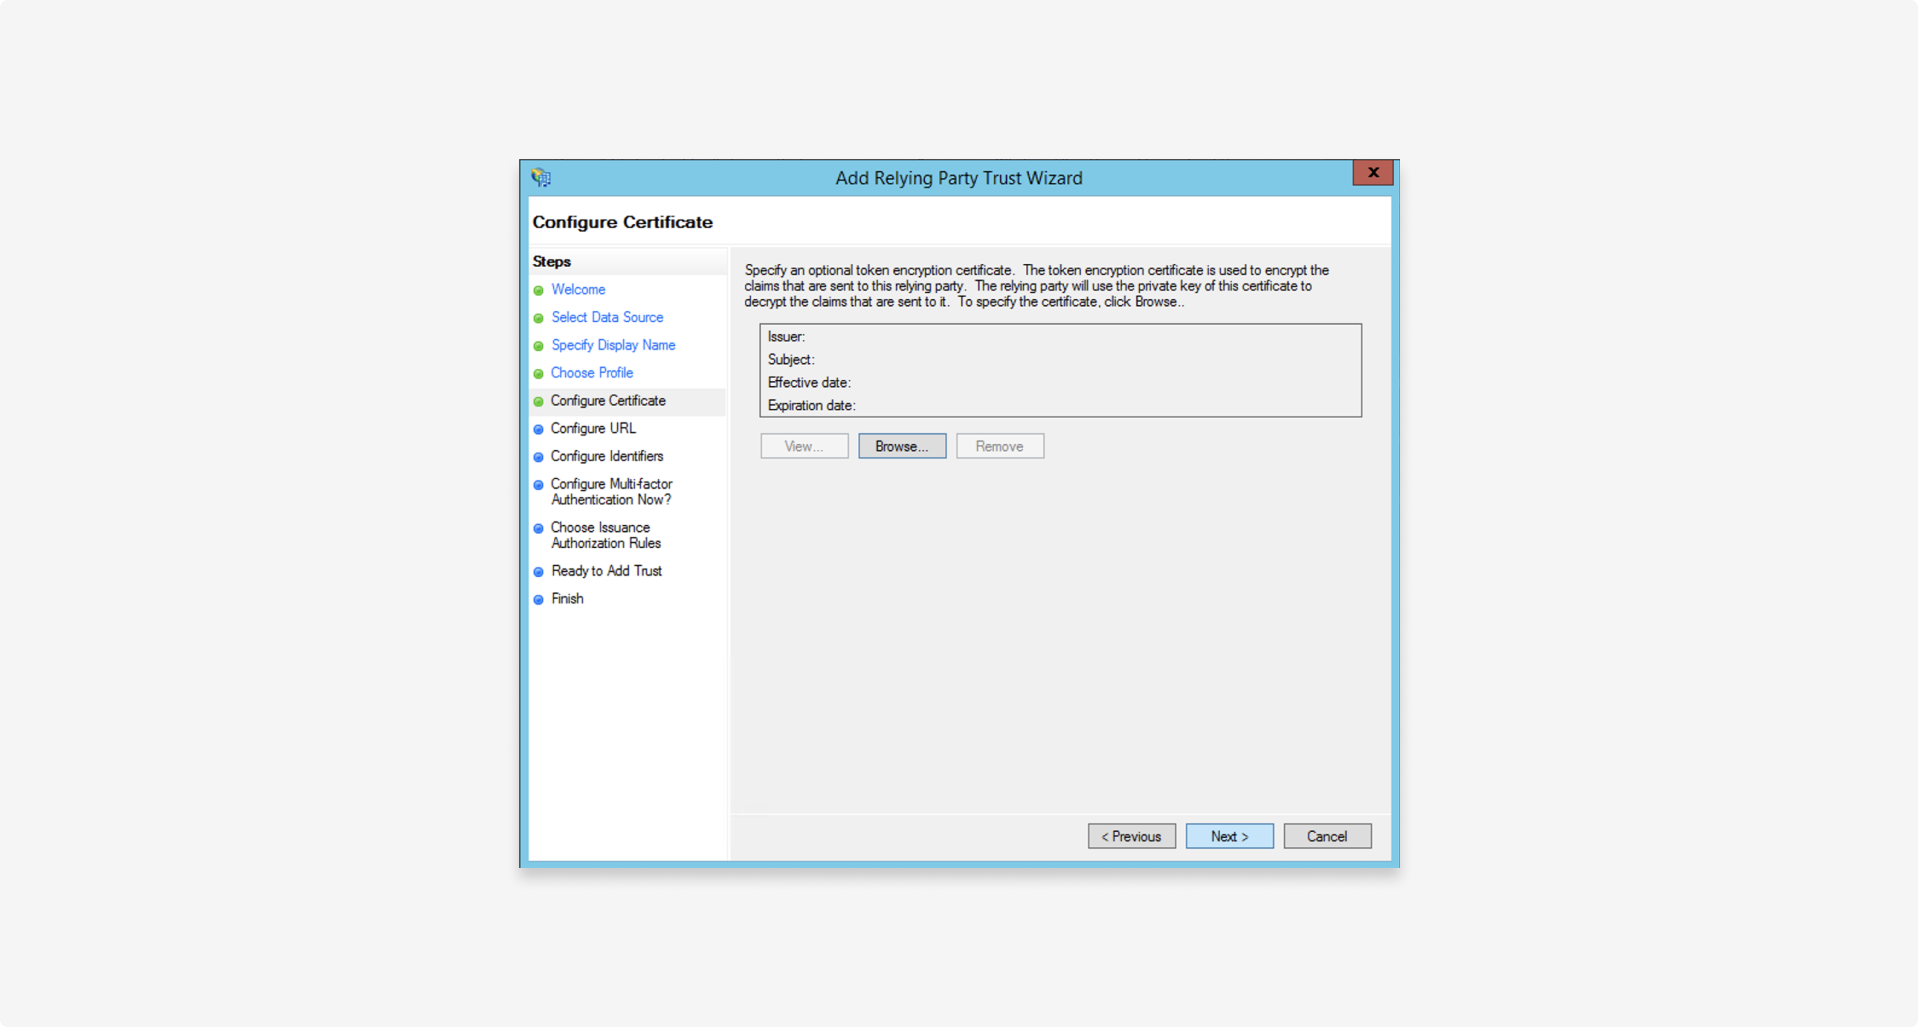
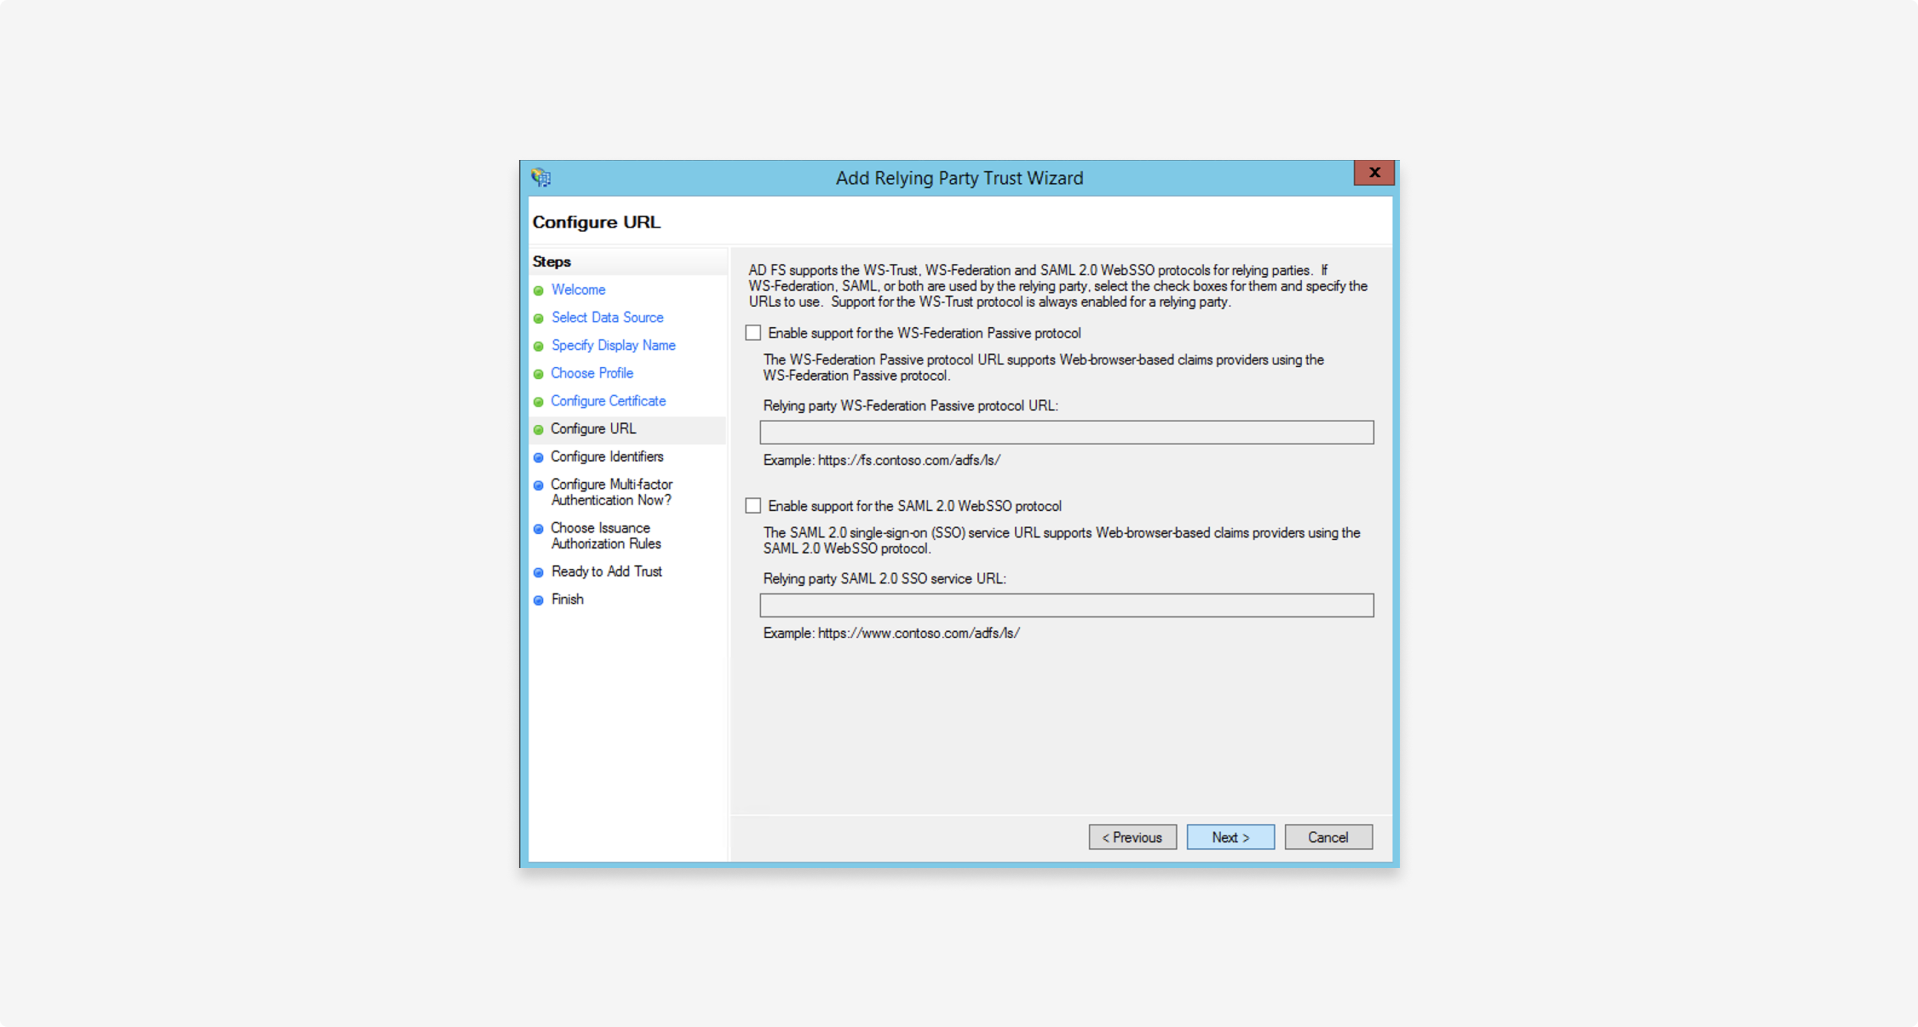
For the following steps, use the default values shown:
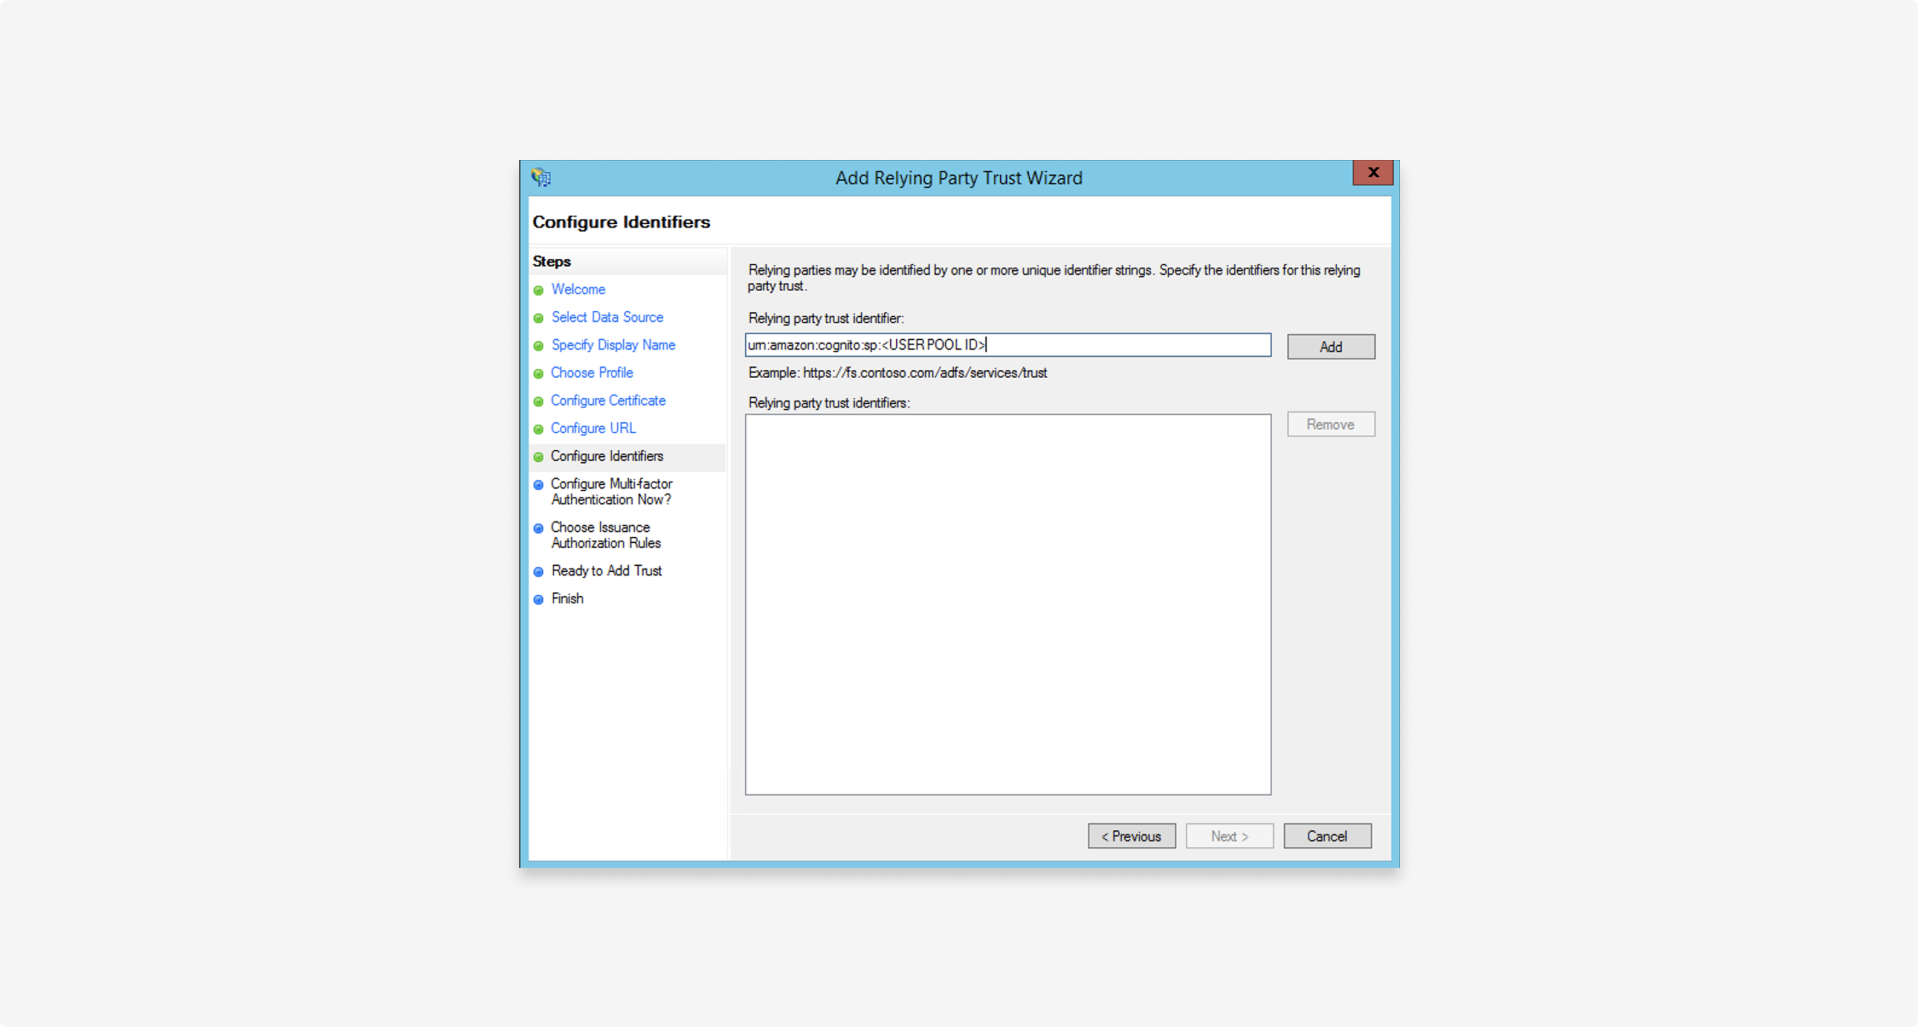
1.4 Configure identifiers
Set the relying party trust identifier to the service provider entity ID provided by Fourthline, formatted as follows: urn:amazon:cognito:sp:<UserPoolID>
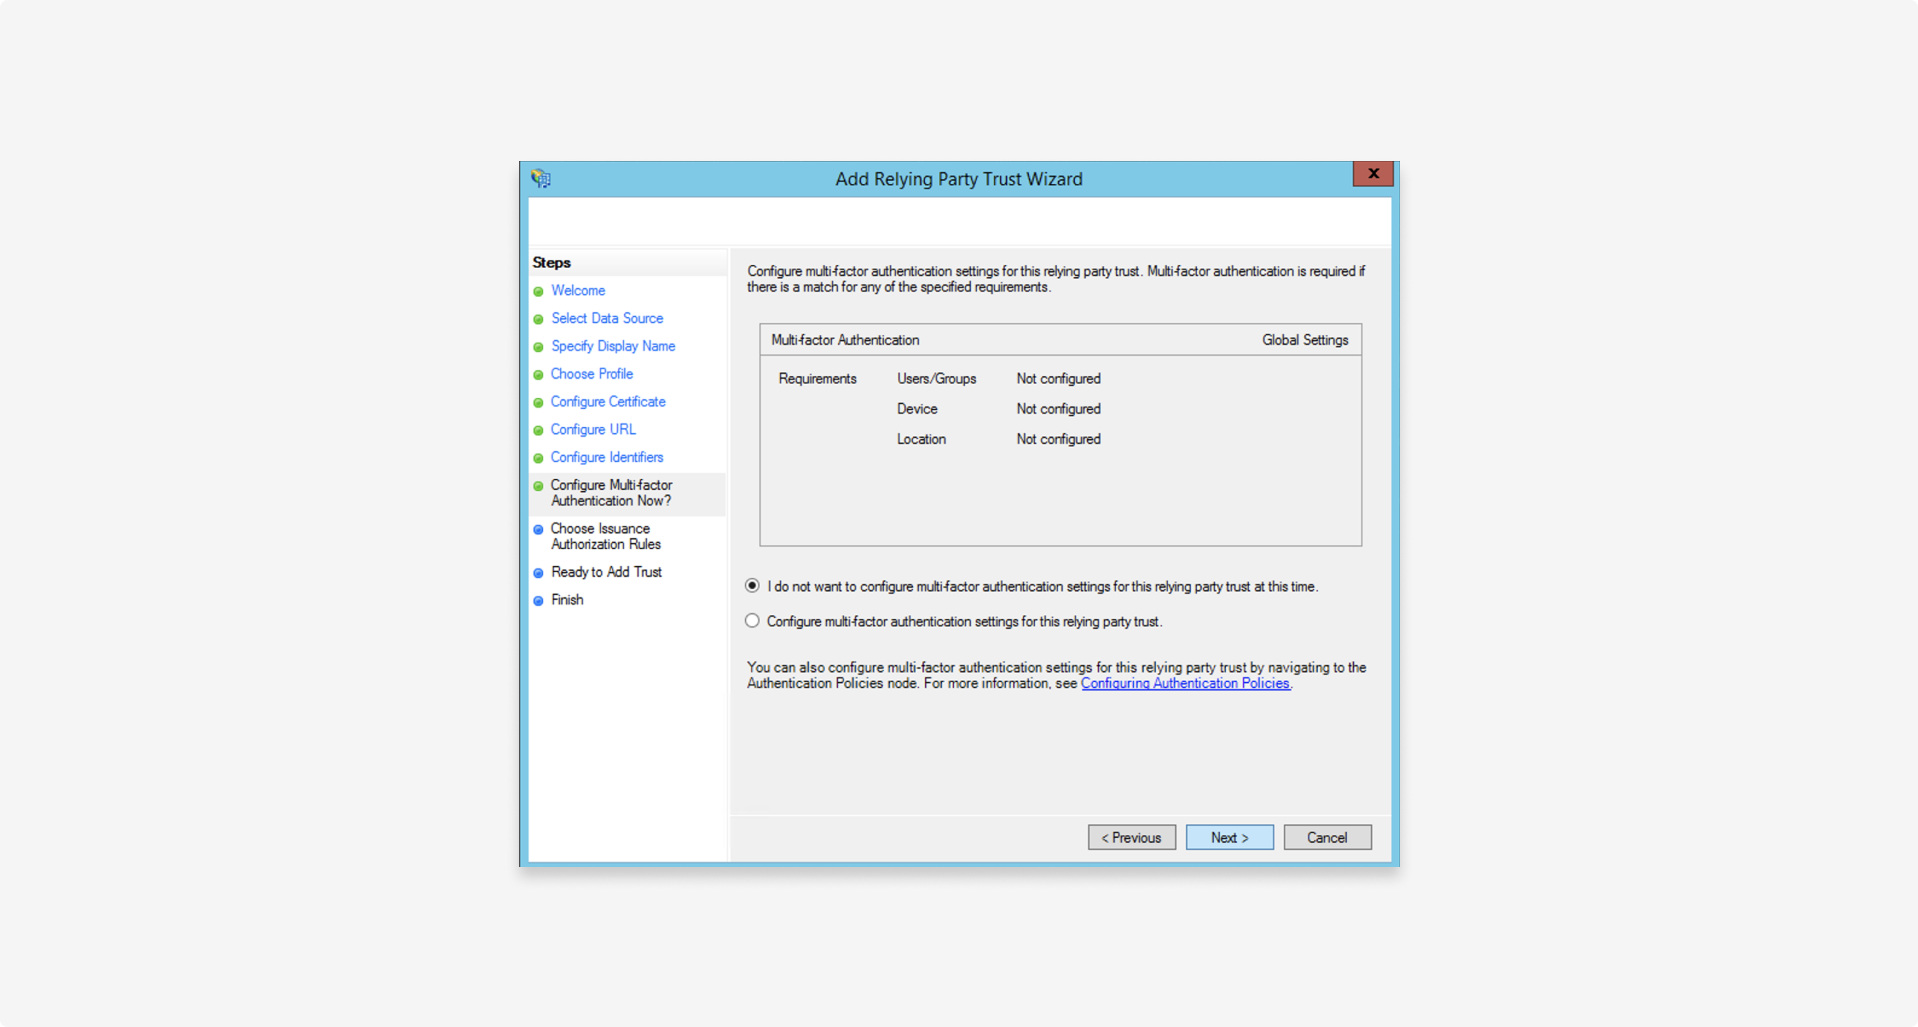
1.5 Configure multi-factor authentication
Configure multi-factor authentication in line with your organization's security policies (not required to successfully set up federation).
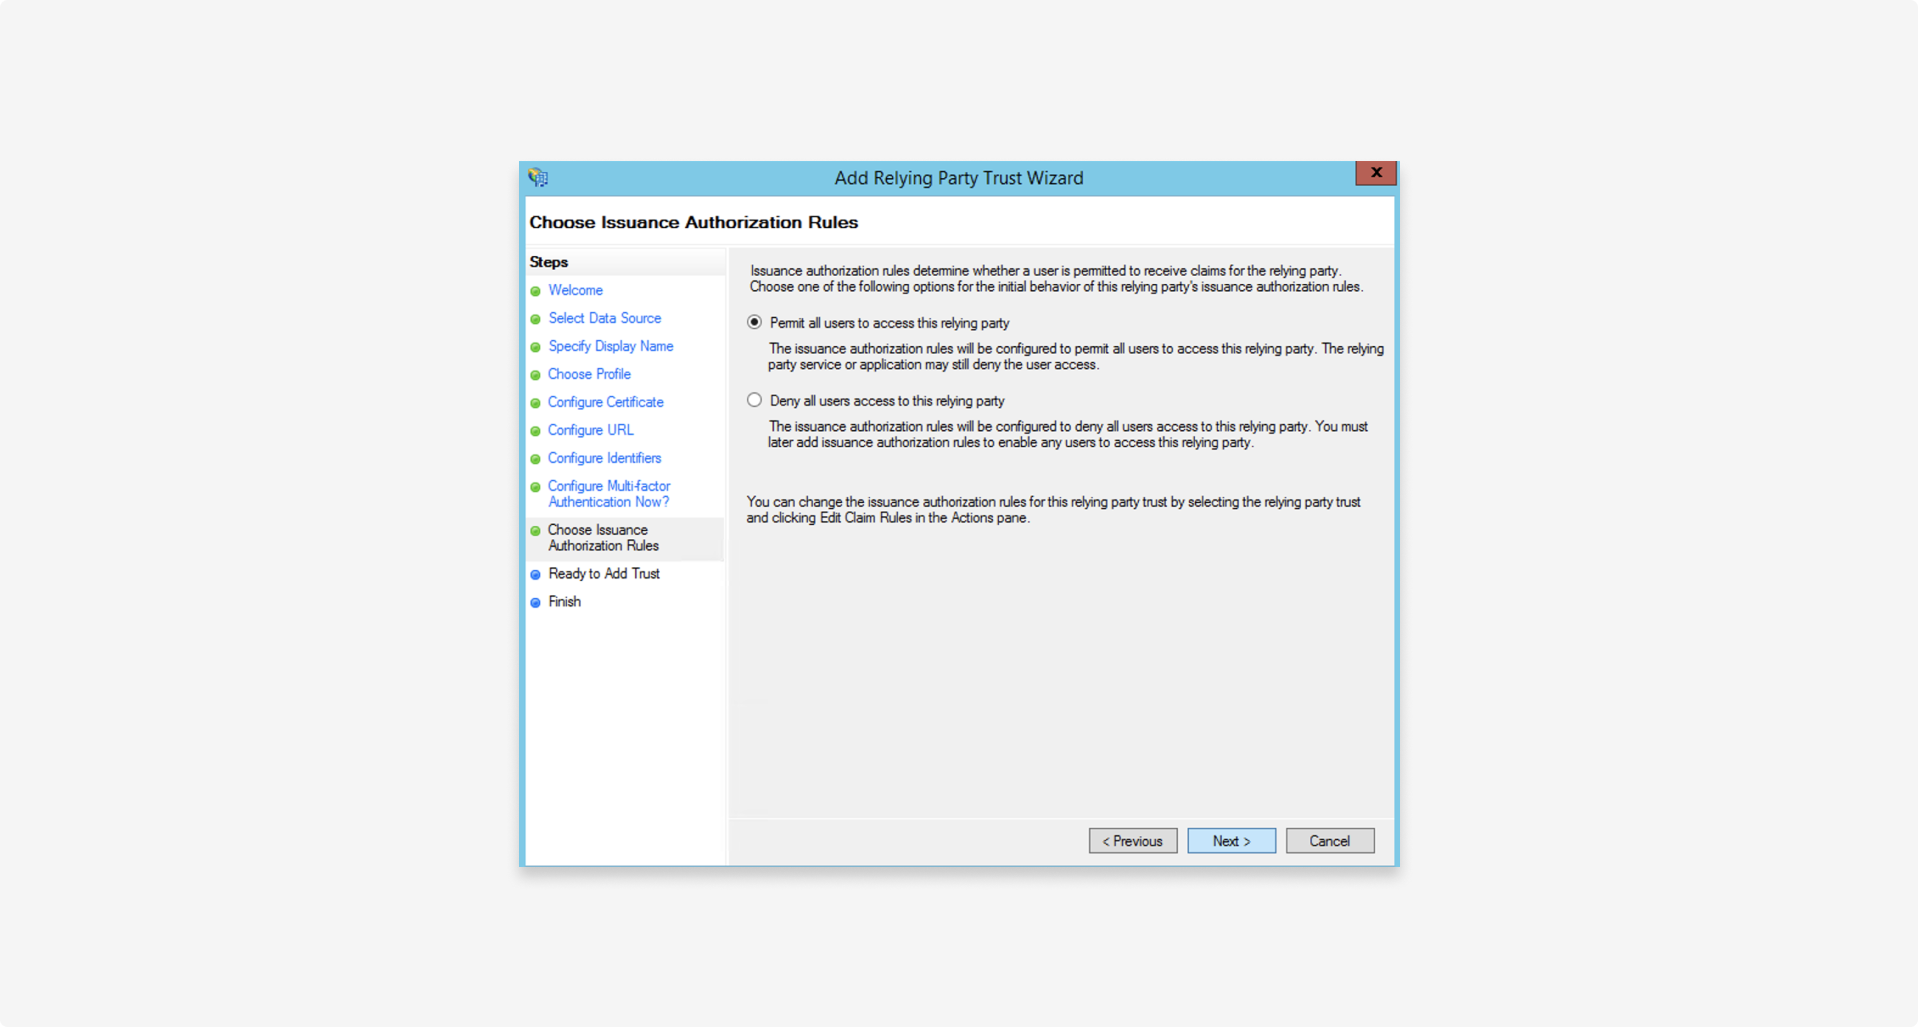
1.6 Use default settings
In most cases, select Permit all users to access this relying party because portal access is determined using role-based access control (RBAC).
You can further limit access later by specifying authorization rules in Actions > Edit claim rules.
No changes in the following step:
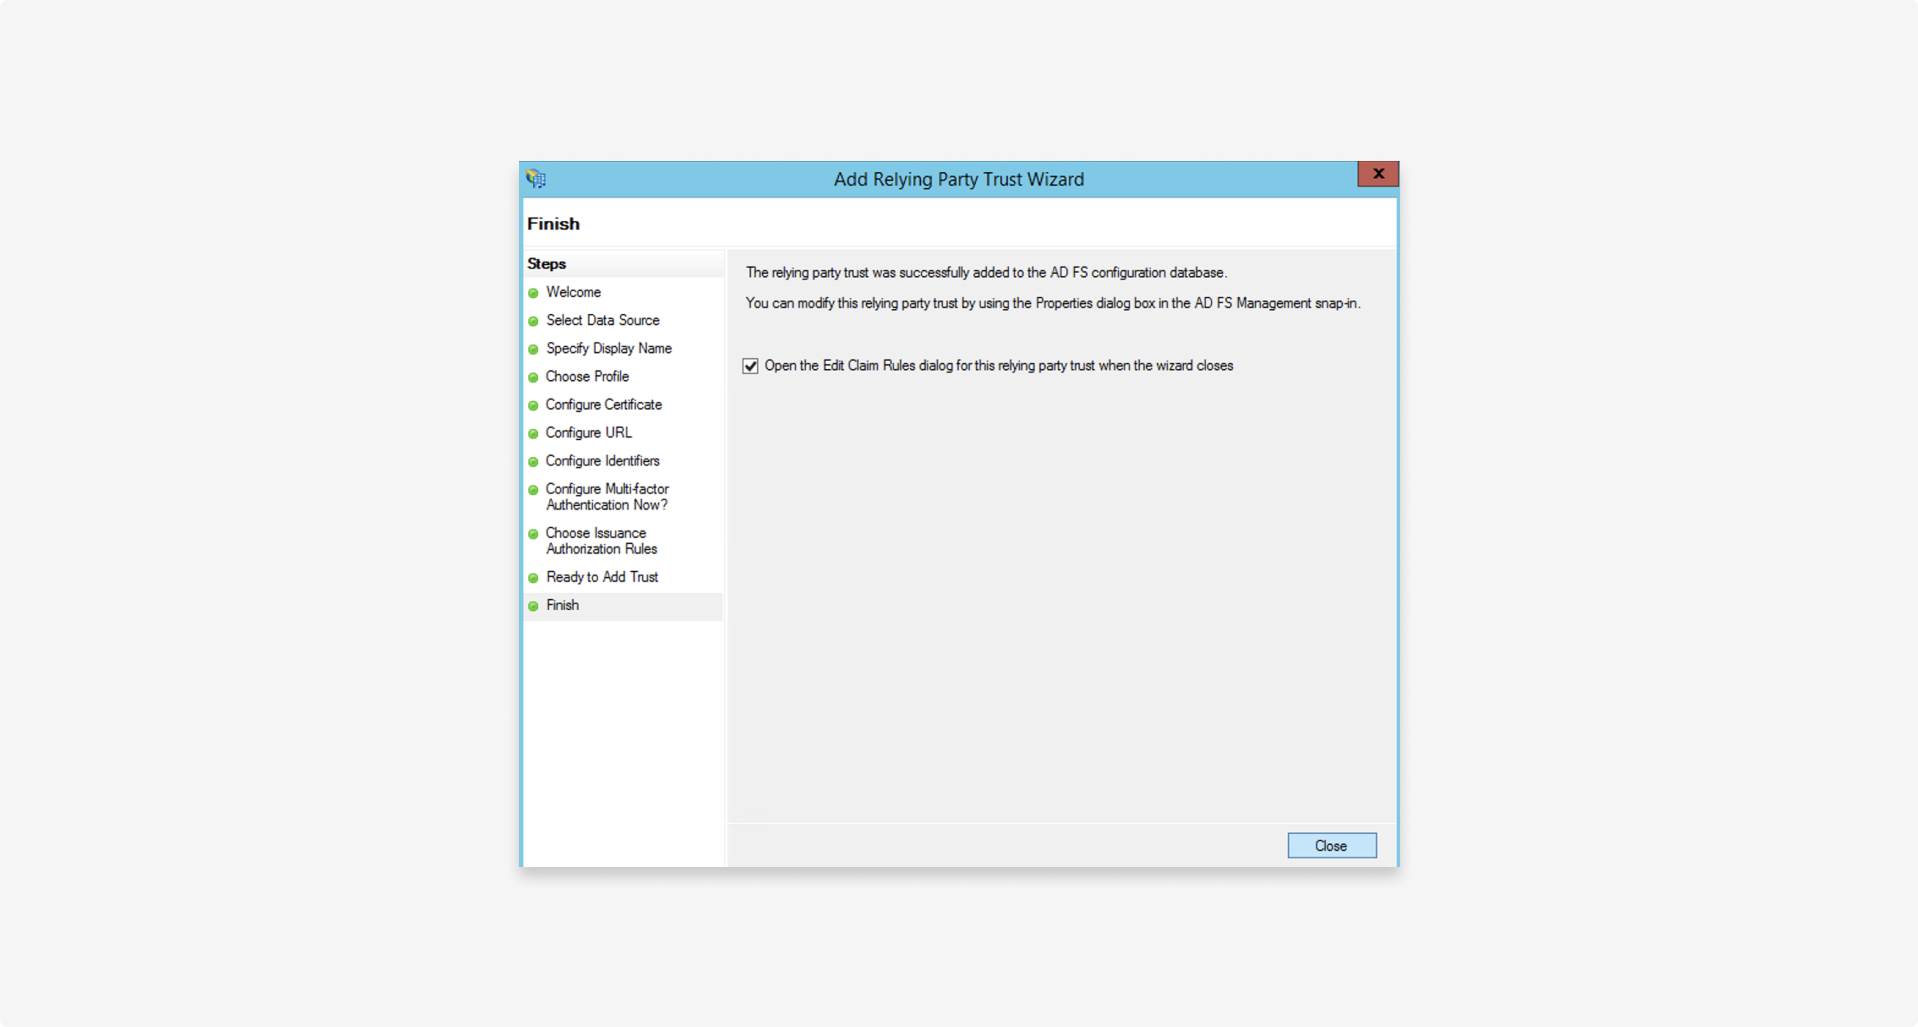
Complete the wizard:
2. Configure claims mapping
Map all SAML claims you need to send to the relying party as follows:
2.1 Configure Name ID mapping rules
The Name ID claim is the unique identifier to match the user identity principle from the federated Identity Provider (IdP), in this case AD FS, to the shadow account in our system.
To add this claim:
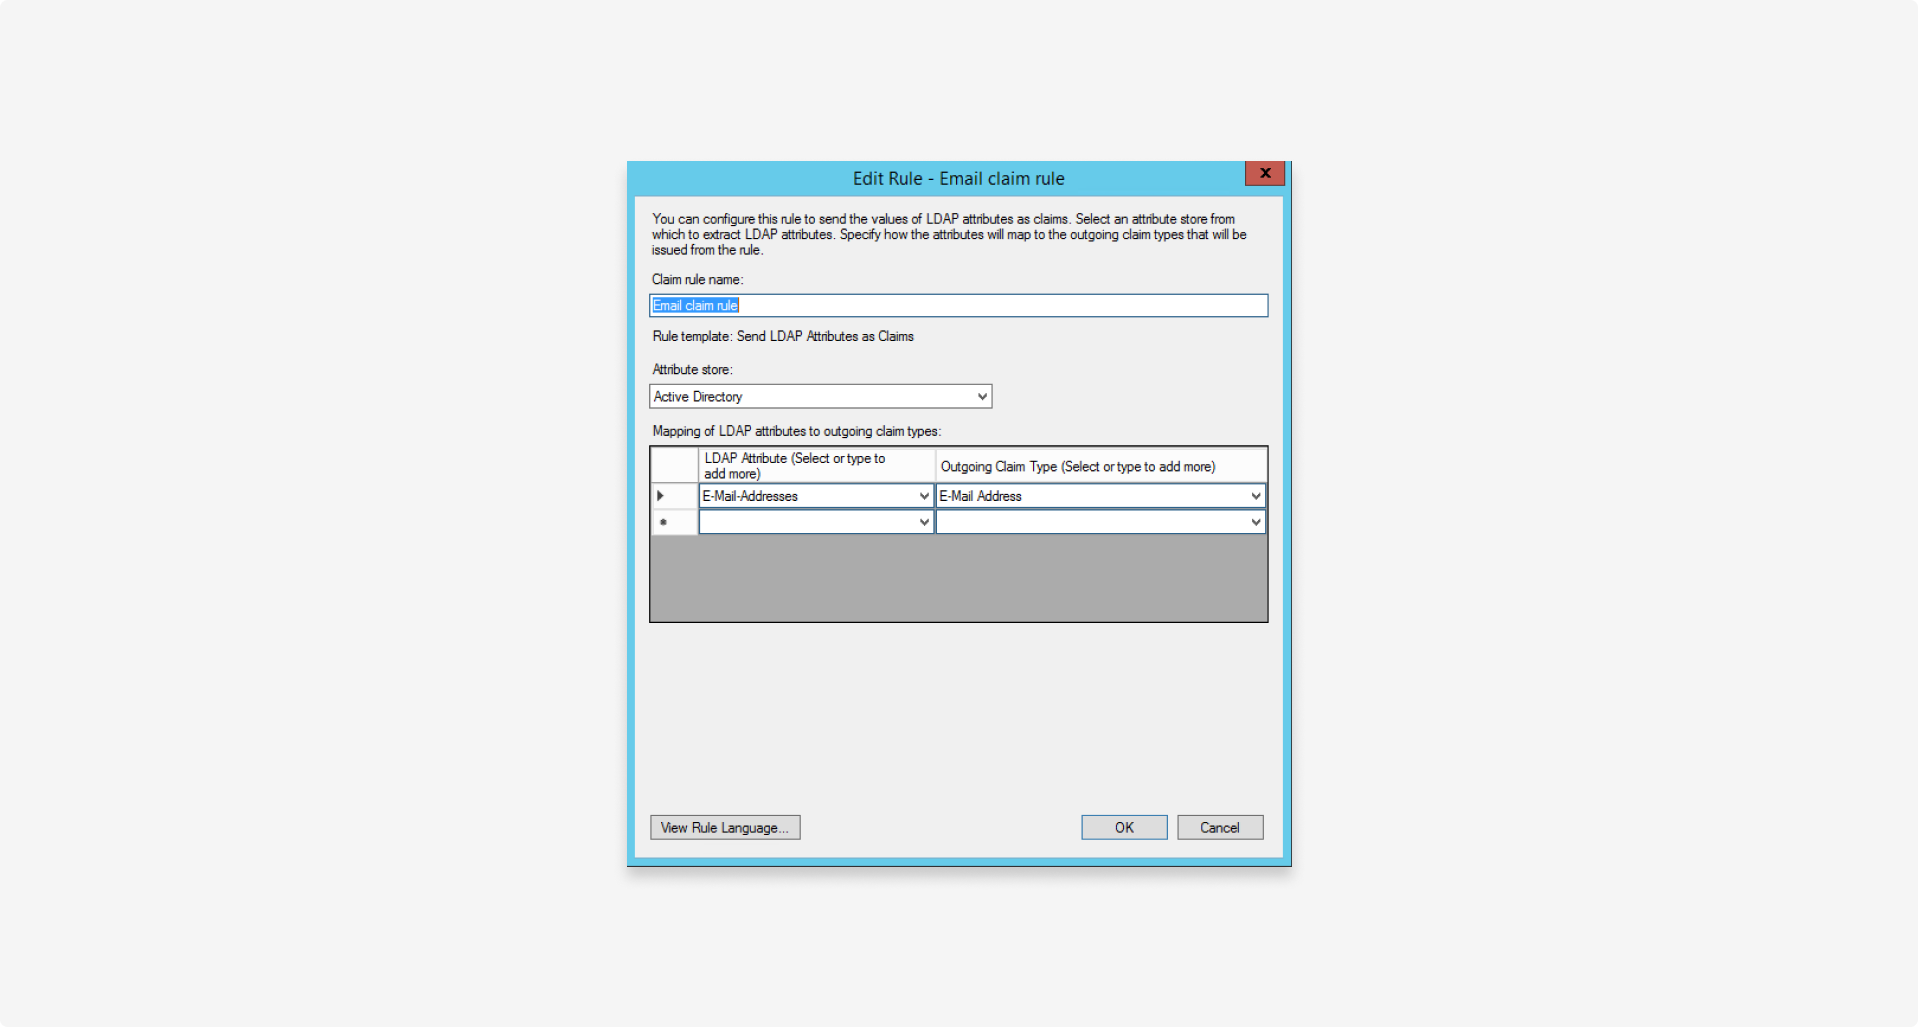
- Add a rule to map an attribute from the Attribute Store (usually Active Directory) to a claim.
- Map the claim from the previous step to an outgoing
Name IDclaim. - In the relying party, select Edit claim rules > Add rule with the template > Send LDAP attributes as claims.
- Create a new
Email claimrule to map the email address from the attribute store to the outgoingEmail addressclaim:
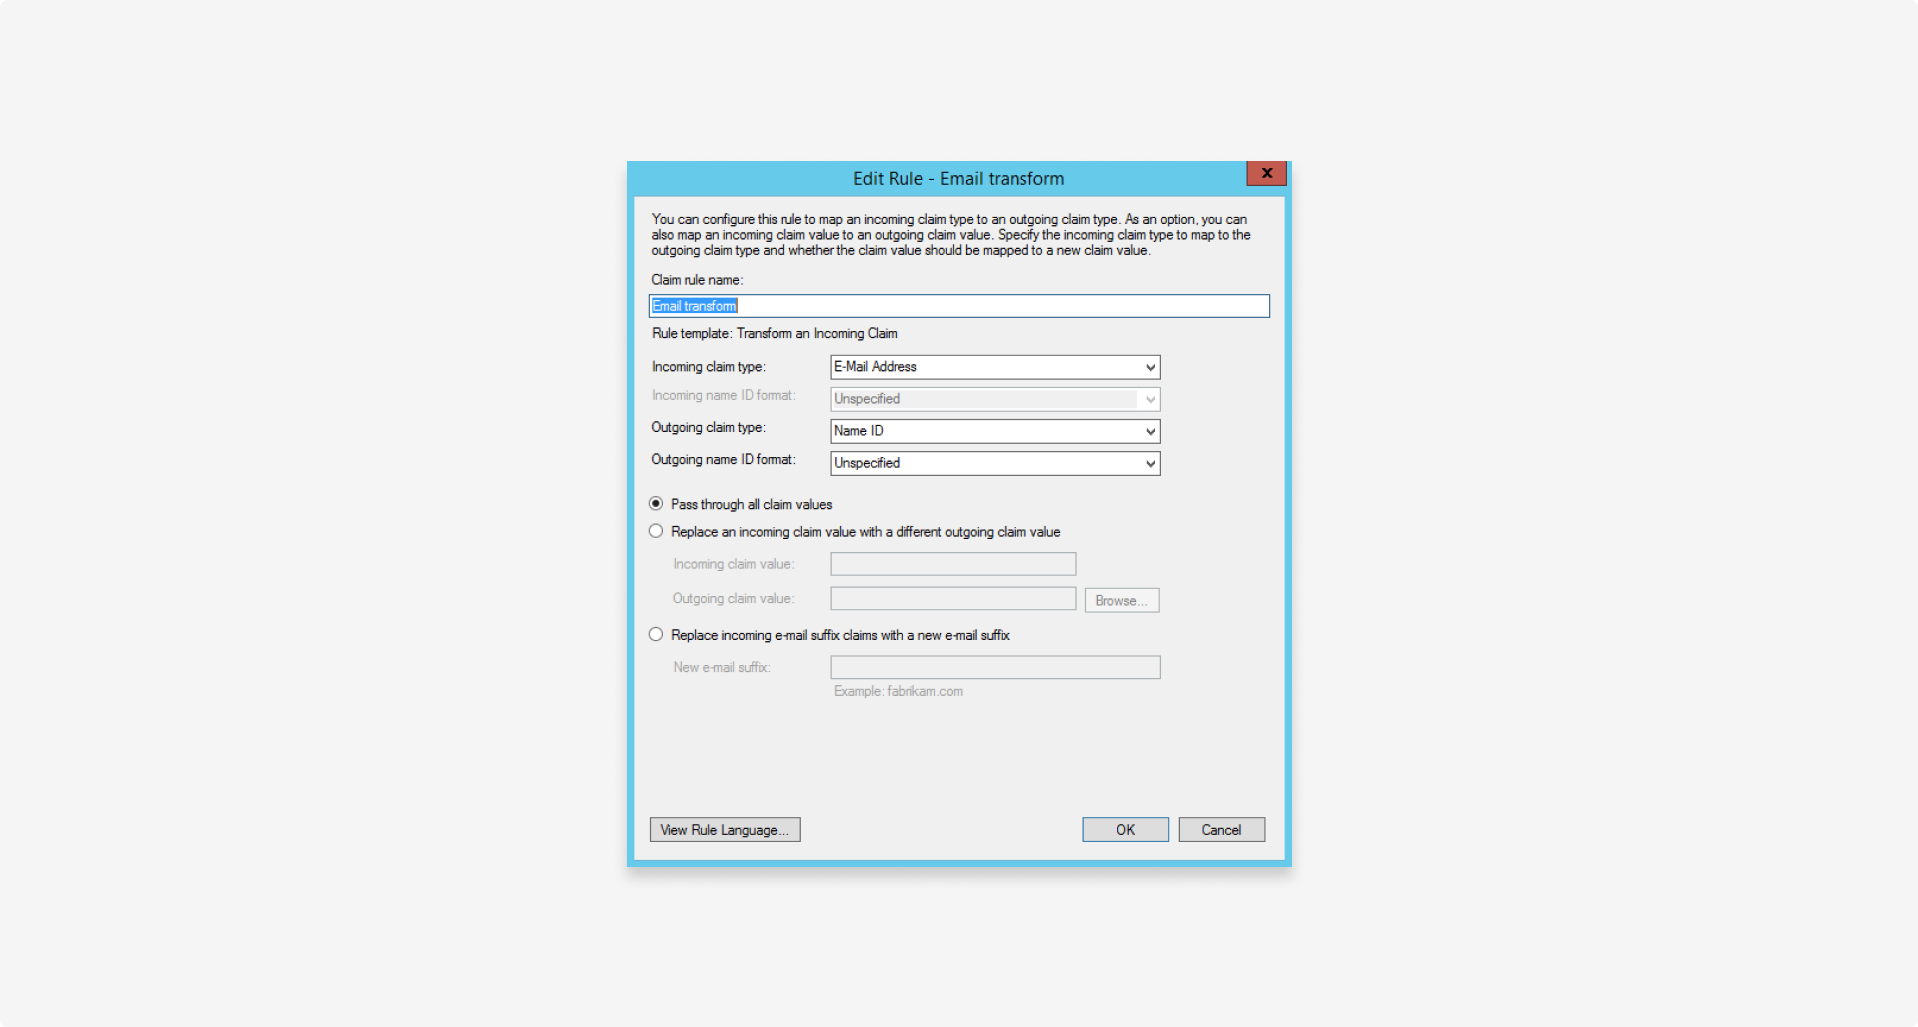
- Using the Transform an incoming claim template, create a second claim rule to transform the
Email Addressto an outgoingName IDclaim:
2.2 Configure RBAC mapping rules
To map the security groups to the RBAC claims, follow these steps:
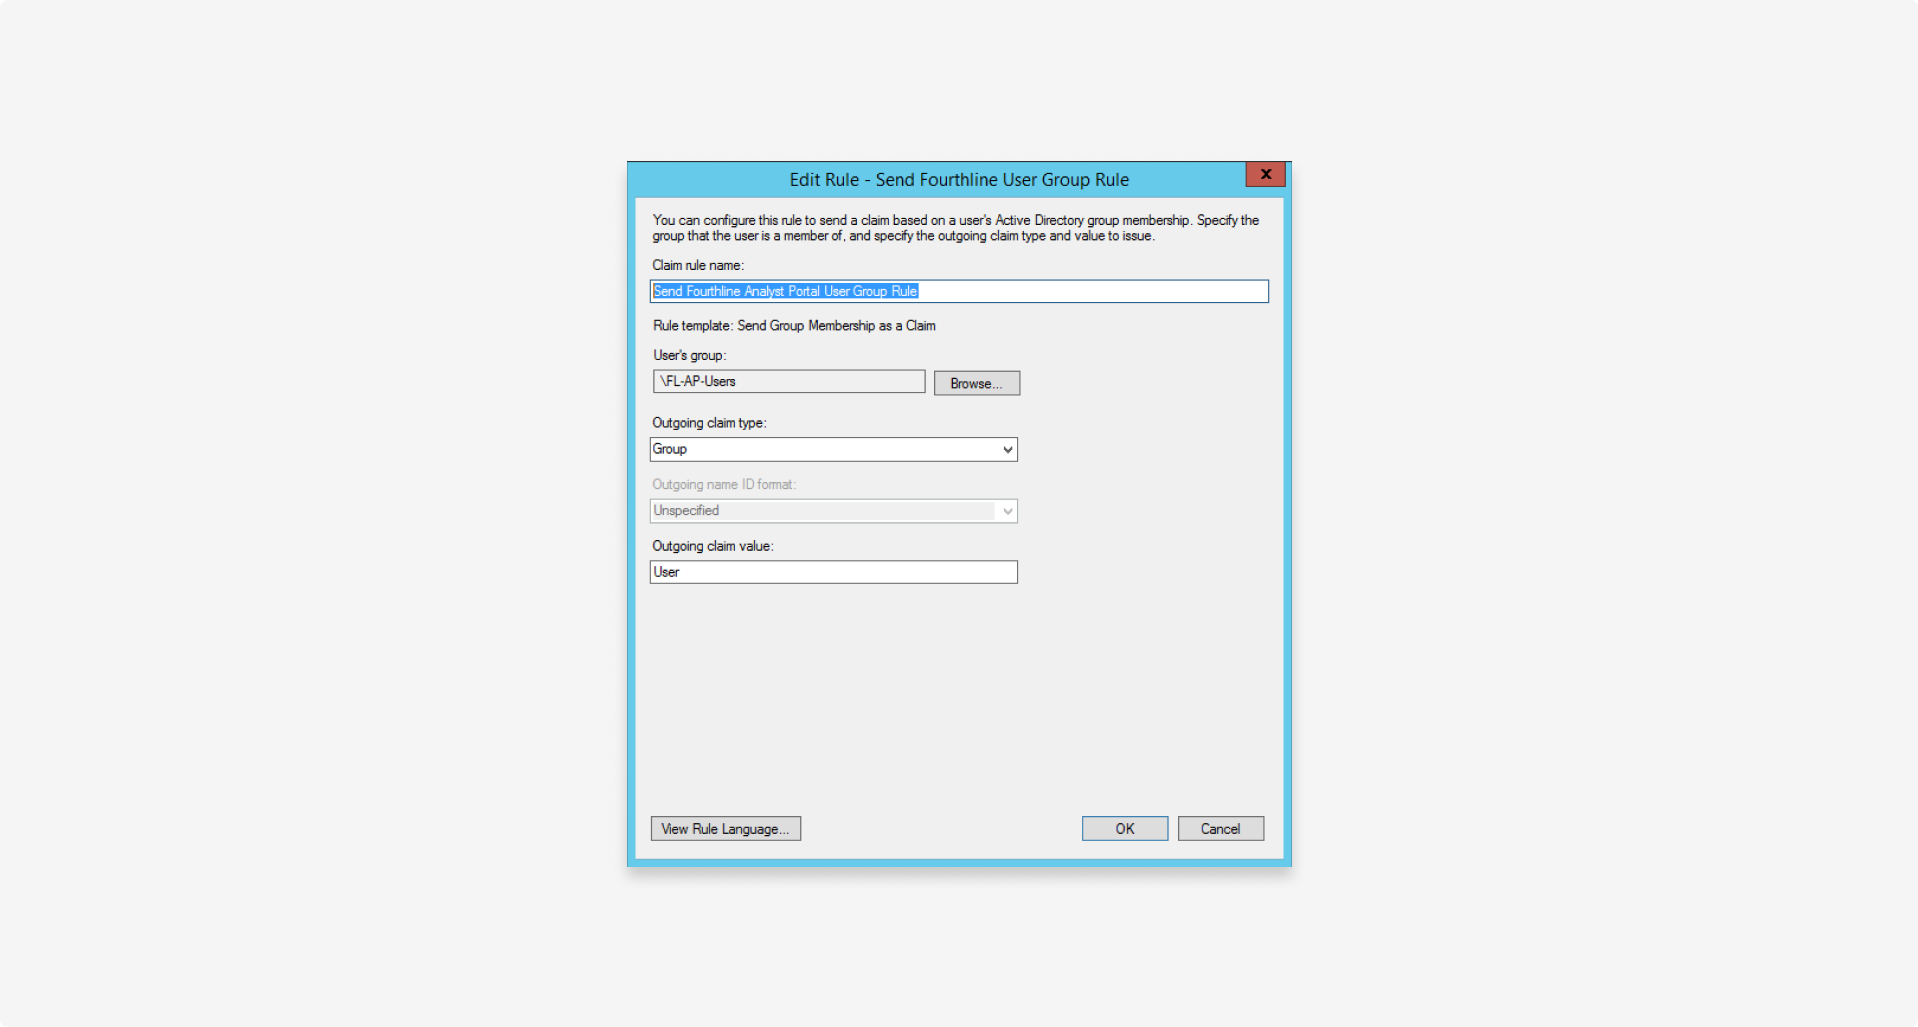
- Create a separate rule for each security group your organization uses to manage user roles.
- On the Relying Party, select Edit claim rules > Add rule, and use the Send group membership template as a claim.
- Create a new Send Fourthline analyst portal user group rule claim rule that maps the User's group value to the Outgoing claim type:
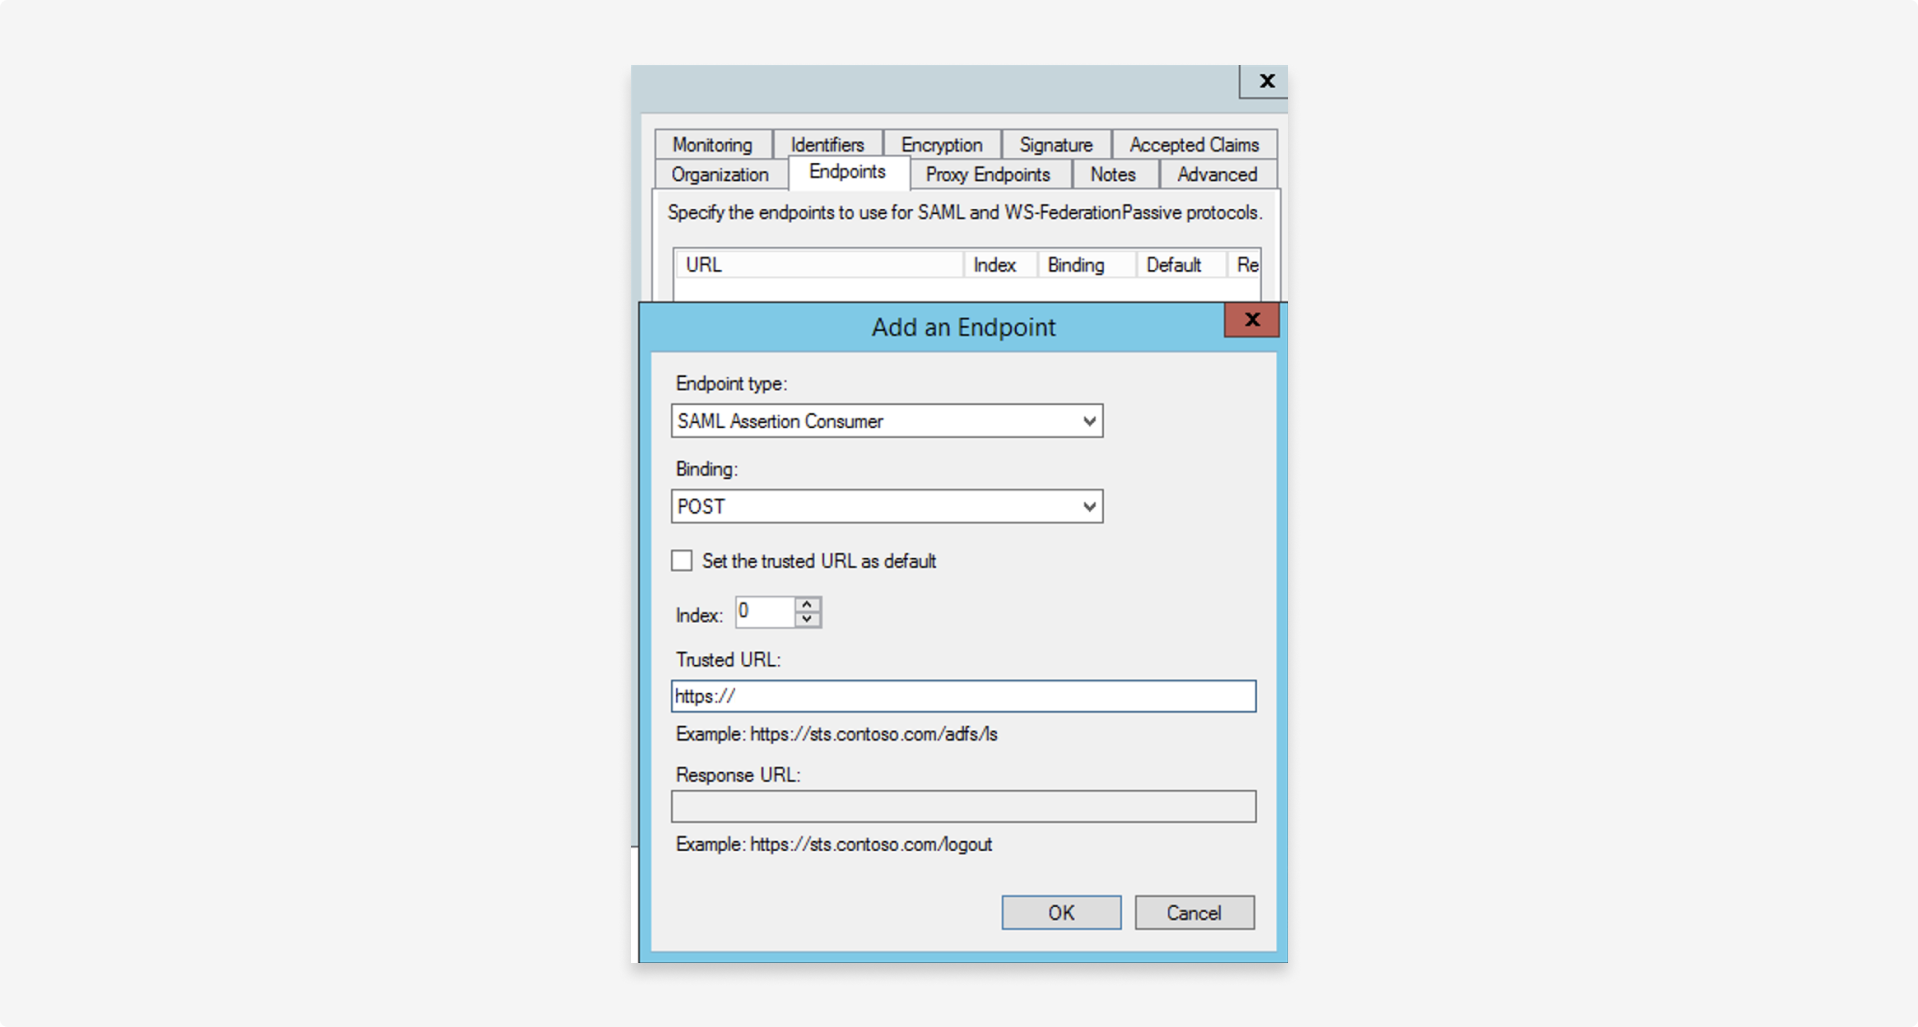
3. Set the SAML endpoint
Configure the SAML endpoint provided by Fourthline for the relying party in the following format: https://<cognitoUrl>/saml2/idpresponse
On the Relying party > Endpoints tab, configure the following settings:
| Setting | Description |
|---|---|
| Endpoint type | Set to SAML Assertion Consumer. |
| Binding | Set to POST. |
| Trusted URL | Set to https://<cognitoUrl>/saml2/idpresponse. |
Updated 5 months ago