
Okta Federation
Integration guide
This page sets out how to integrate the Case Review Portal with the self-service or hybrid model with single sign-on.

Okta Federation
To set up Okta Federation to manage access to the Case Review Portal, follow these steps.
Prerequisites
Your Fourthline delivery manager provides you the following:
| Prerequisite | Description |
|---|---|
| Service provider entity ID | urn:amazon:cognito:sp:<UserPoolID> |
| SAML endpoint | https://<cognitoUrl>/saml2/idpresponse |
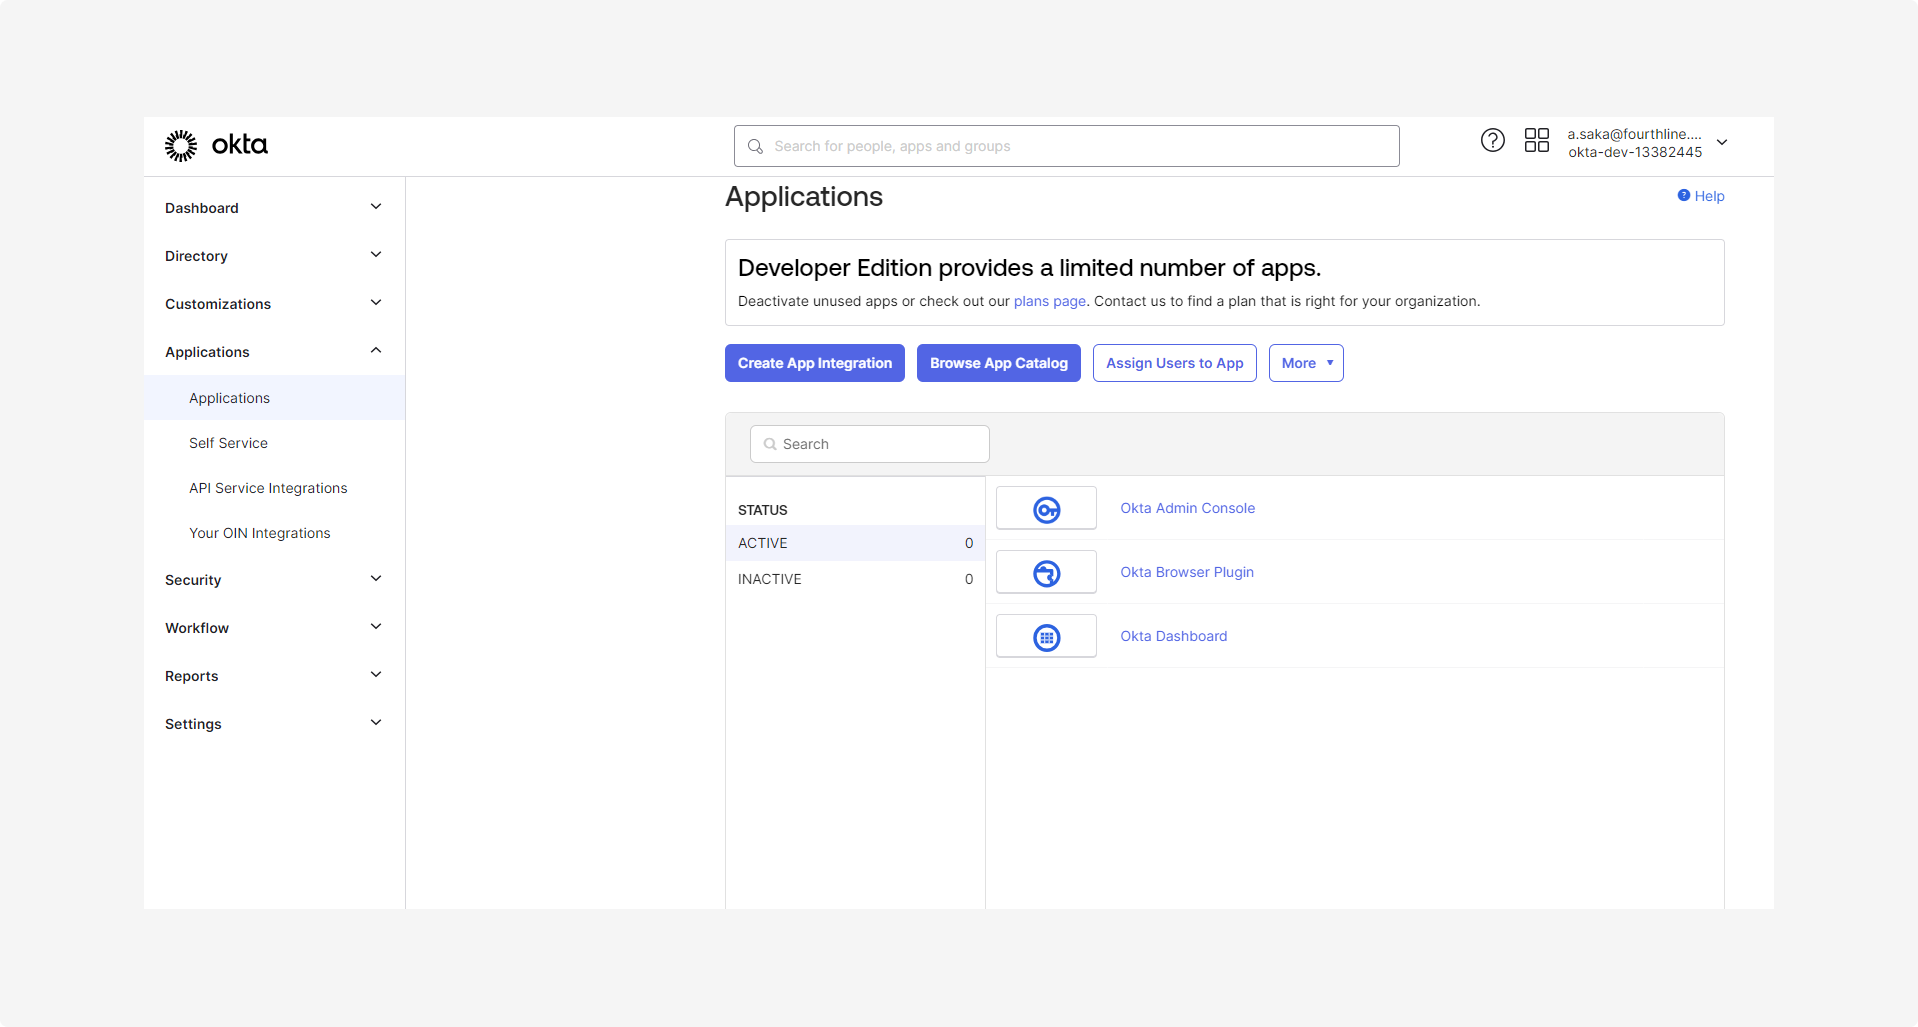
1. Create app integration
1.1 In the Okta Admin portal, go to Applications, and then click Create app integration:
1.2 Select SAML 2.0 and then click Next:

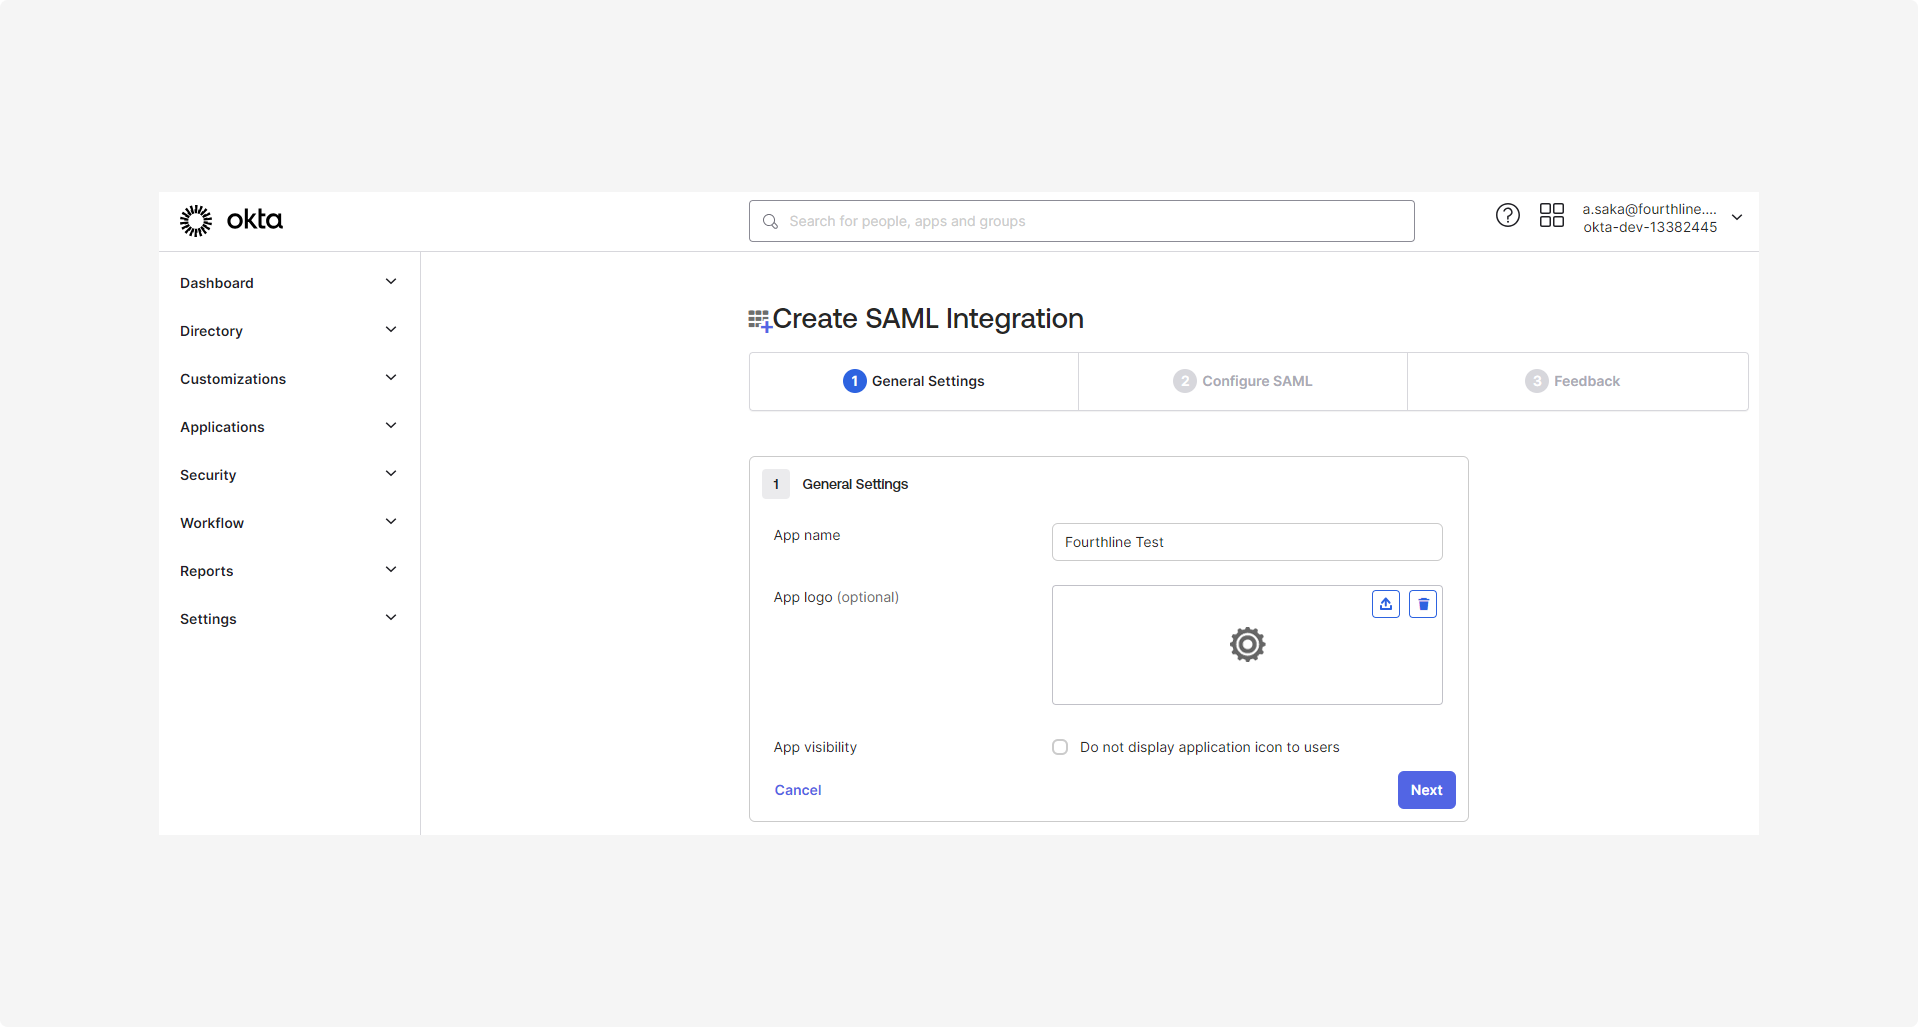
1.3 On the Create SAML integration > General settings page, in the App name field, enter the name for your app, and then click Next:
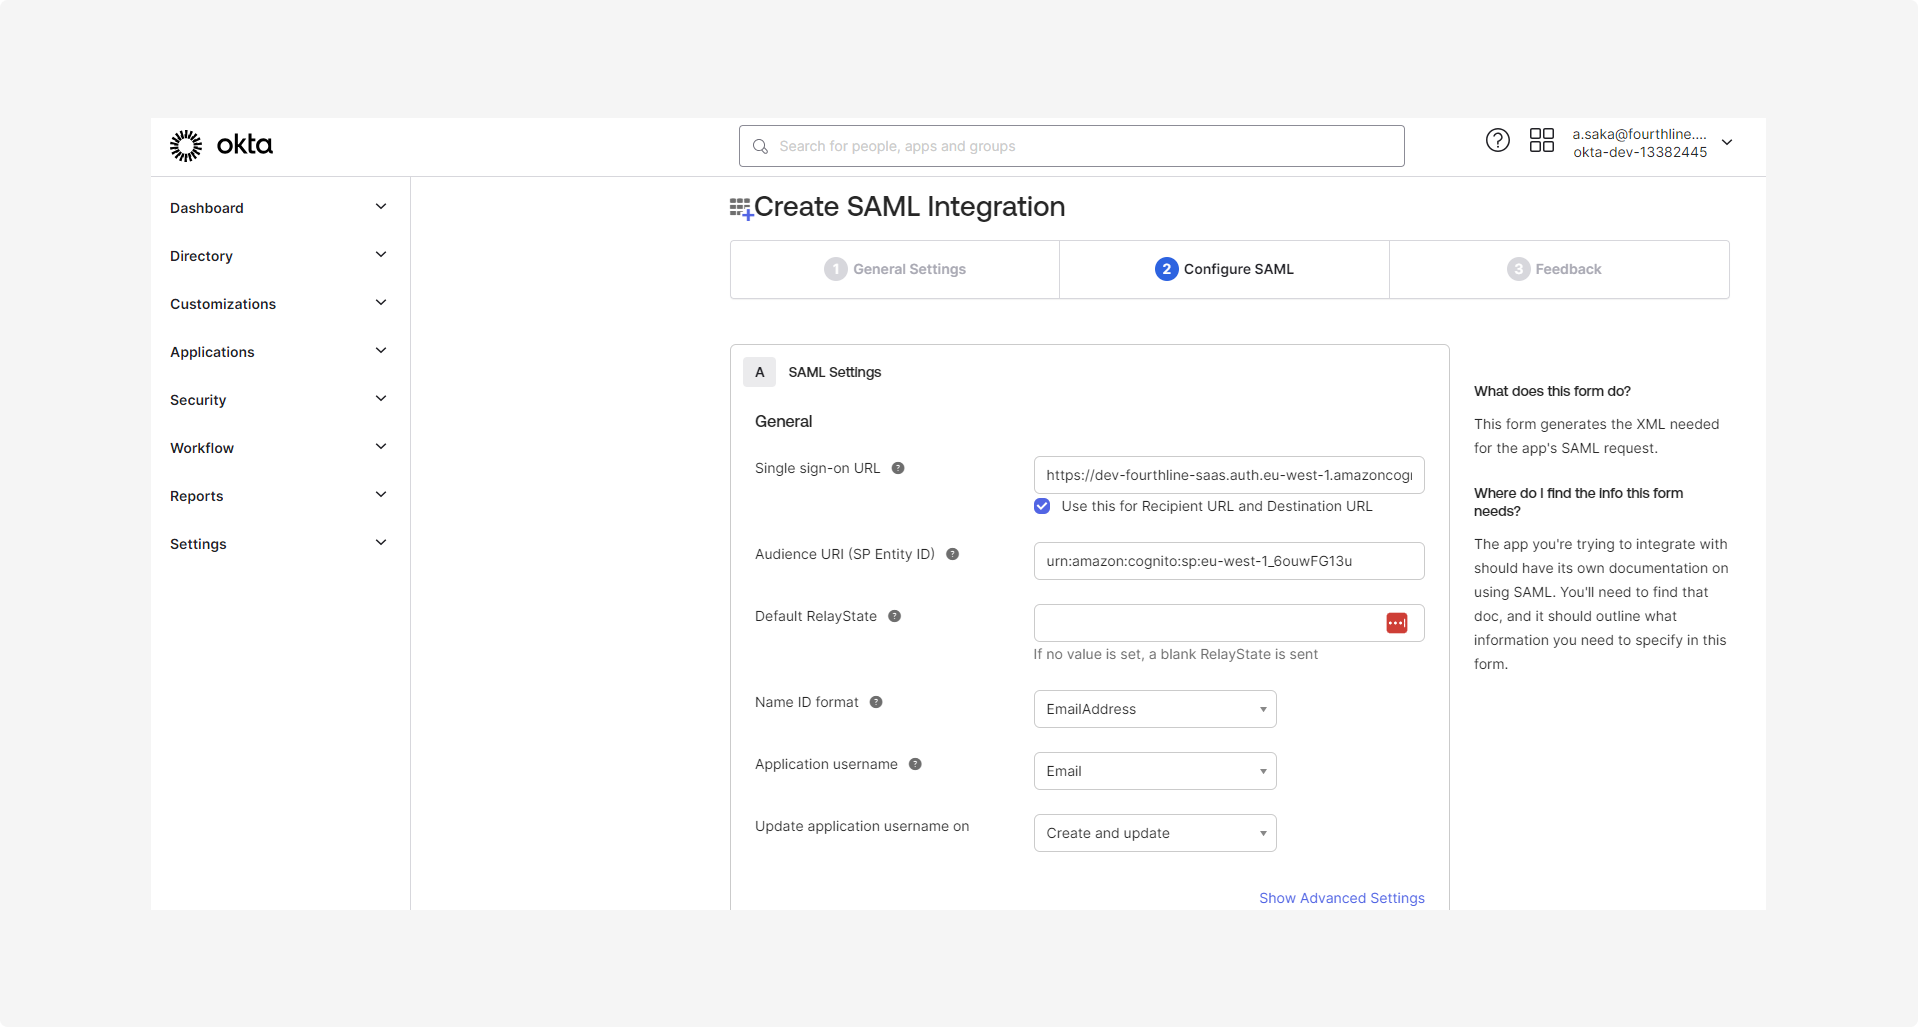
1.4 On the Create SAML integration > Configure SAML page, complete the following fields:
| Field | Input |
|---|---|
| Single sign-on URL | Enter the SAML endpoint provided by Fourthline. |
| Audience URI (ISP Entity ID) | Enter the service provider entity ID. |
| Name ID format | Set to EmailAddress. |
| Application username | Set to Email. |
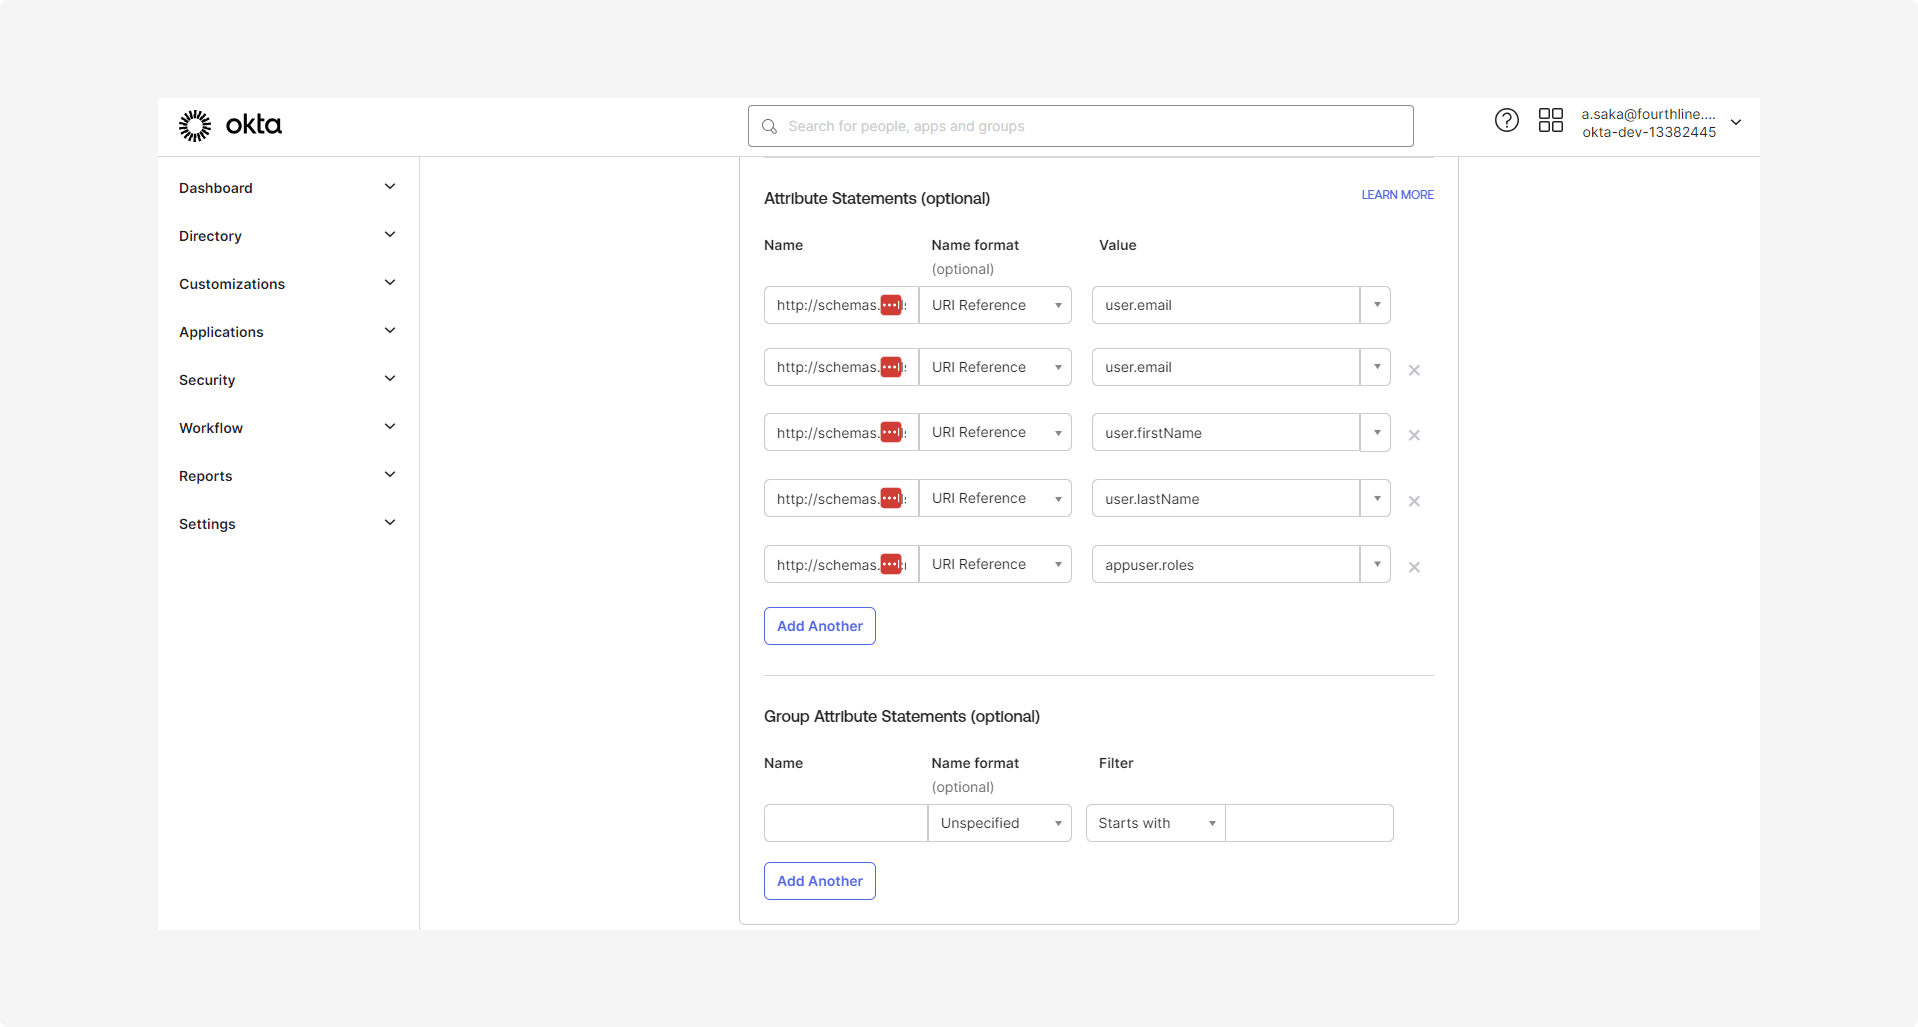
1.5 On the Attribute statements page, configure the user attributes and map all required SAML claims you need to send to the relying party as follows:
A unique user identifier (also known as NameID):
http://schemas.xmlsoap.org/ws/2005/05/identity/claims/name
The user's email address:
http://schemas.xmlsoap.org/ws/2005/05/identity/claims/emailaddress
The user's first name:
http://schemas.xmlsoap.org/ws/2005/05/identity/claims/givenname
The user's last name:
http://schemas.xmlsoap.org/ws/2005/05/identity/claims/surname
The application roles:
http://schemas.microsoft.com/ws/2008/06/identity/claims/role

This requires a custom value that is created in Step 2. Configure app roles.
1.6 Check the SAML assertion is correct, by either:
- Clicking Preview the SAML assertion:
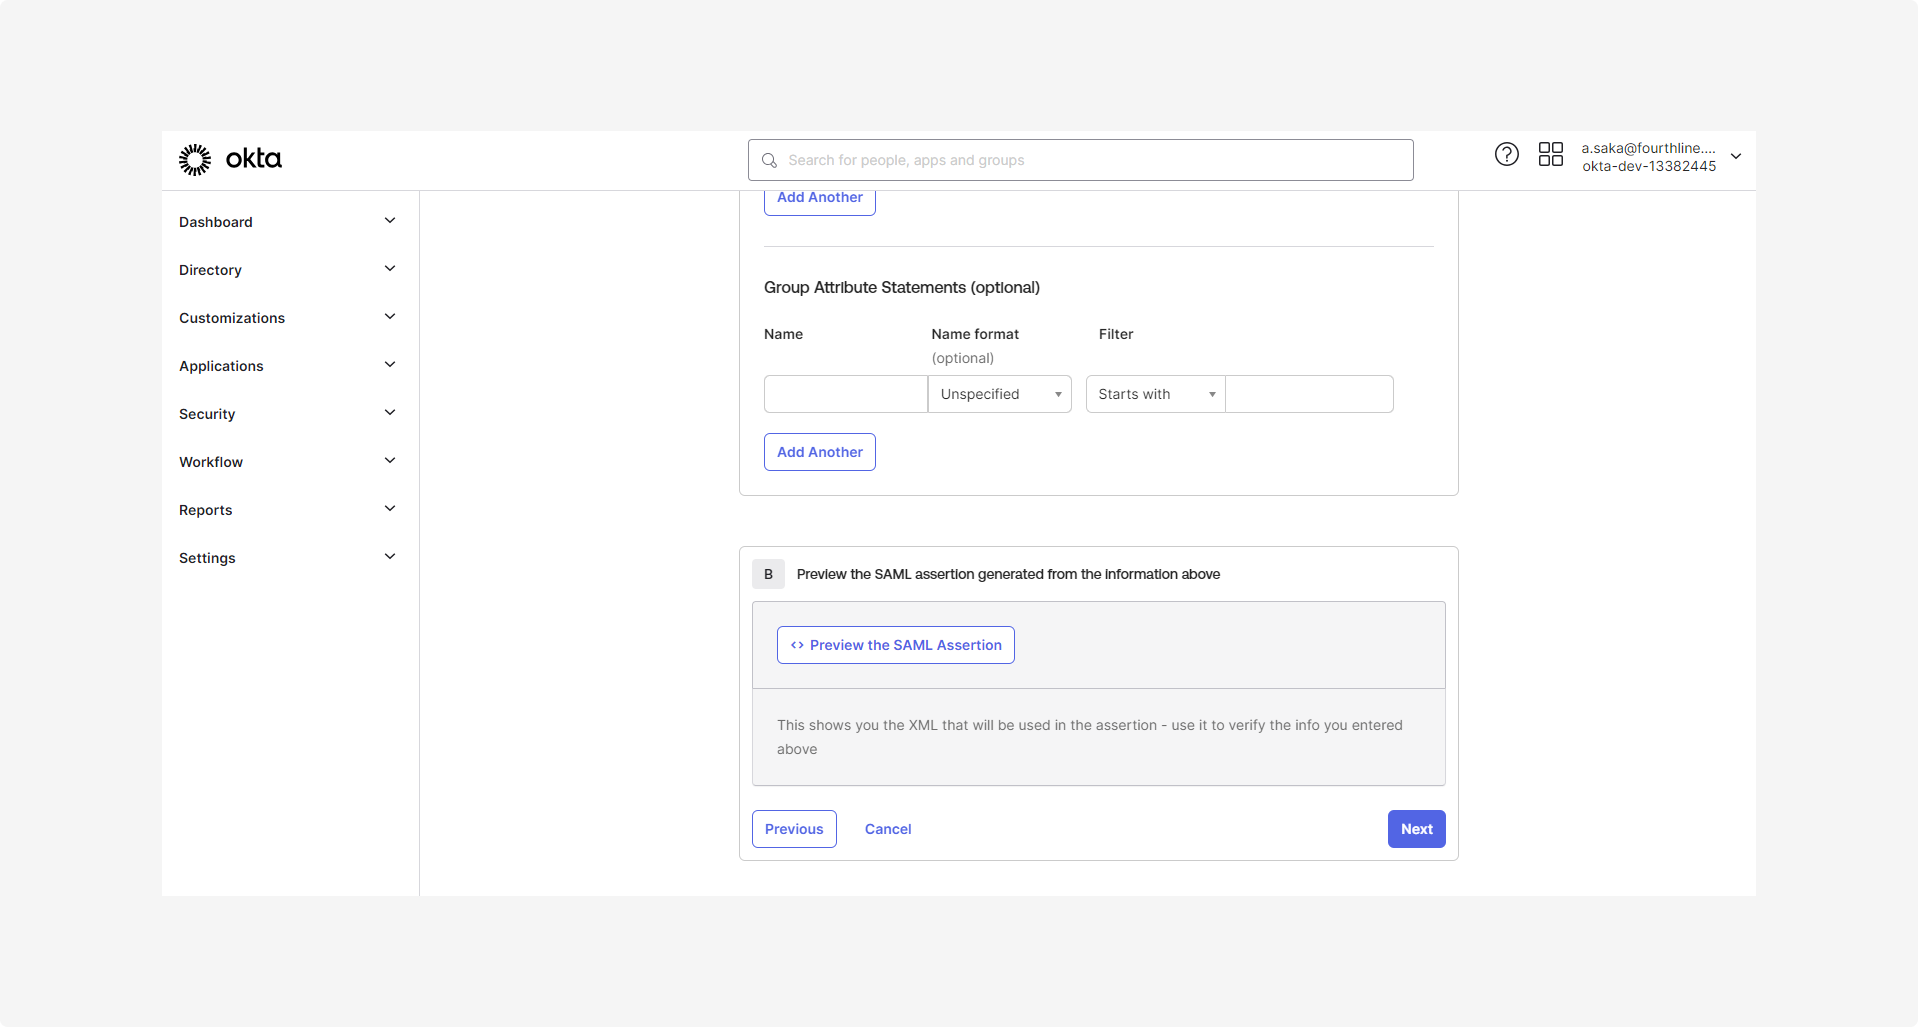
- Using the following sample SAML assertion:
Sample SAML assertion
Sample SAML assertion
<?xml version="1.0" encoding="UTF-8"?>
<saml2:Assertion ID="id651880288180766539212832" IssueInstant="2024-03-25T12:33:11.762Z" Version="2.0"
    xmlns:saml2="urn:oasis:names:tc:SAML:2.0:assertion">
    <saml2:Issuer Format="urn:oasis:names:tc:SAML:2.0:nameid-format:entity">http://www.okta.com/exkfyw539pRUwwtjc5d7</saml2:Issuer>
    <saml2:Subject>
        <saml2:NameID Format="urn:oasis:names:tc:SAML:1.1:nameid-format:emailAddress">[email protected]</saml2:NameID>
        <saml2:SubjectConfirmation Method="urn:oasis:names:tc:SAML:2.0:cm:bearer">
            <saml2:SubjectConfirmationData NotOnOrAfter="2024-03-25T12:38:11.762Z" Recipient="https://test-fourthline-saas-fourthline.auth.eu-west-1.amazoncognito.com/saml2/idpresponse"/>
        </saml2:SubjectConfirmation>
    </saml2:Subject>
    <saml2:Conditions NotBefore="2024-03-25T12:28:11.762Z" NotOnOrAfter="2024-03-25T12:38:11.762Z">
        <saml2:AudienceRestriction>
            <saml2:Audience>urn:amazon:cognito:sp:eu-west-1_3sVAez0r7</saml2:Audience>
        </saml2:AudienceRestriction>
    </saml2:Conditions>
    <saml2:AuthnStatement AuthnInstant="2024-03-25T12:33:11.762Z" SessionIndex="id1711369991761.1590474608">
        <saml2:AuthnContext>
            <saml2:AuthnContextClassRef>urn:oasis:names:tc:SAML:2.0:ac:classes:PasswordProtectedTransport</saml2:AuthnContextClassRef>
        </saml2:AuthnContext>
    </saml2:AuthnStatement>
    <saml2:AttributeStatement>
        <saml2:Attribute Name="http://schemas.xmlsoap.org/ws/2005/05/identity/claims/name" NameFormat="urn:oasis:names:tc:SAML:2.0:attrname-format:uri">
            <saml2:AttributeValue
                xmlns:xs="http://www.w3.org/2001/XMLSchema"
                xmlns:xsi="http://www.w3.org/2001/XMLSchema-instance" xsi:type="xs:string">[email protected]
            </saml2:AttributeValue>
        </saml2:Attribute>
        <saml2:Attribute Name="http://schemas.xmlsoap.org/ws/2005/05/identity/claims/emailaddress" NameFormat="urn:oasis:names:tc:SAML:2.0:attrname-format:uri">
            <saml2:AttributeValue
                xmlns:xs="http://www.w3.org/2001/XMLSchema"
                xmlns:xsi="http://www.w3.org/2001/XMLSchema-instance" xsi:type="xs:string">[email protected]
            </saml2:AttributeValue>
        </saml2:Attribute>
        <saml2:Attribute Name="http://schemas.xmlsoap.org/ws/2005/05/identity/claims/givenname" NameFormat="urn:oasis:names:tc:SAML:2.0:attrname-format:uri">
            <saml2:AttributeValue
                xmlns:xs="http://www.w3.org/2001/XMLSchema"
                xmlns:xsi="http://www.w3.org/2001/XMLSchema-instance" xsi:type="xs:string">John
            </saml2:AttributeValue>
        </saml2:Attribute>
        <saml2:Attribute Name="http://schemas.xmlsoap.org/ws/2005/05/identity/claims/surname" NameFormat="urn:oasis:names:tc:SAML:2.0:attrname-format:uri">
            <saml2:AttributeValue
                xmlns:xs="http://www.w3.org/2001/XMLSchema"
                xmlns:xsi="http://www.w3.org/2001/XMLSchema-instance" xsi:type="xs:string">Smith
            </saml2:AttributeValue>
        </saml2:Attribute>
        <saml2:Attribute Name="http://schemas.microsoft.com/ws/2008/06/identity/claims/role" NameFormat="urn:oasis:names:tc:SAML:2.0:attrname-format:uri">
            <saml2:AttributeValue
                xmlns:xs="http://www.w3.org/2001/XMLSchema"
                xmlns:xsi="http://www.w3.org/2001/XMLSchema-instance" xsi:type="xs:string">User
            </saml2:AttributeValue>
            <saml2:AttributeValue
                xmlns:xs="http://www.w3.org/2001/XMLSchema"
                xmlns:xsi="http://www.w3.org/2001/XMLSchema-instance" xsi:type="xs:string">Reviewer
            </saml2:AttributeValue>
        </saml2:Attribute>
    </saml2:AttributeStatement>
</saml2:Assertion>

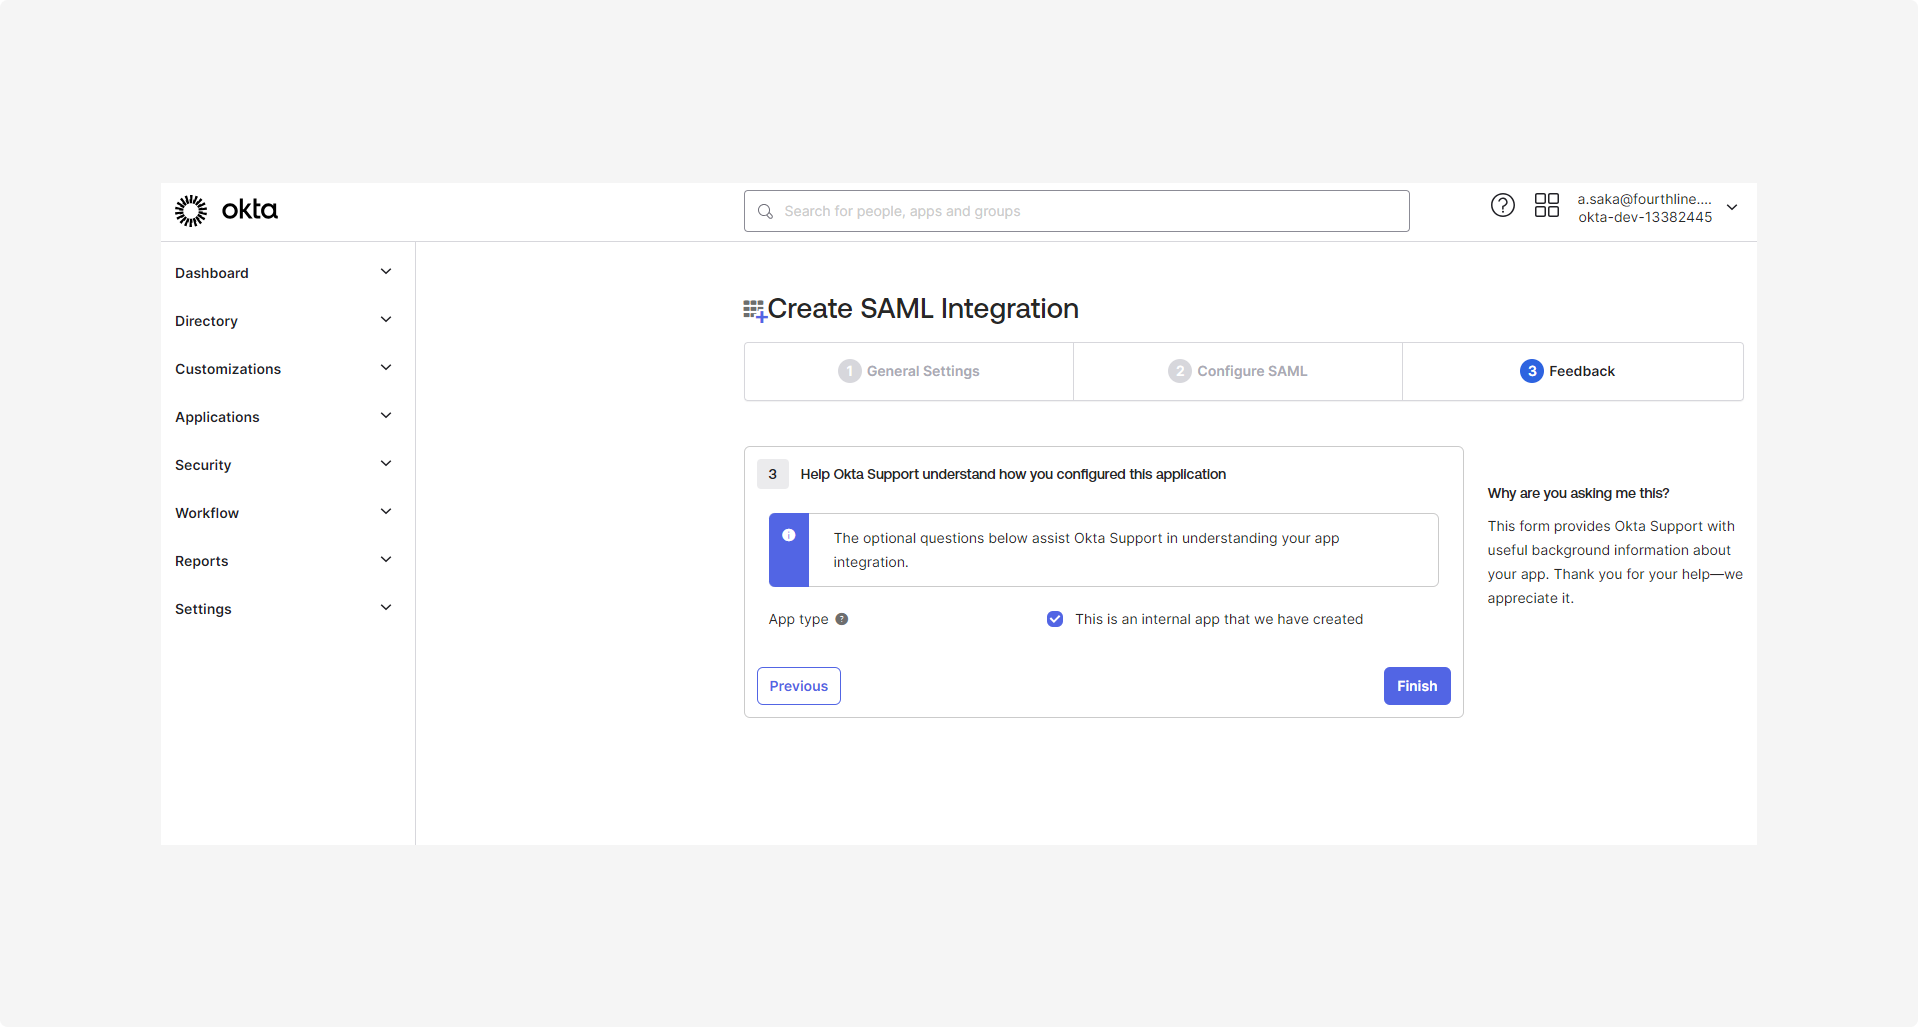
1.7 To finish creating the app, click Finish:
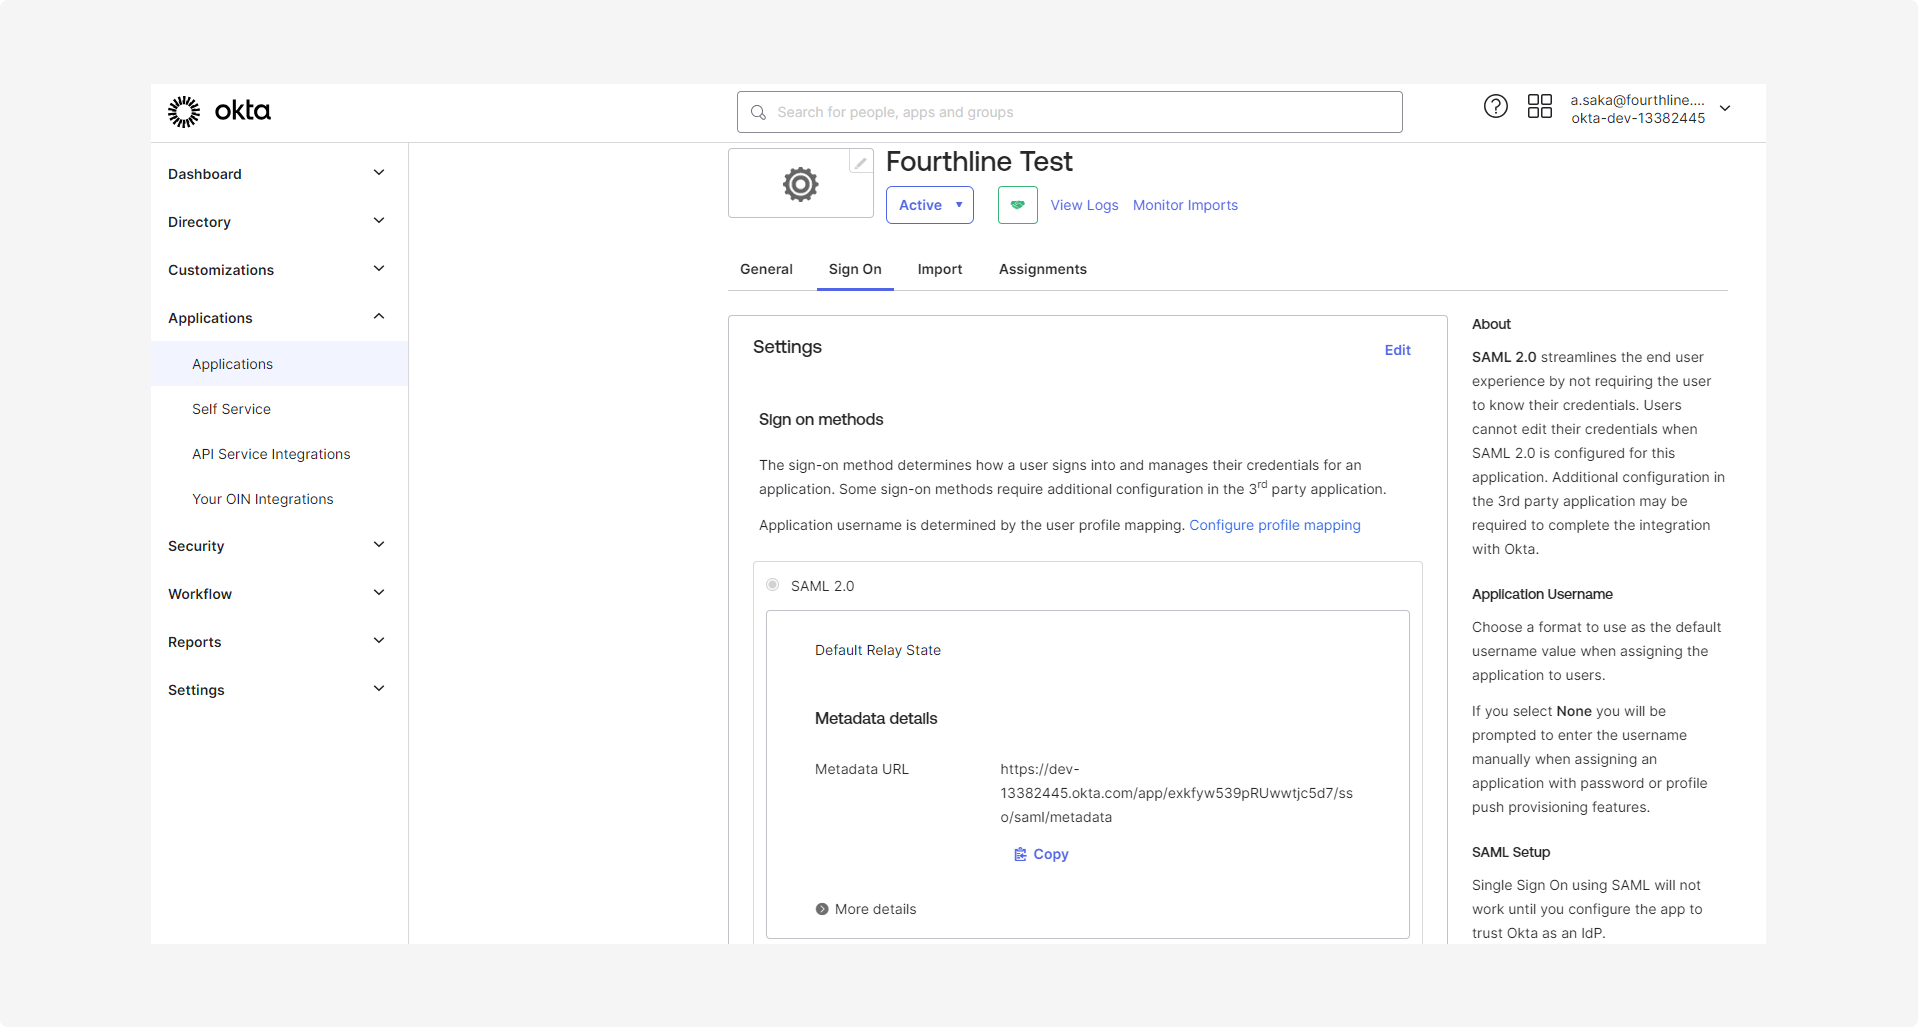
1.8 Copy the SAML metadata URL to share with your Fourthline delivery manager after you have successfully completed the integration.
2. Configure app roles
Depending on your organizational structure and requirements, you can configure the role attribute as required at either user level or group level.
For example, to configure roles user level, follow these steps:
2.1 Determine which roles your organization requires for your organization.
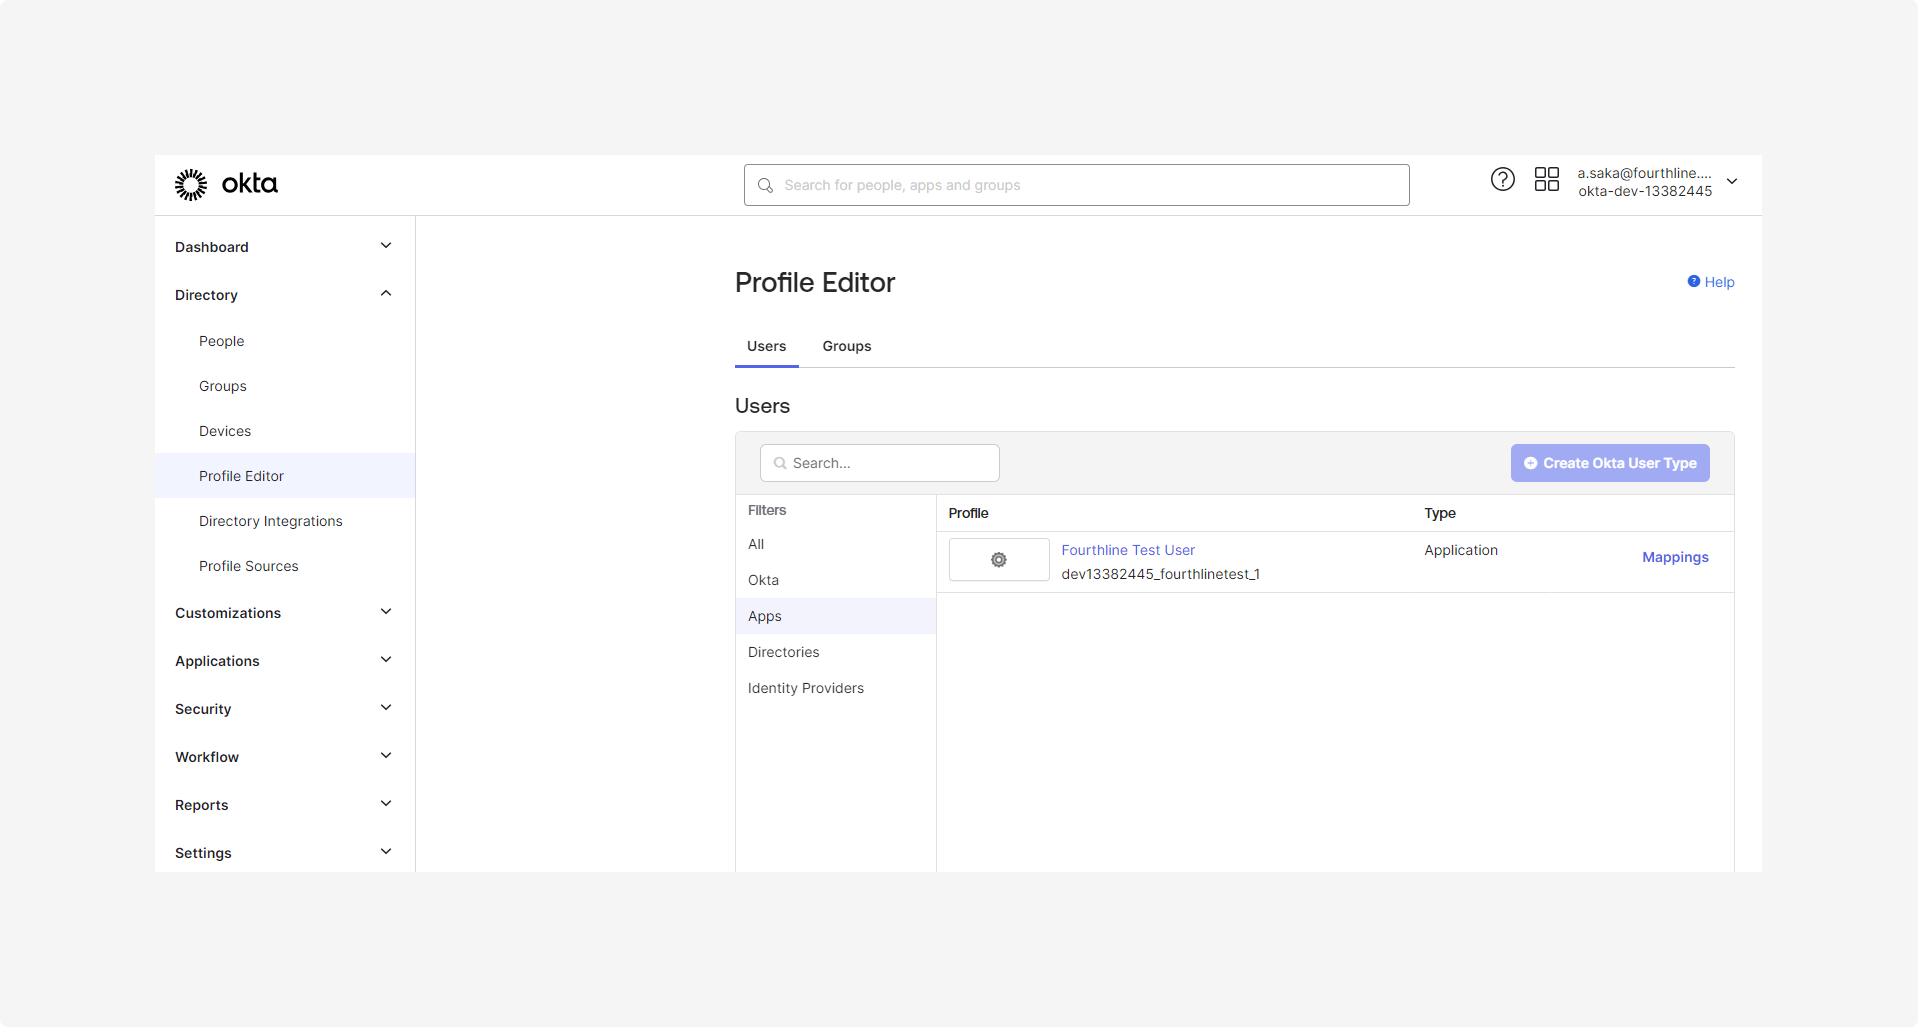
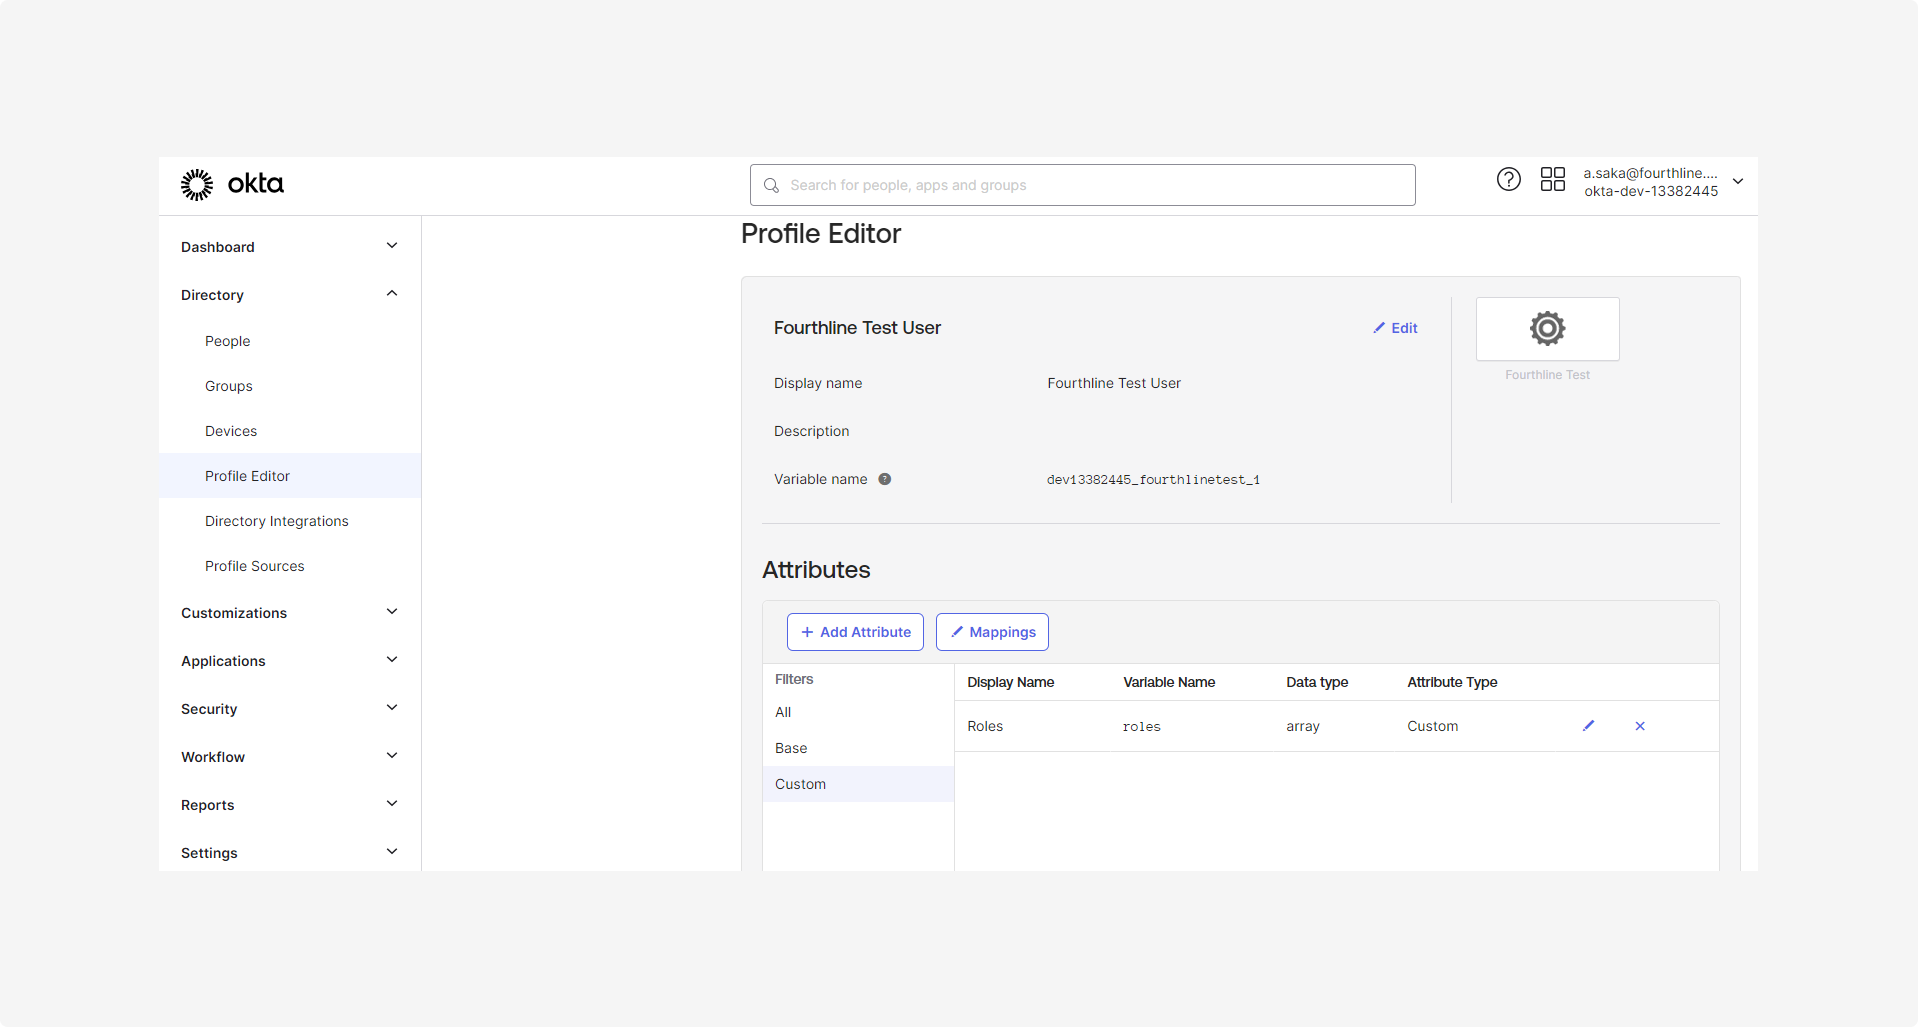
2.2 Go to Directory > Profile editor:
- On the Users tab, under Filters, click Apps.
- Under Profile, click your app name:
2.3 On the Profile Editor page, under Attributes, click Add attribute.
Complete the following fields:
- Display name: Roles
- Variable name:
roles - Data type: array
- Attribute type: Custom
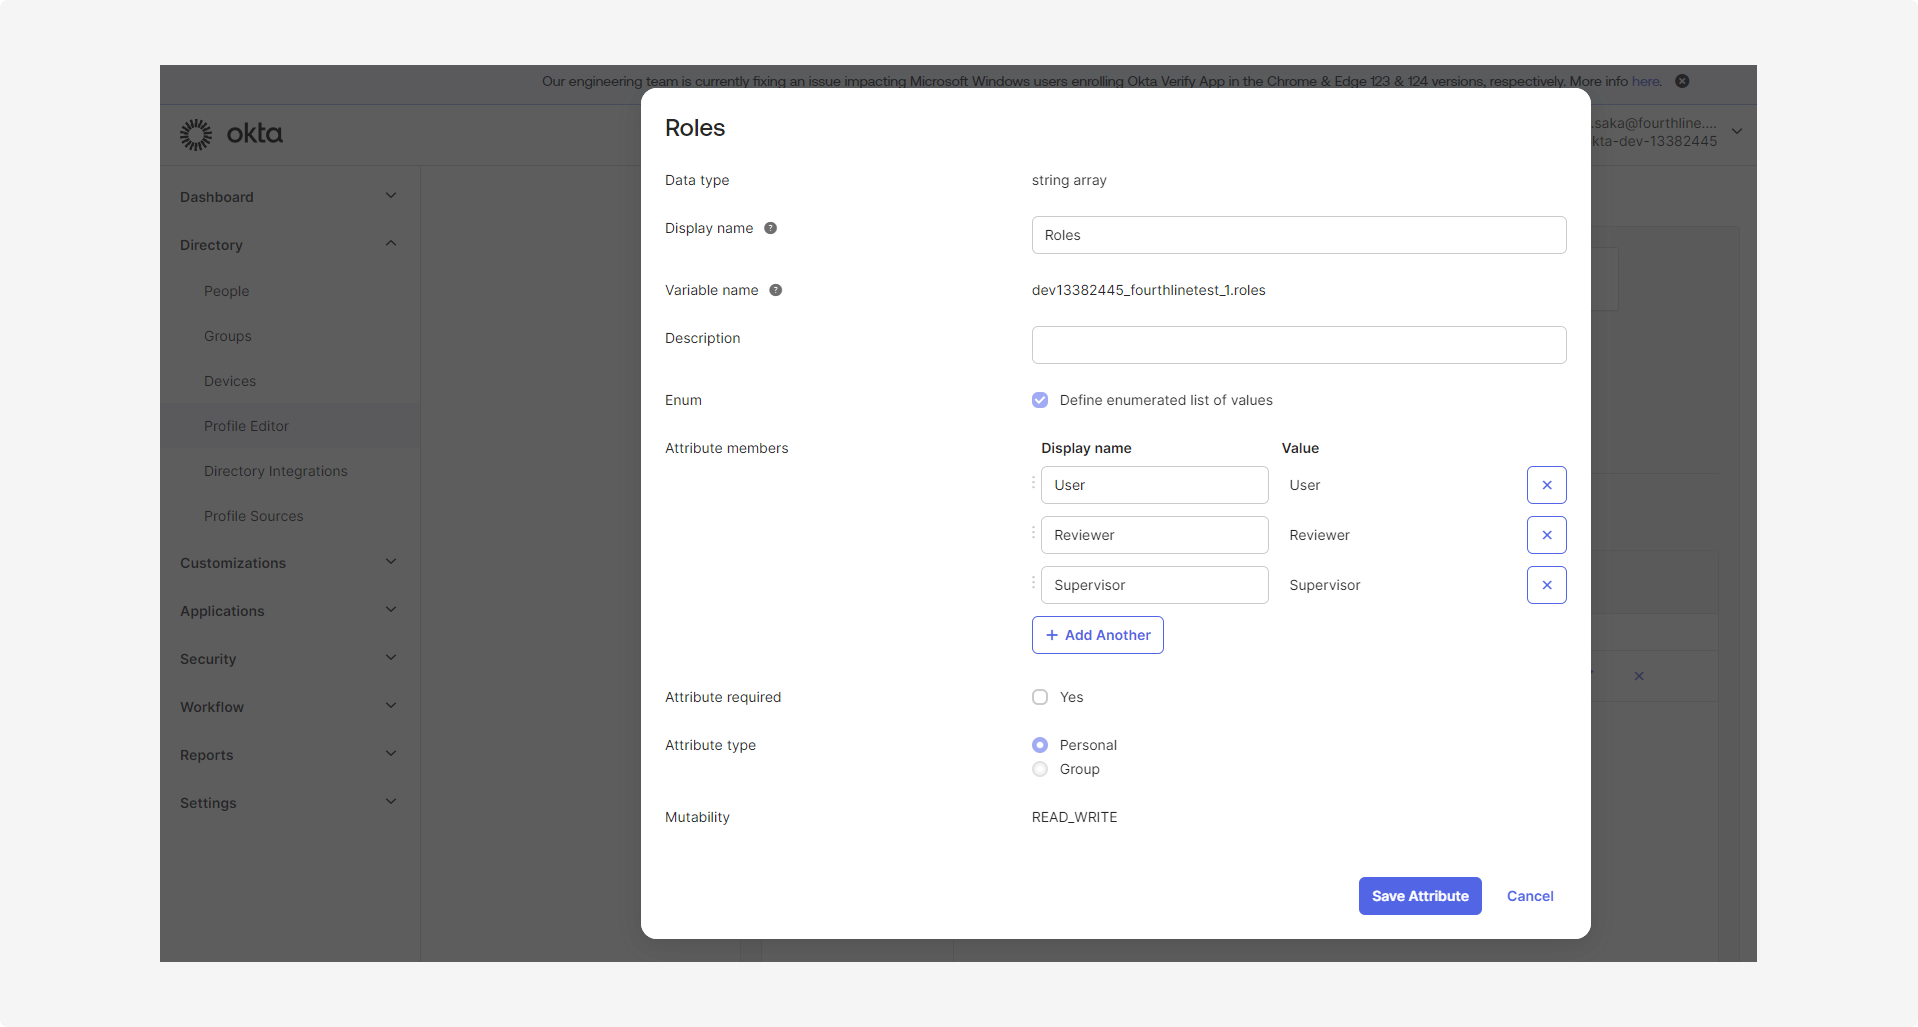
2.4 In the Roles dialog, add all the required roles for your organization, and then click Save attribute:
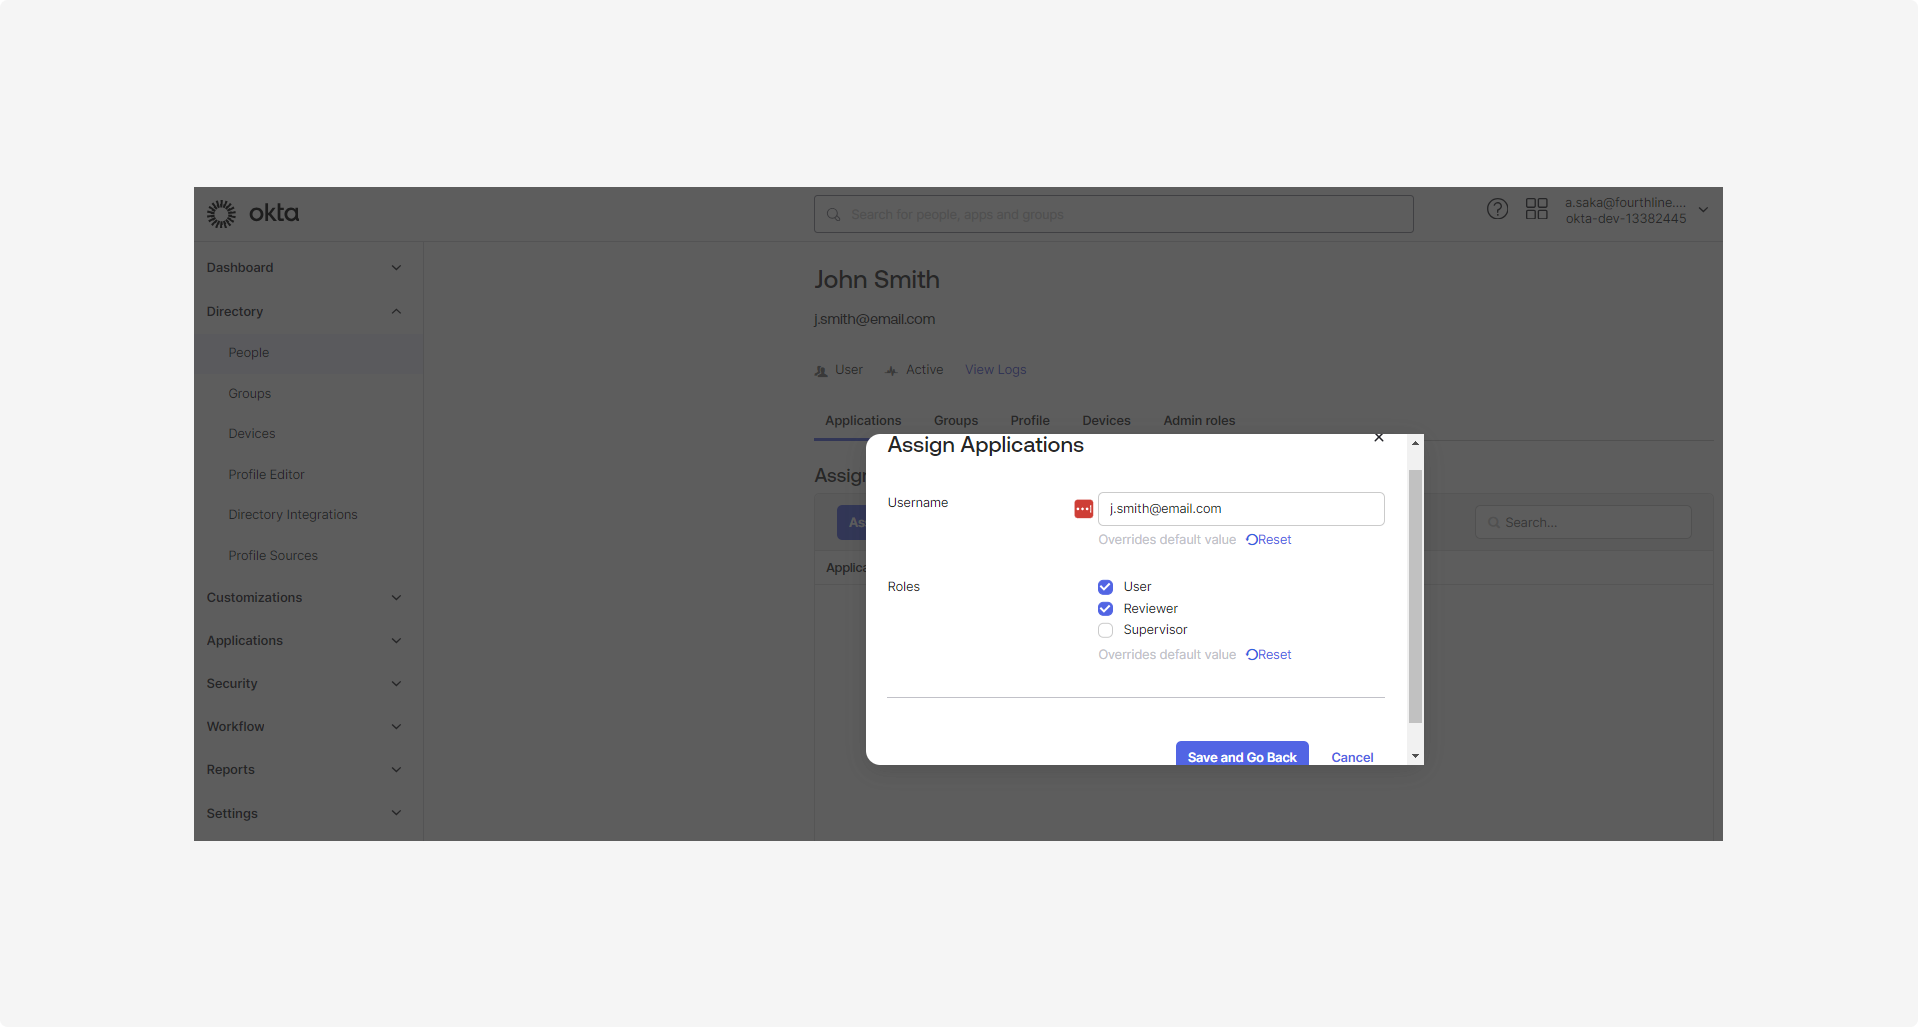
2.5 To assign roles to users:
- Go to Directory > People.
- On each user's profile page, on the Applications tab, click Assign applications, select the checkboxes of the relevant role(s), and then click Save and go back:
2.6 Optionally, to make sure the roles are being passed via SAML metadata, you can assign the application to the admin user, and then re-check the SAML assertion (see step 1.6).

Updated 5 months ago