Azure Federation
Integration guide
This page sets out how to integrate the Case Review Portal with the self-service or hybrid model with single sign-on.
Azure Federation
To set up Azure Federation to manage access to the Case Review Portal, follow these steps:
Prerequisites
Your organization must have Azure AD Premium.
Your Fourthline delivery manager provides you the following:
| Prerequisite | Description |
|---|---|
| Service provider entity ID | urn:amazon:cognito:sp:<UserPoolID> |
| SAML endpoint | https://<cognitoUrl>/saml2/idpresponse |
After you have successfully set up the federation with AD FS, you must send us your Federation Metadata XML file.
1. Create an enterprise application
1.1 From the Azure Portal, navigate to the target tenant by switching to the relevant Azure Active Directory, and then click Enterprise applications:
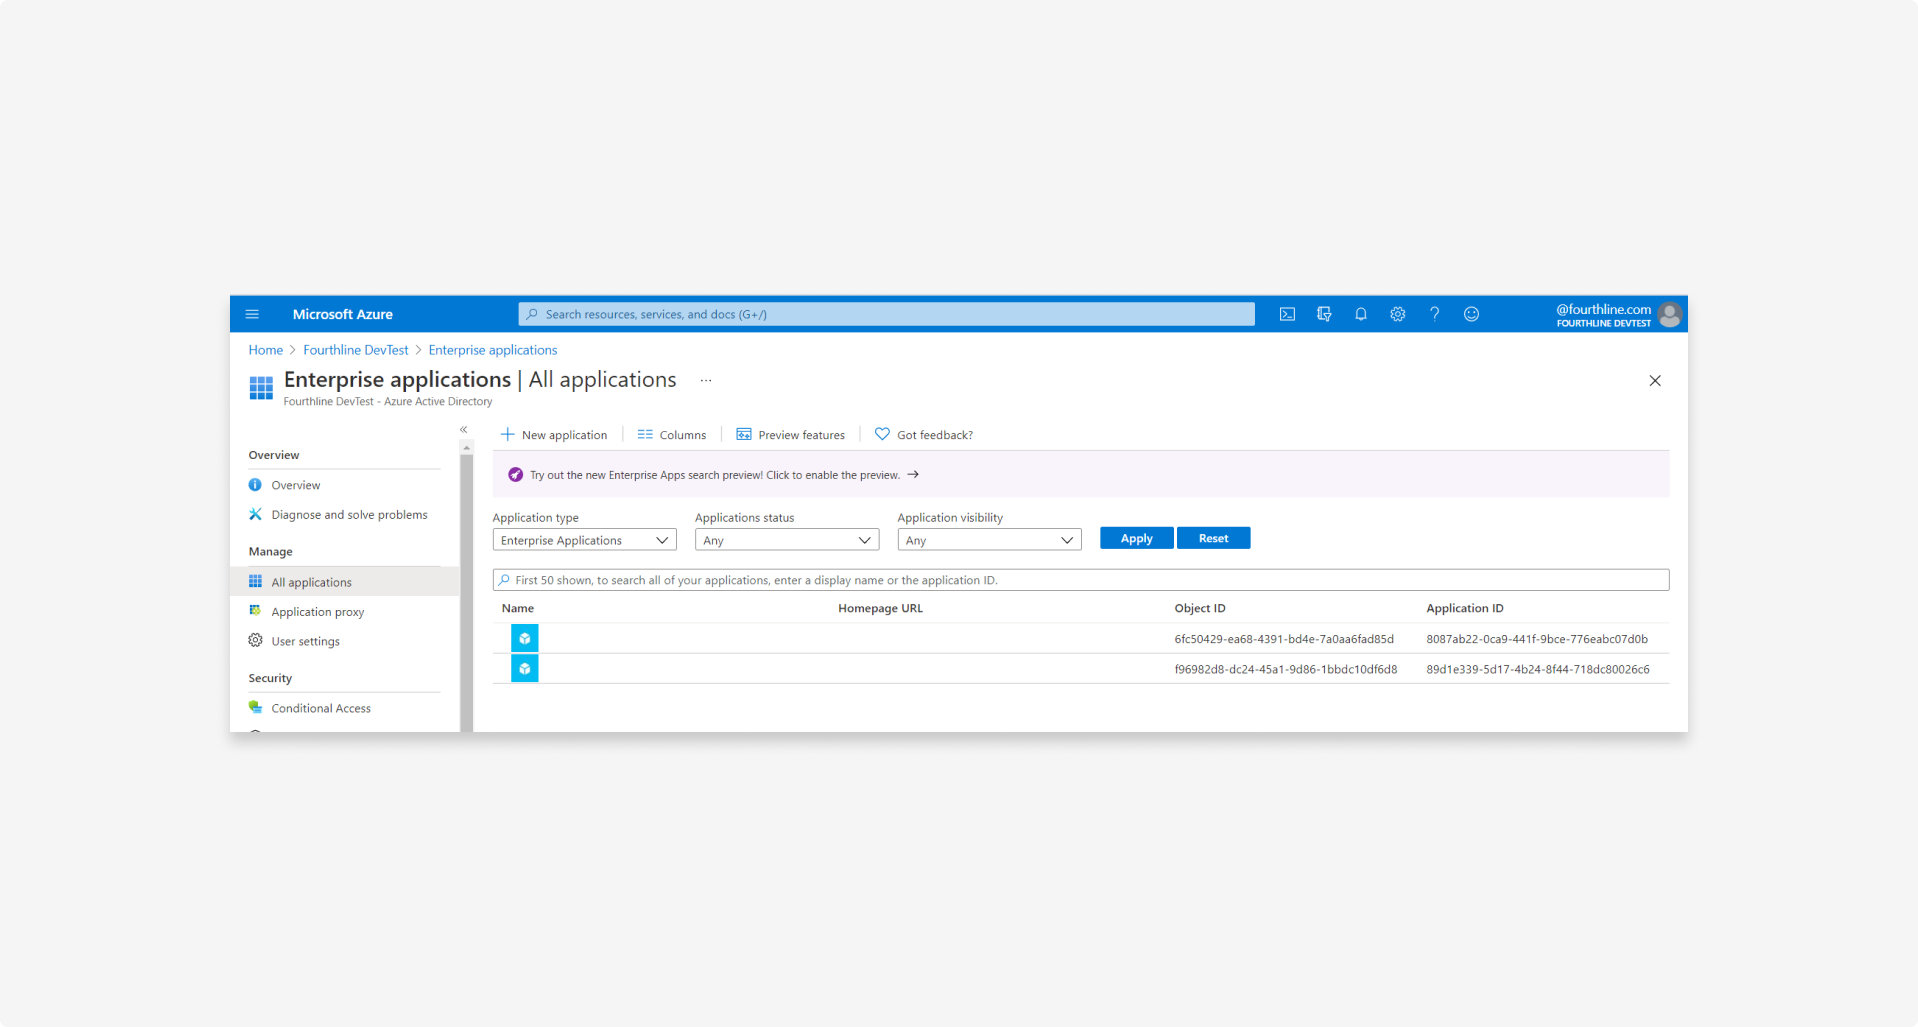
1.2 To create an Azure AD enterprise application, click Enterprise applications > New application:
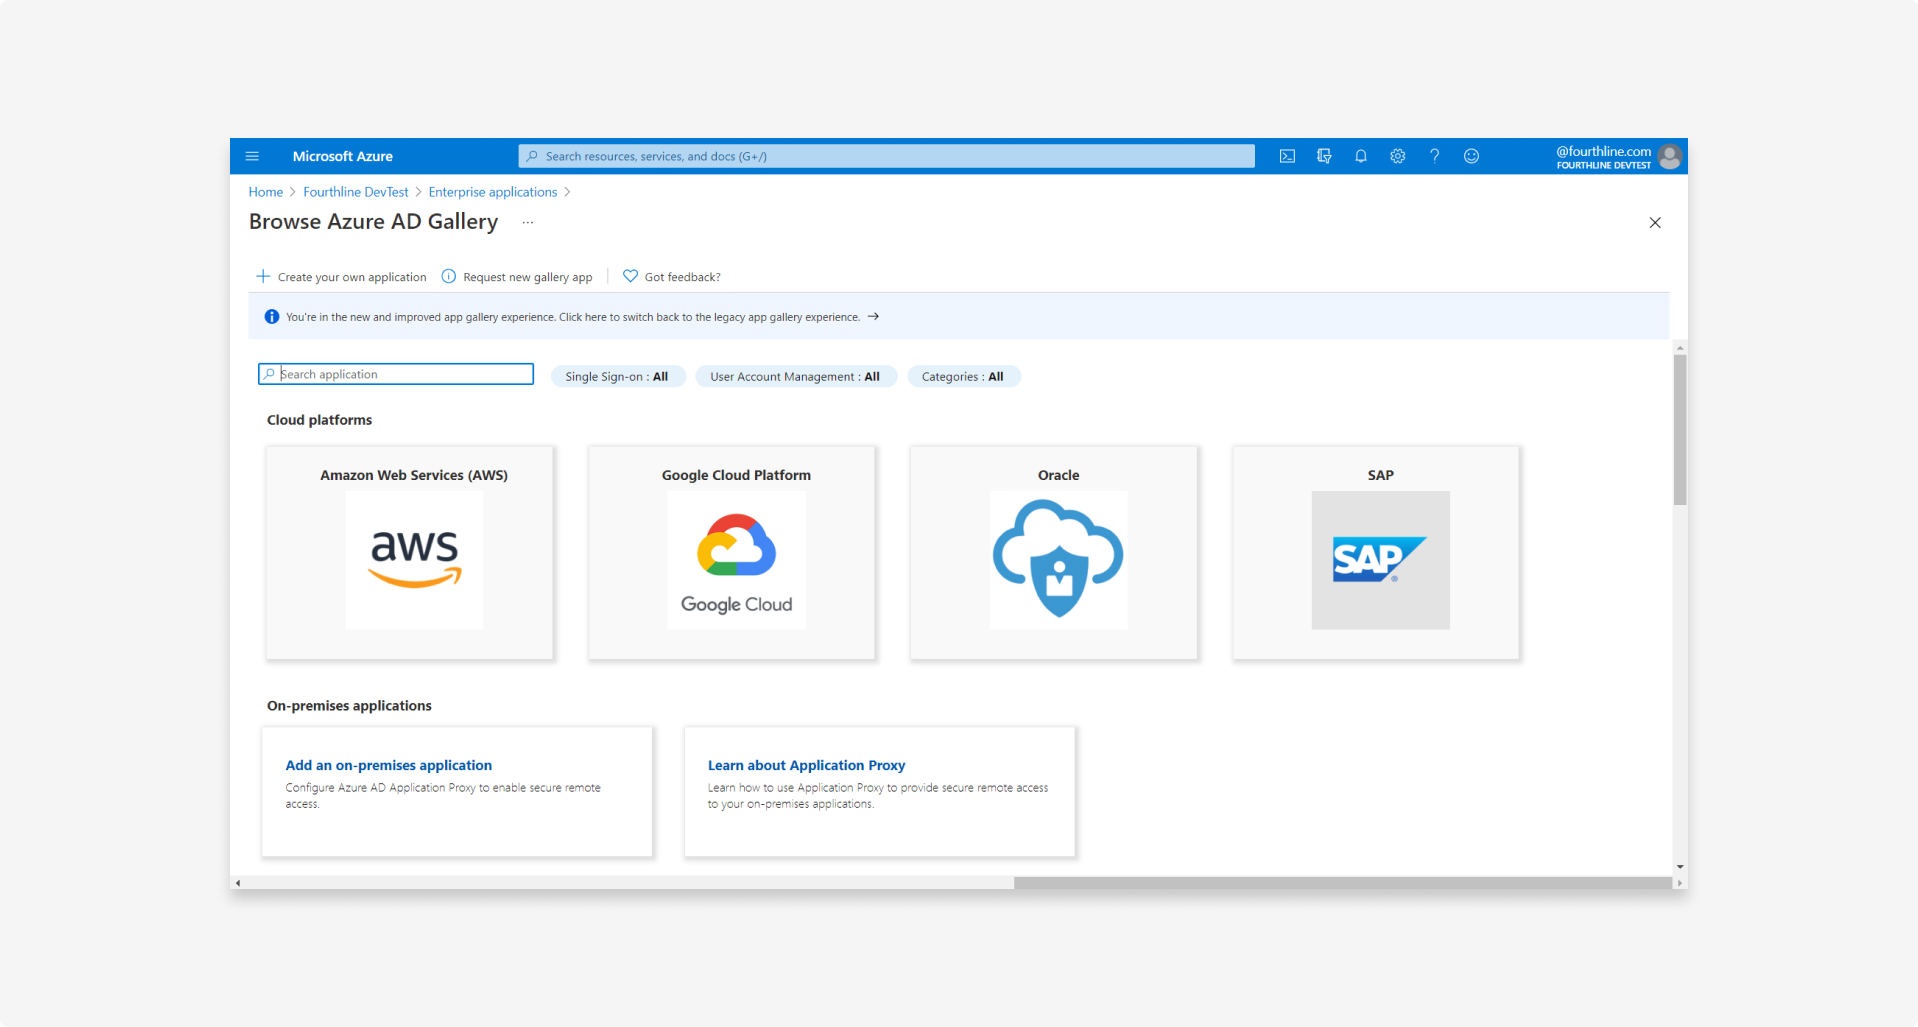
1.3 If you see a notification "You're in the new and improved app gallery experience. Click here to switch back to the legacy app gallery experience.", click the banner to go to the legacy experience:
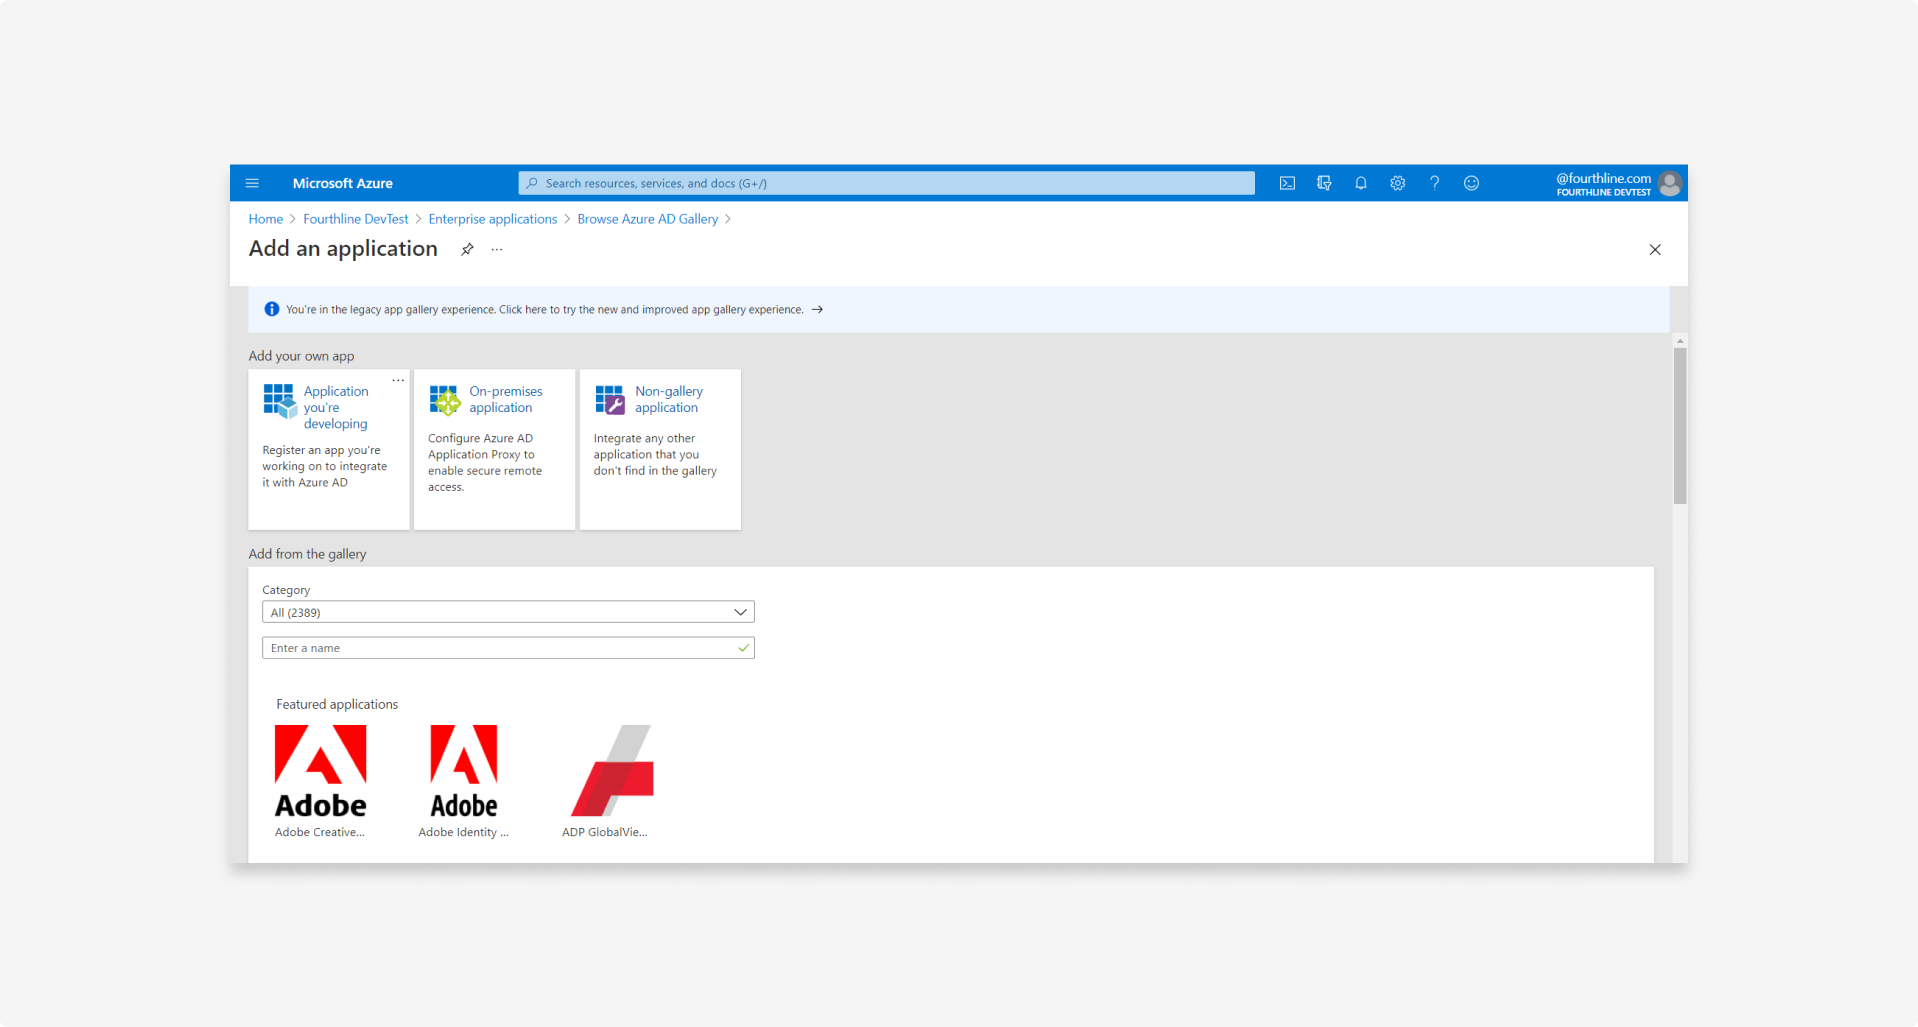
1.4 Click app type Non-gallery application.
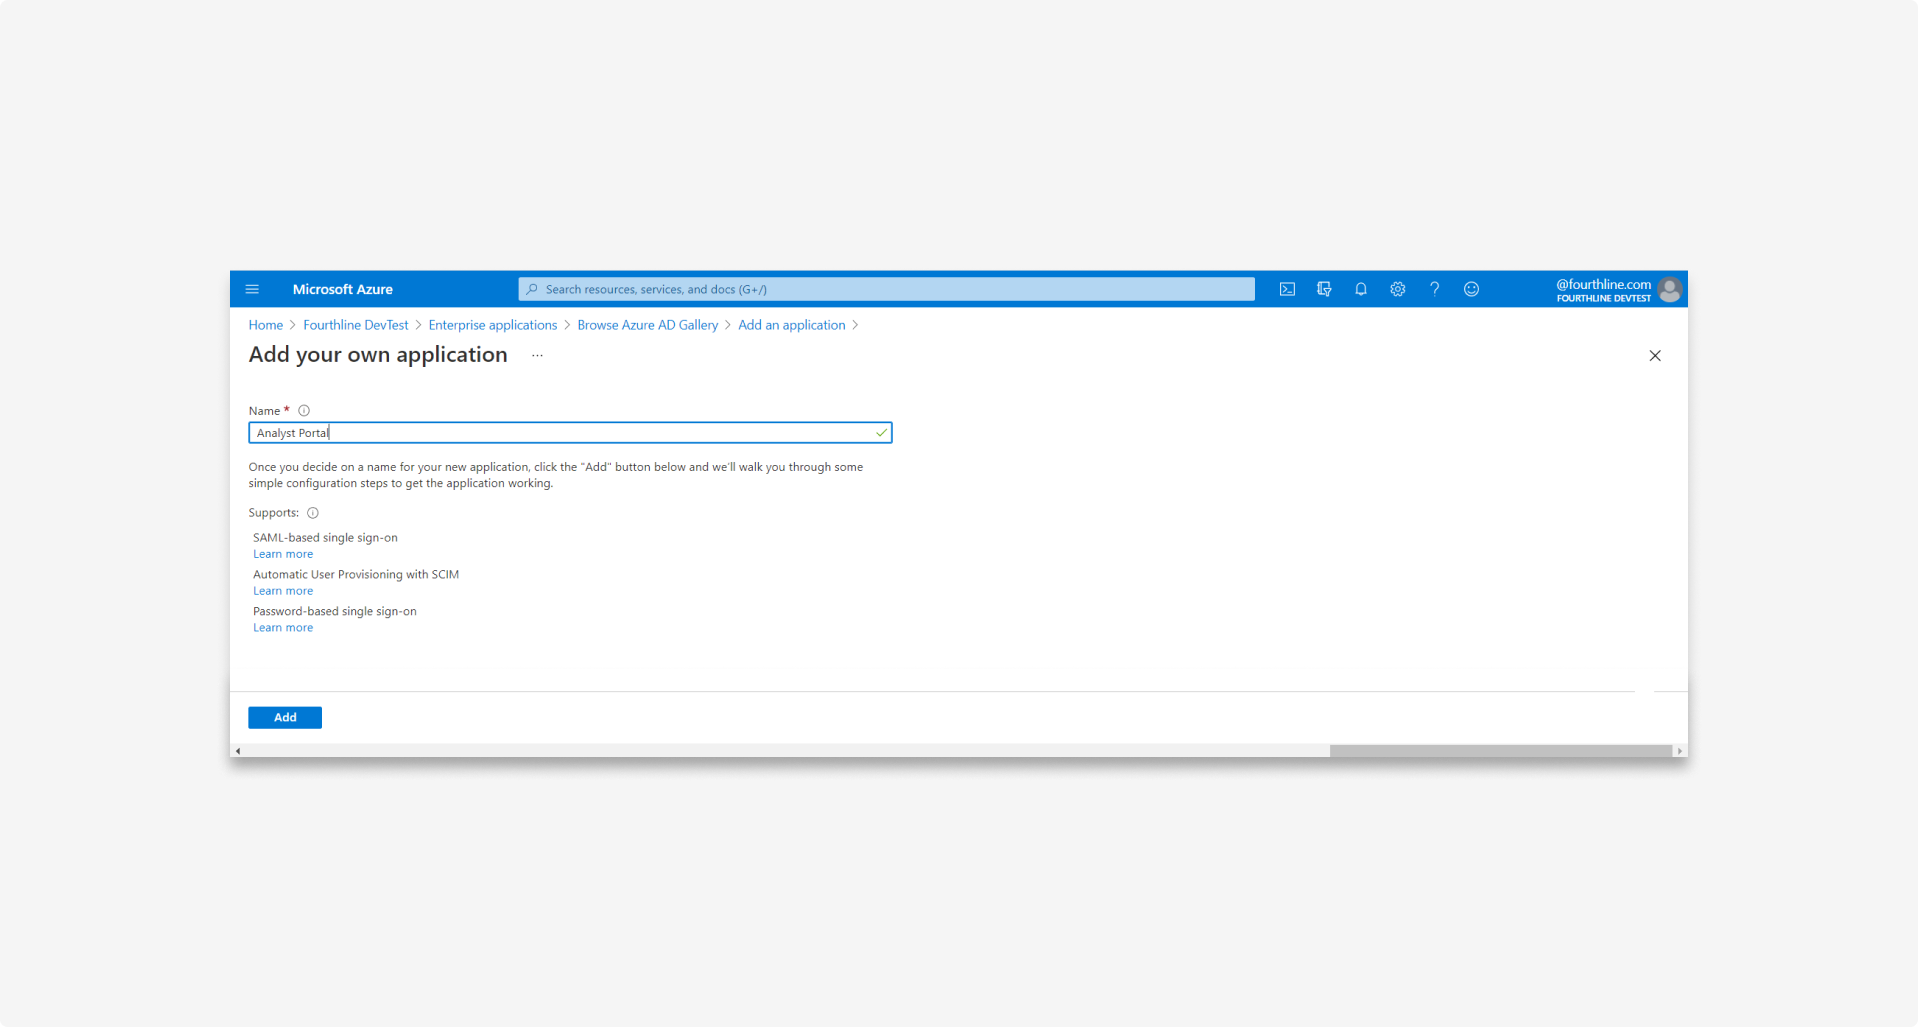
1.5 Choose a name for the federation, e.g. Fourthline Case Review Portal, and then click Add:
2. Configure single sign-on
2.1 In the Azure Portal, go to Overview, and then click Set up single sign-on:
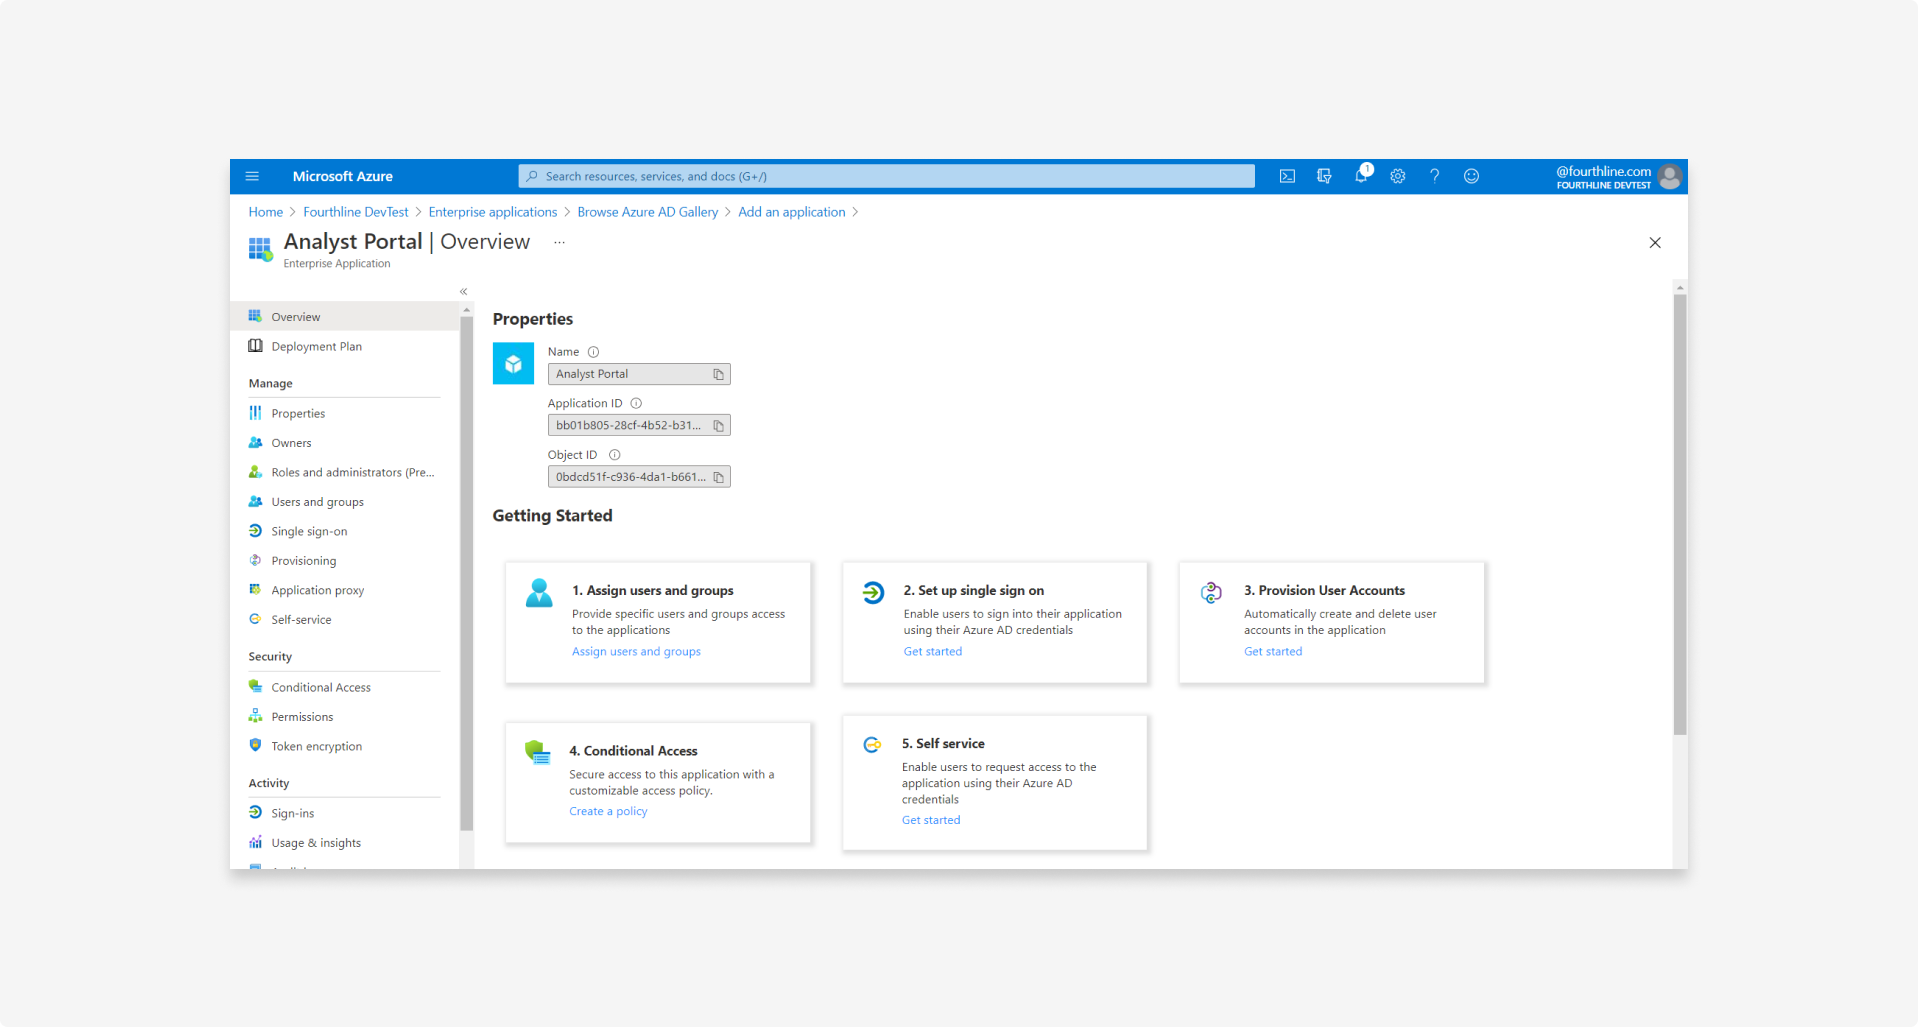
2.2 Click SAML:
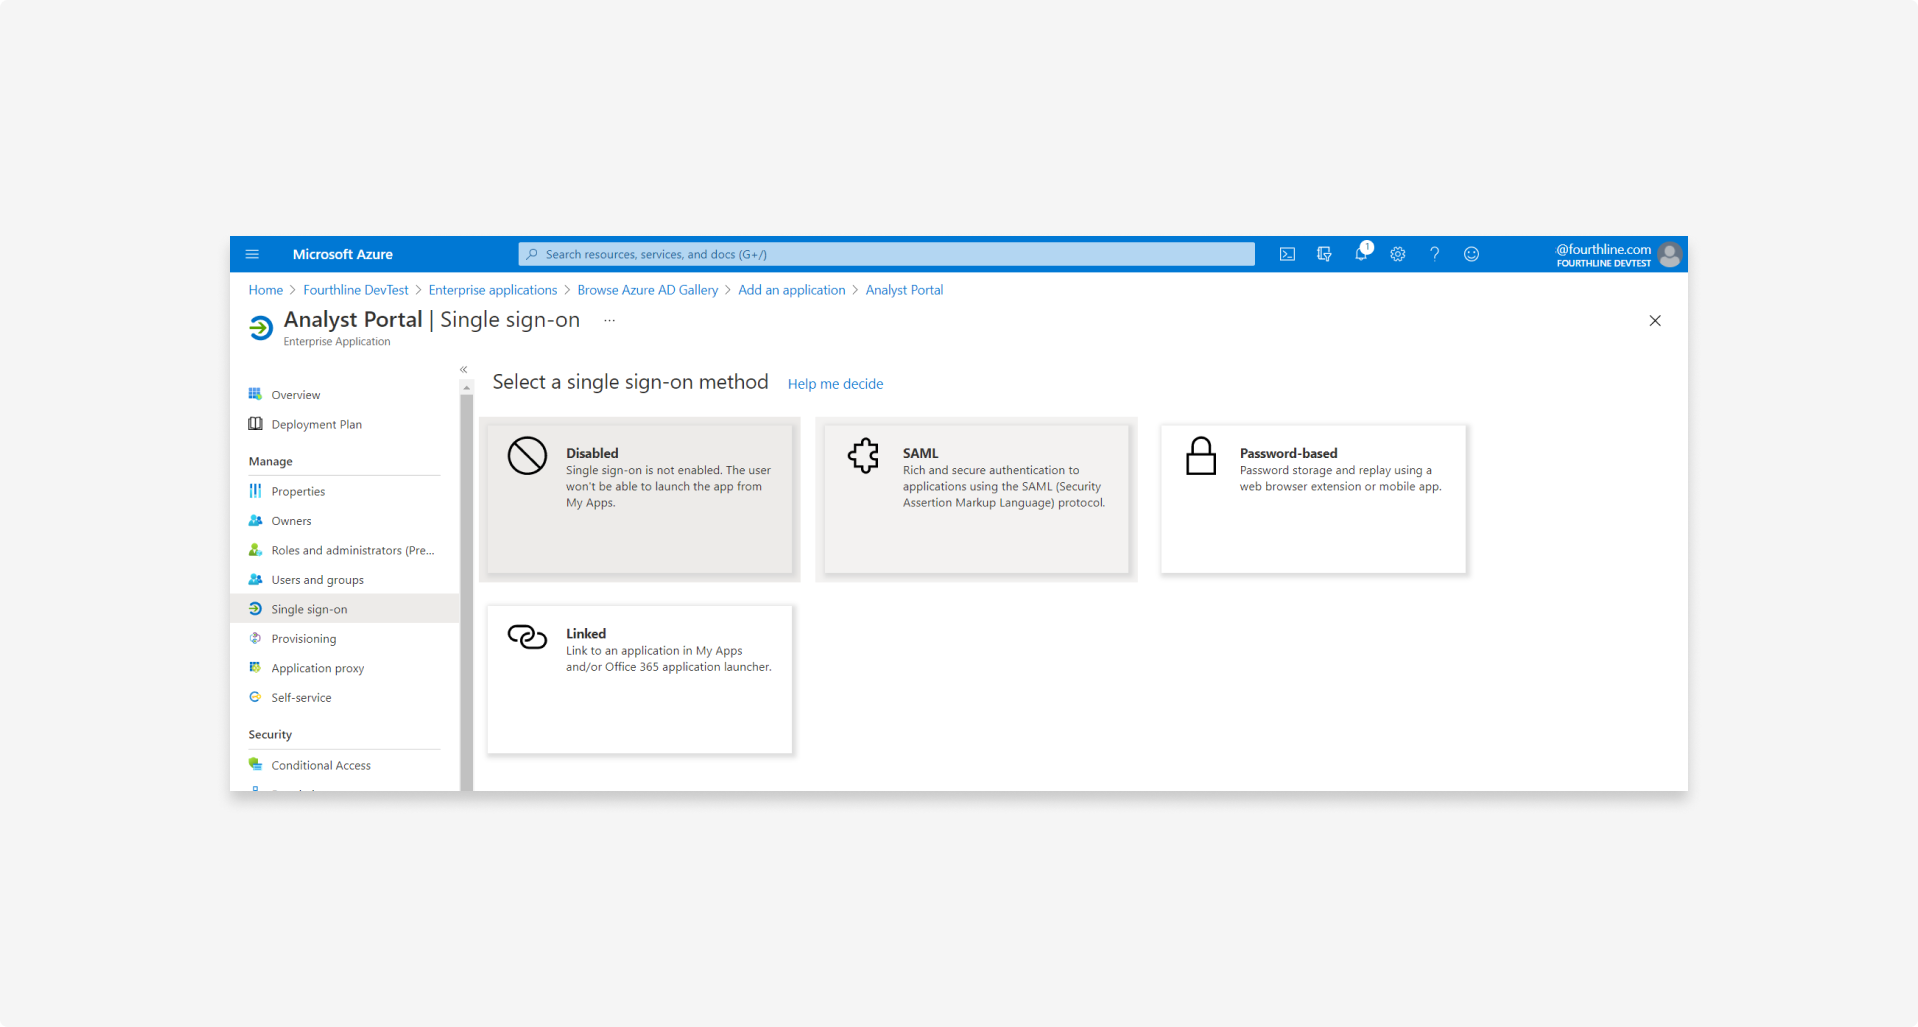
2.3 In the Basic SAML configuration block, click Edit:
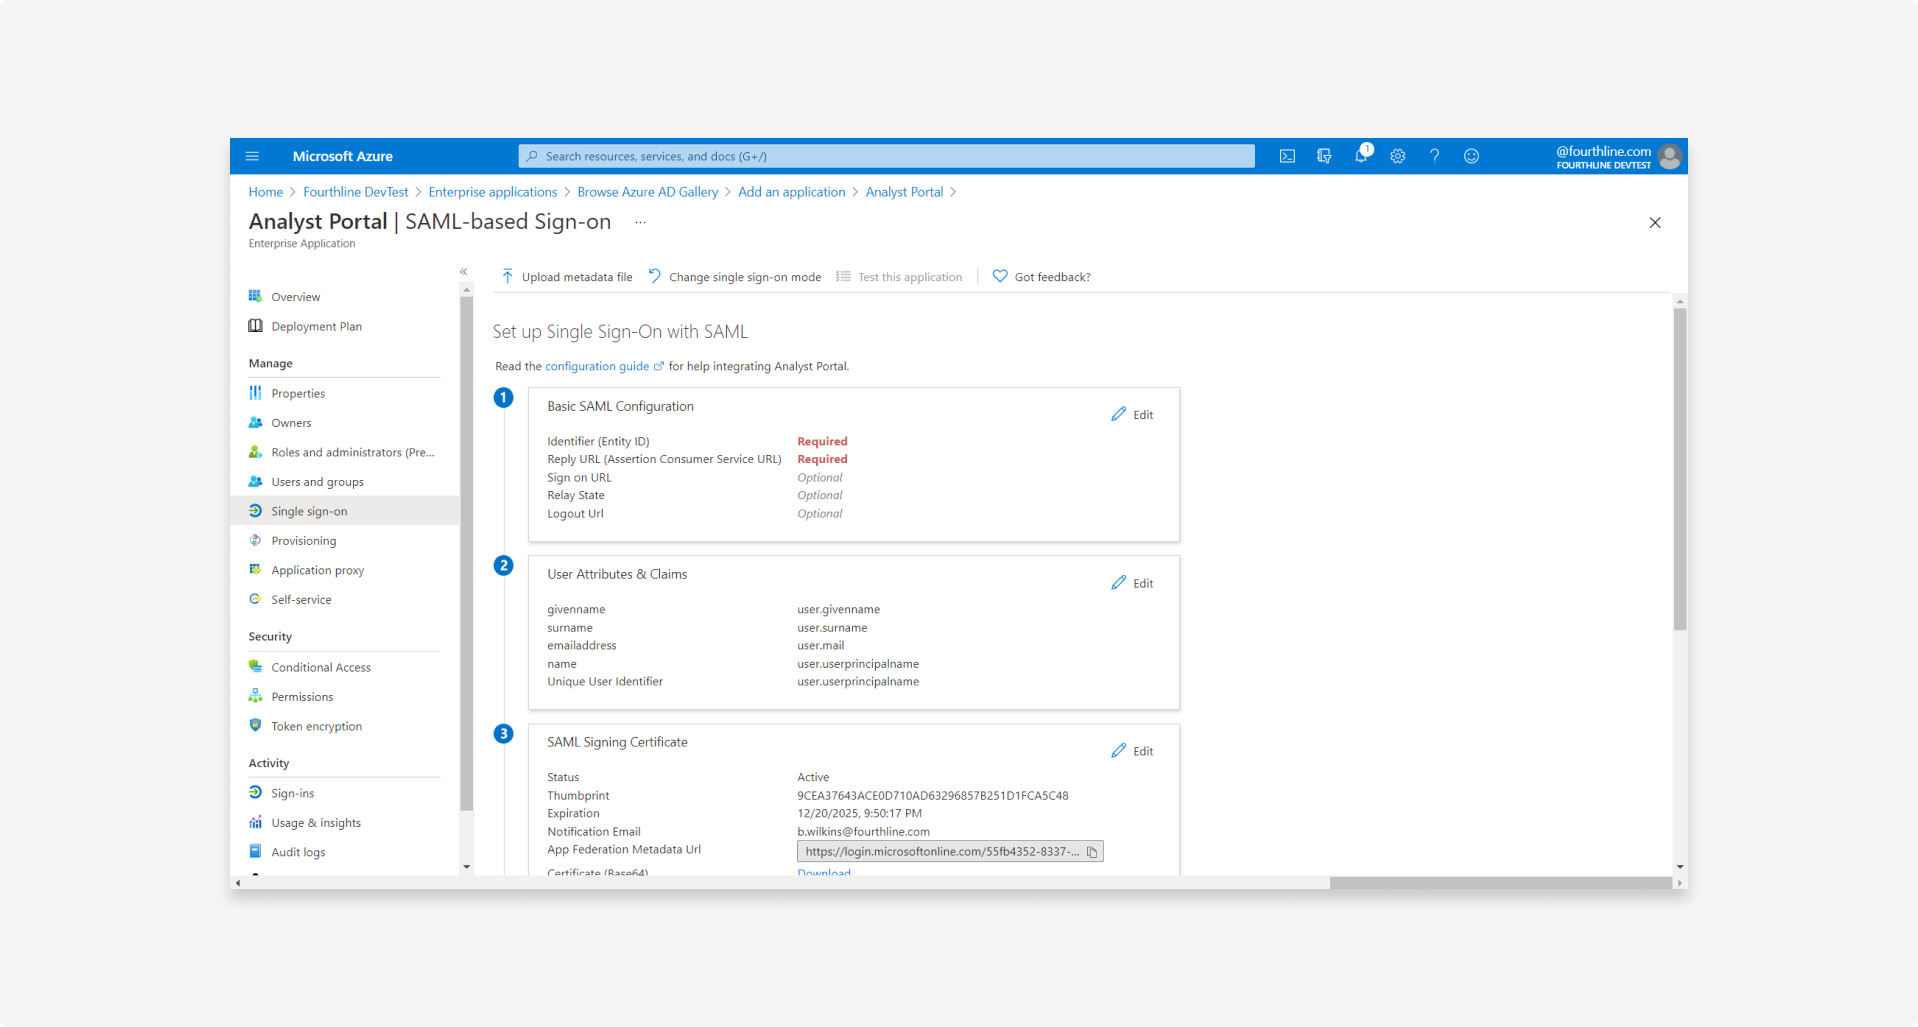
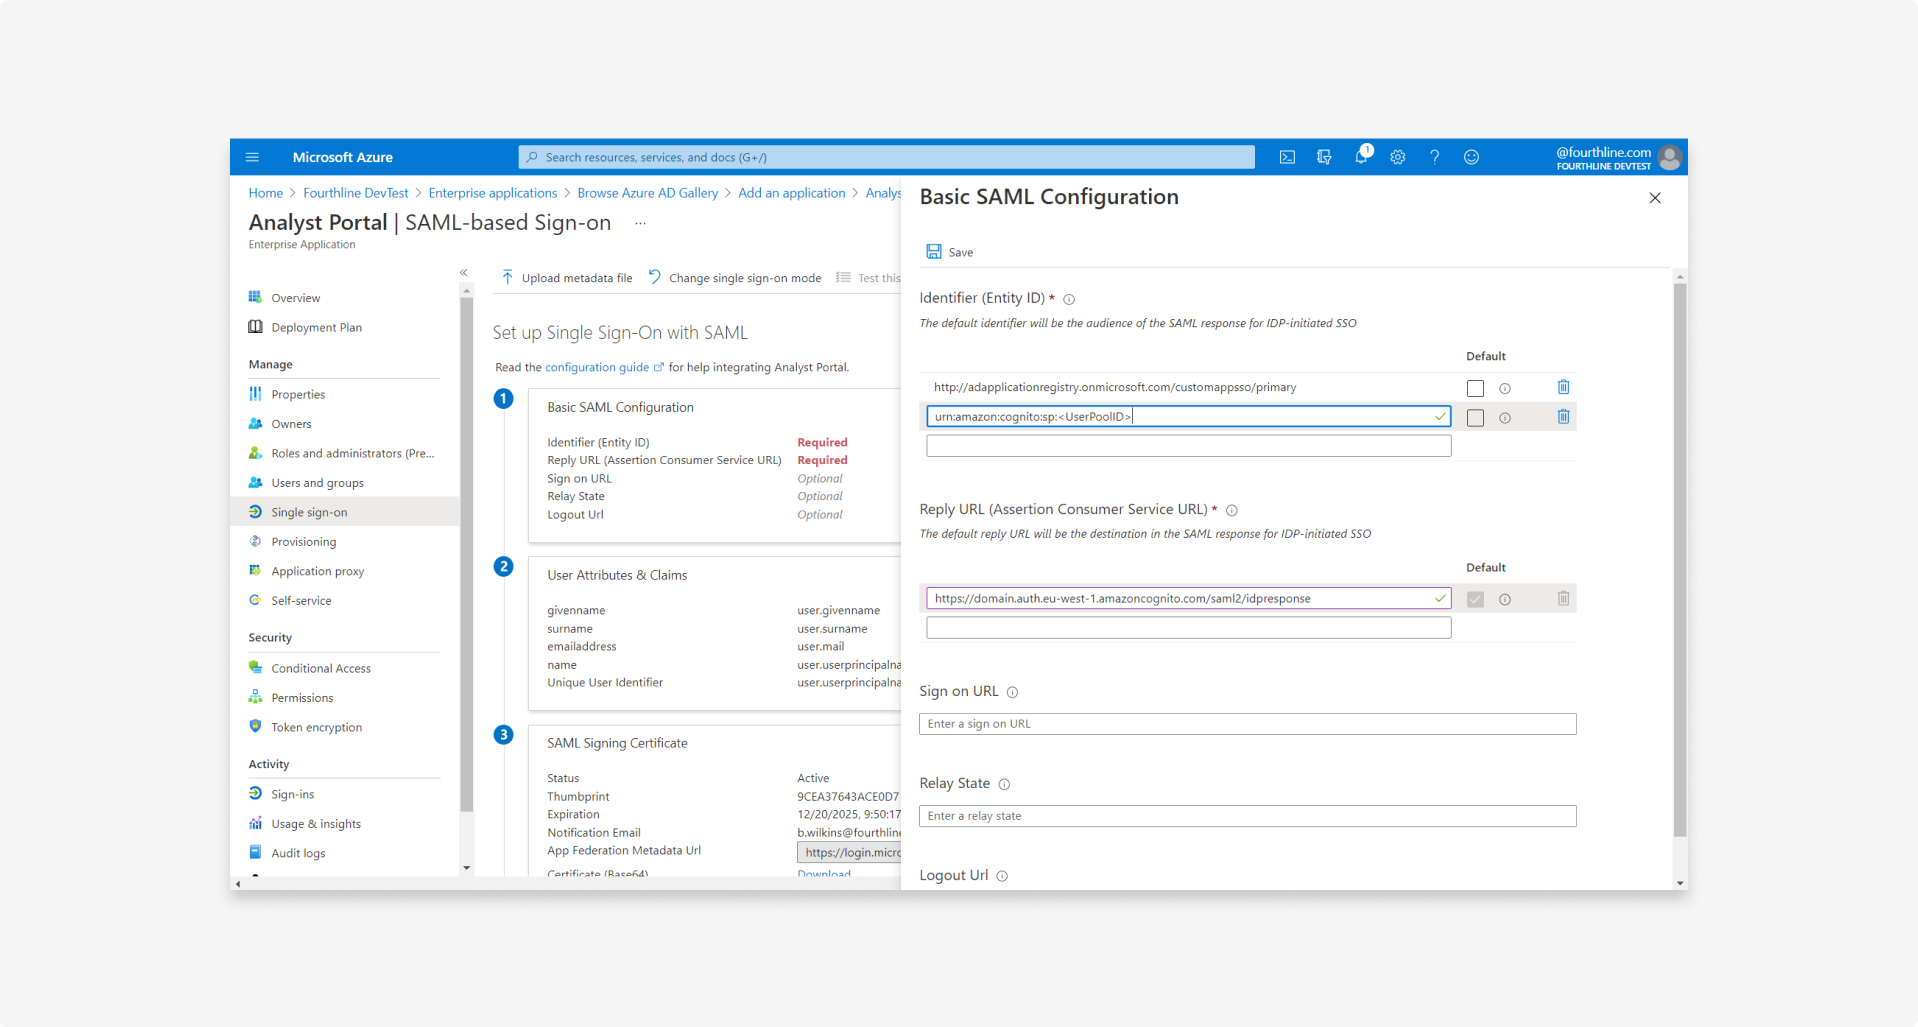
2.4 Configure single sign-on with the settings we provided you:
| Setting | Description |
|---|---|
| Identifier | urn:amazon:cognito:sp:<UserPoolID> |
| Reply URL | https://<cognitoUrl>/saml2/idpresponse |
3. Configure the claims
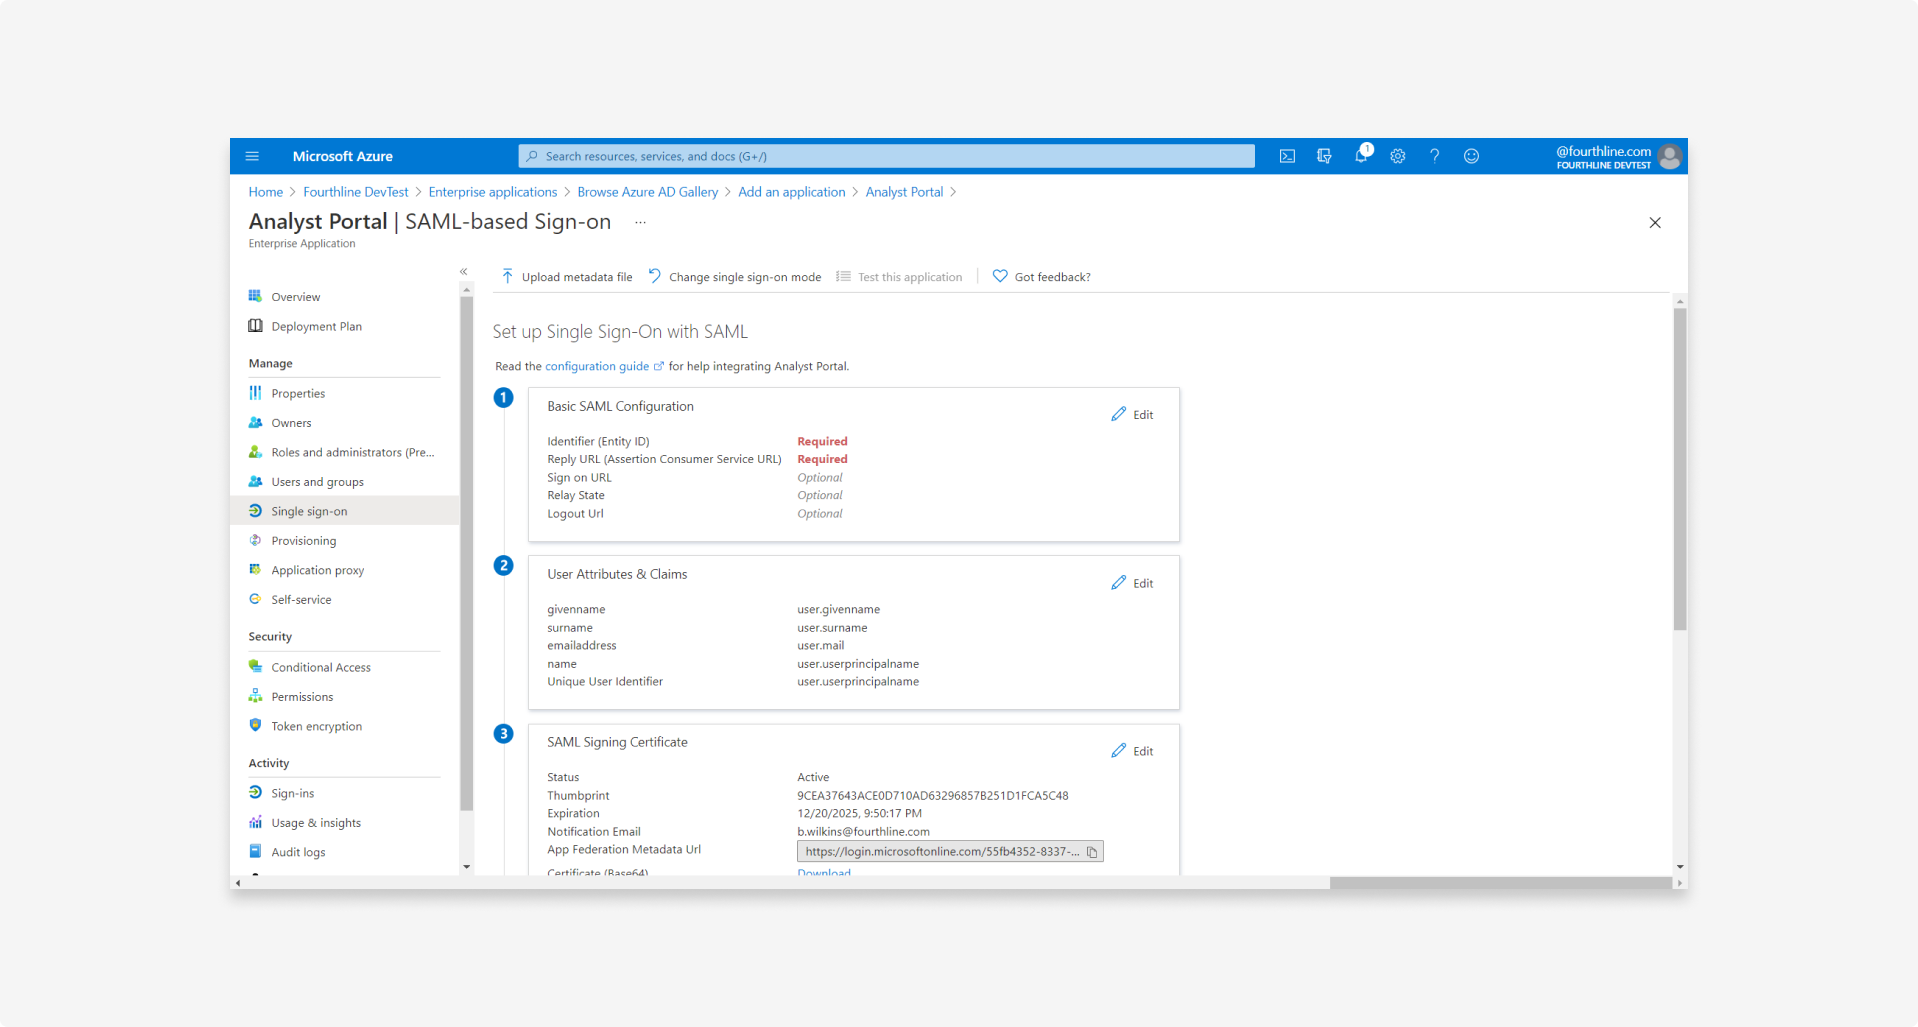
3.1 On the Set up single sign-on with SAML page, in the User attributes & claims block, click Edit:
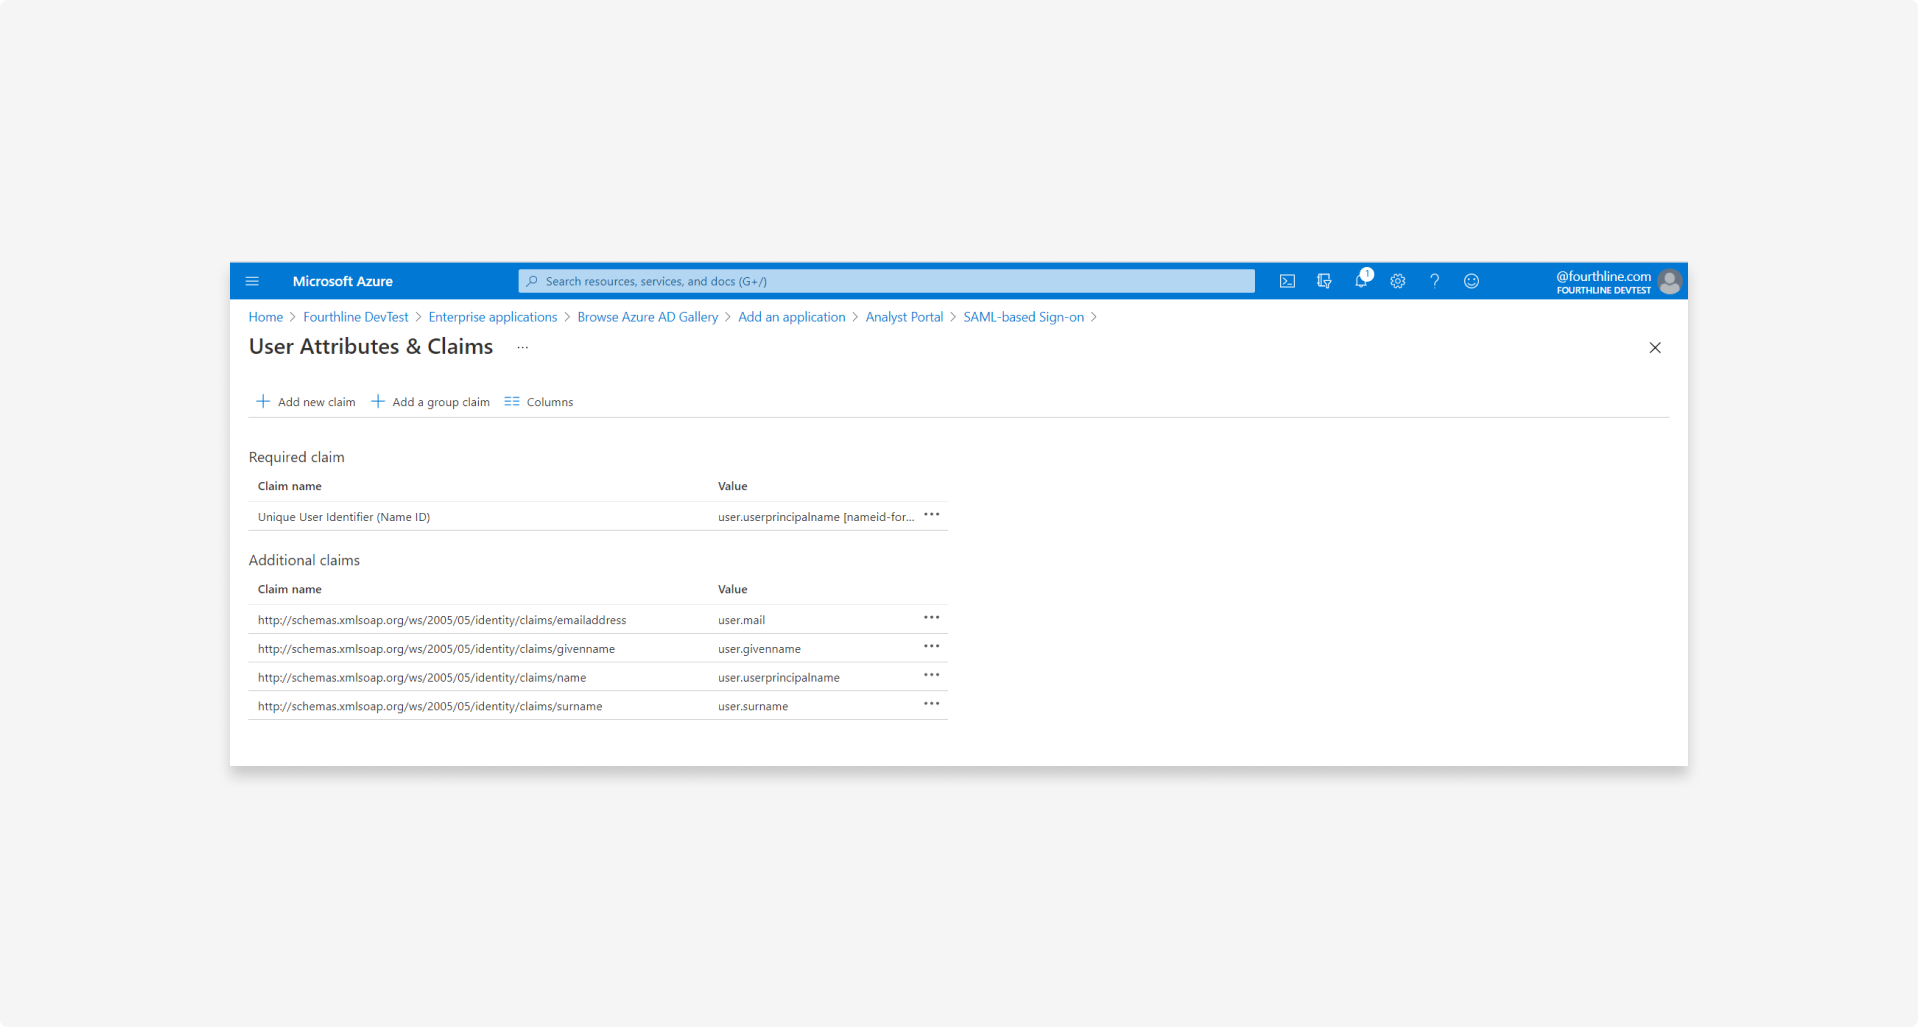
3.2 Configure the user attributes and map all required SAML claims you need to send to the relying party as follows:
A unique user identifier, also referred to as Name ID or User Principal Name:
http://schemas.xmlsoap.org/ws/2005/05/identity/claims/name
The user's email address:
http://schemas.xmlsoap.org/ws/2005/05/identity/claims/emailaddress
The user's first name, also referred to as Given name:
http://schemas.xmlsoap.org/ws/2005/05/identity/claims/givenname
The user's surname:
http://schemas.xmlsoap.org/ws/2005/05/identity/claims/surname
The application roles:
http://schemas.microsoft.com/ws/2008/06/identity/claims/role
4. Download SAML metadata
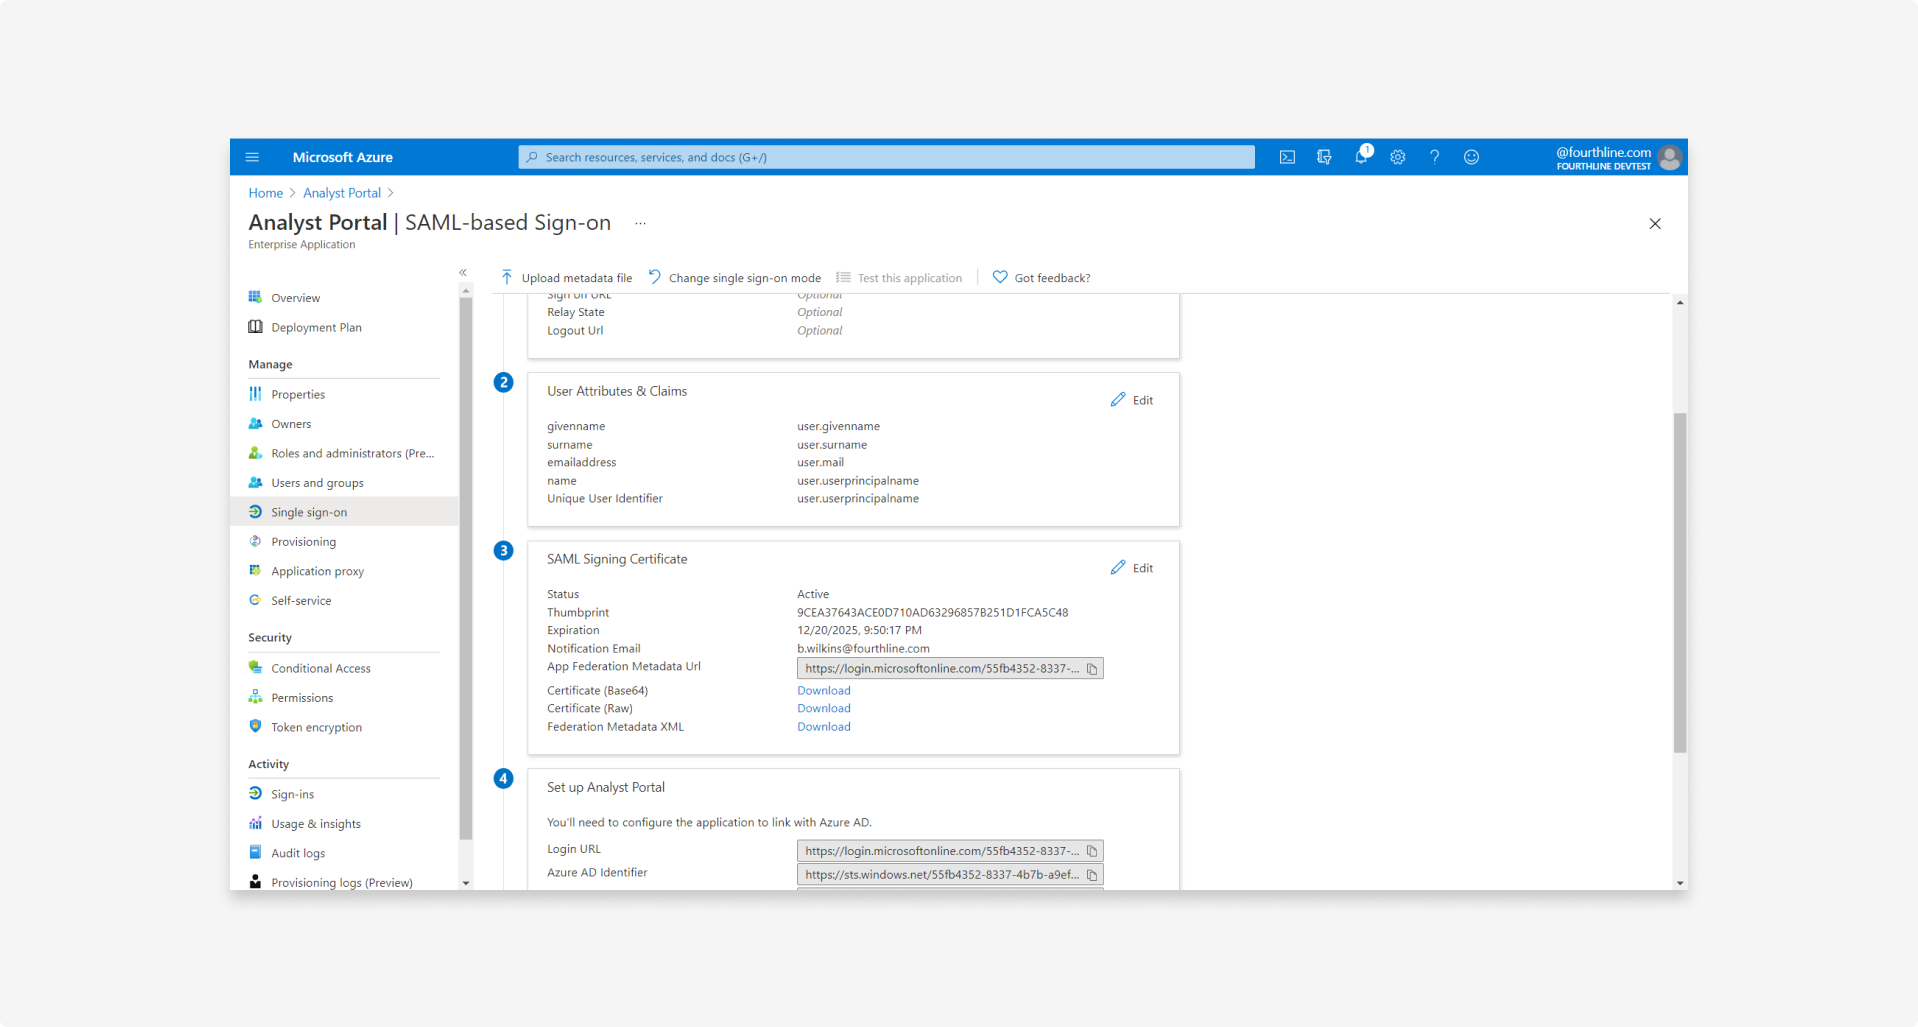
4.1 On the Set up single sign-on with SAML page, in the SAML signing certificate block, click Download for the Federation Metadata XML:
4.2 Send the federation metadata XML file to your Fourthline delivery manager.
5. Add users
5.1 Go to App registrations. It displays Owned application by default.
5.2 If the list is empty, click All applications.
5.3 Select the application you want to configure roles for.
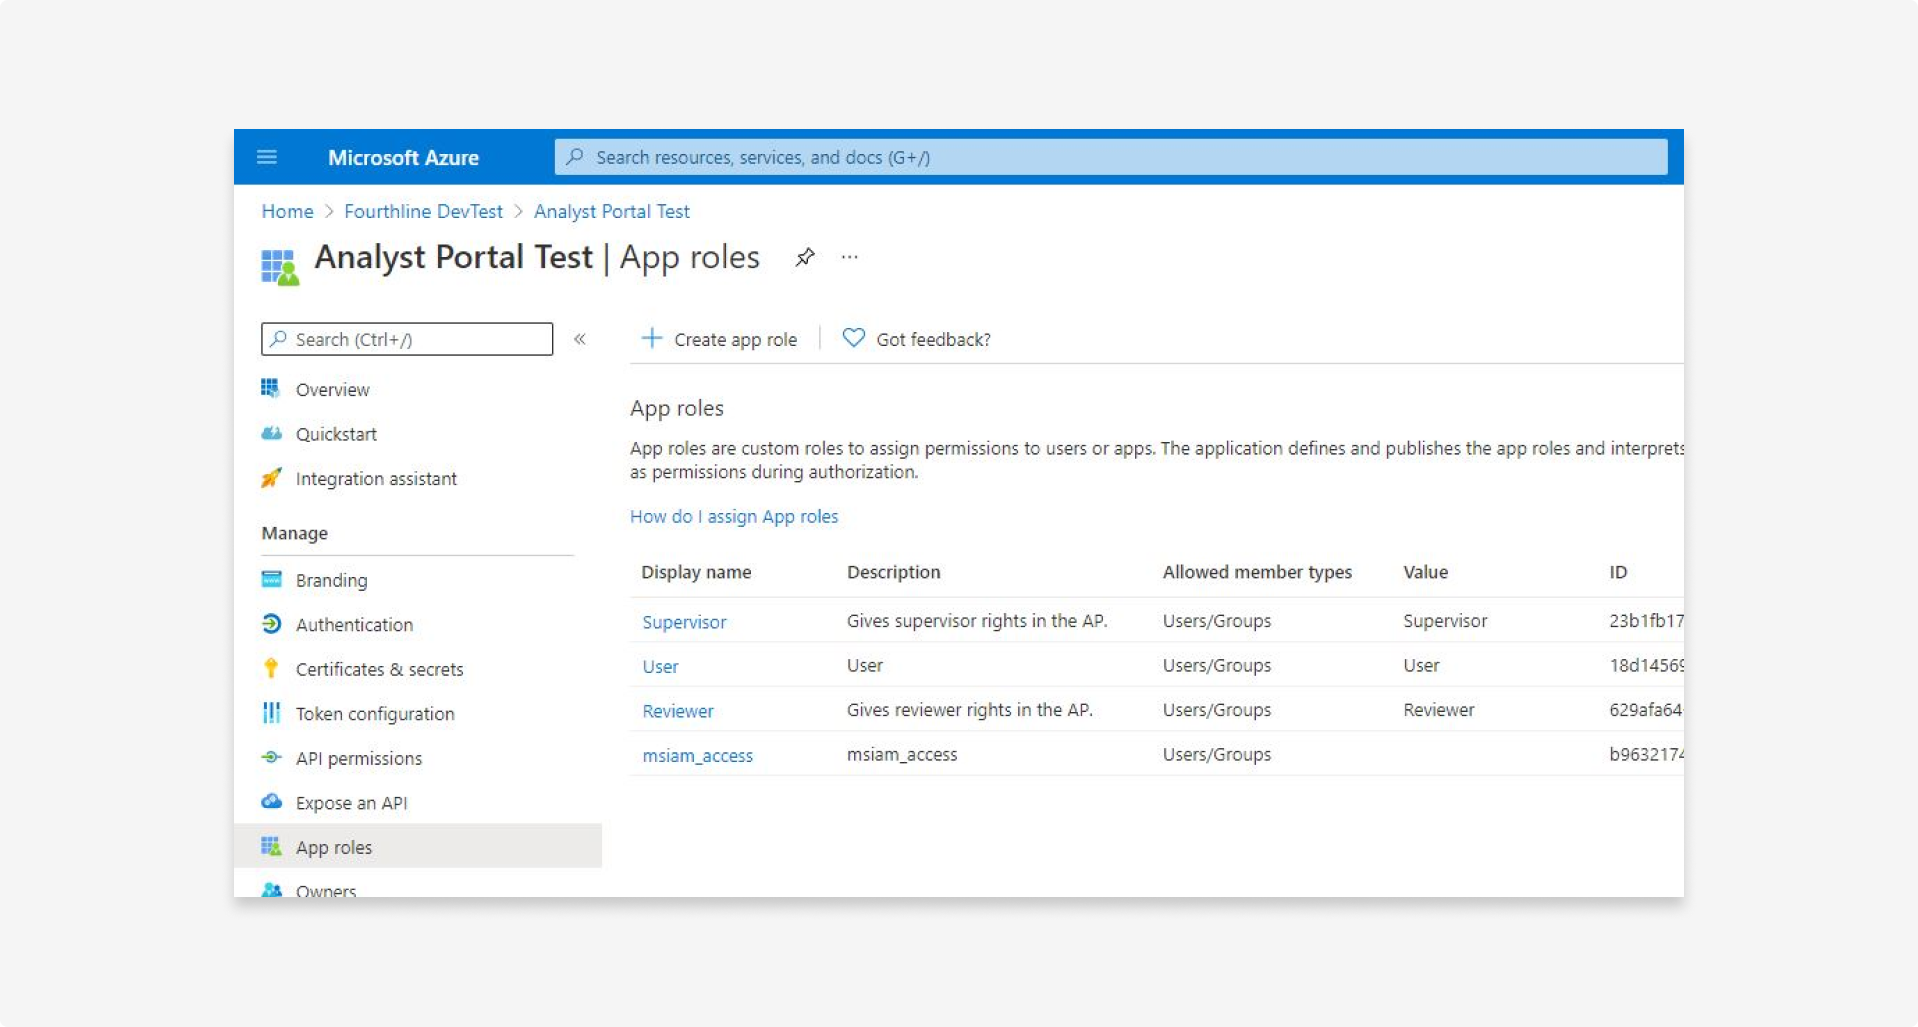
5.4 In the left menu, click App roles.
5.5 In the main screen, click Create app role.
5.6 Add the role permissions.
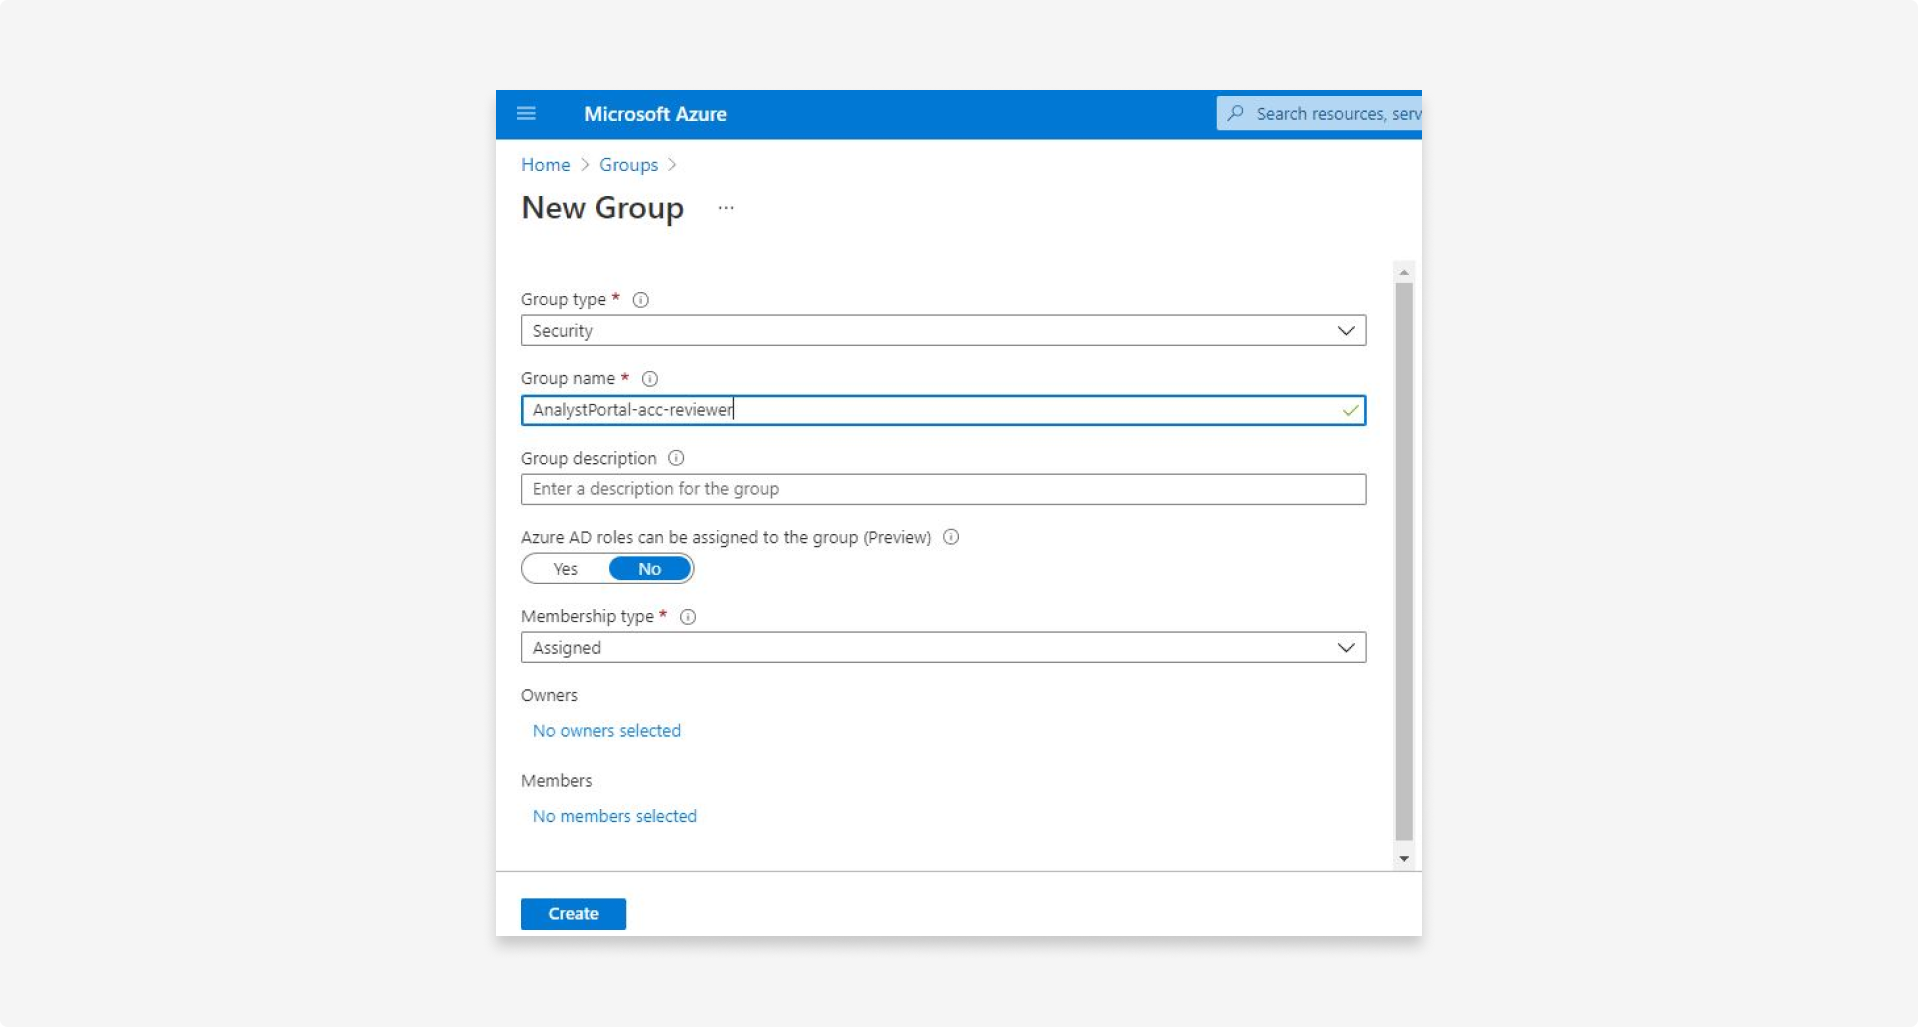
5.7 To add groups to the application:
- On the main tenant screen, in the left menu, click Groups.
- For each role, click New group.
5.8 To add roles to the groups:
- Go to Enterprise applications, and then click the application to configure.
- In the left menu, click Users and groups.
- In the main screen, click Add user/group.
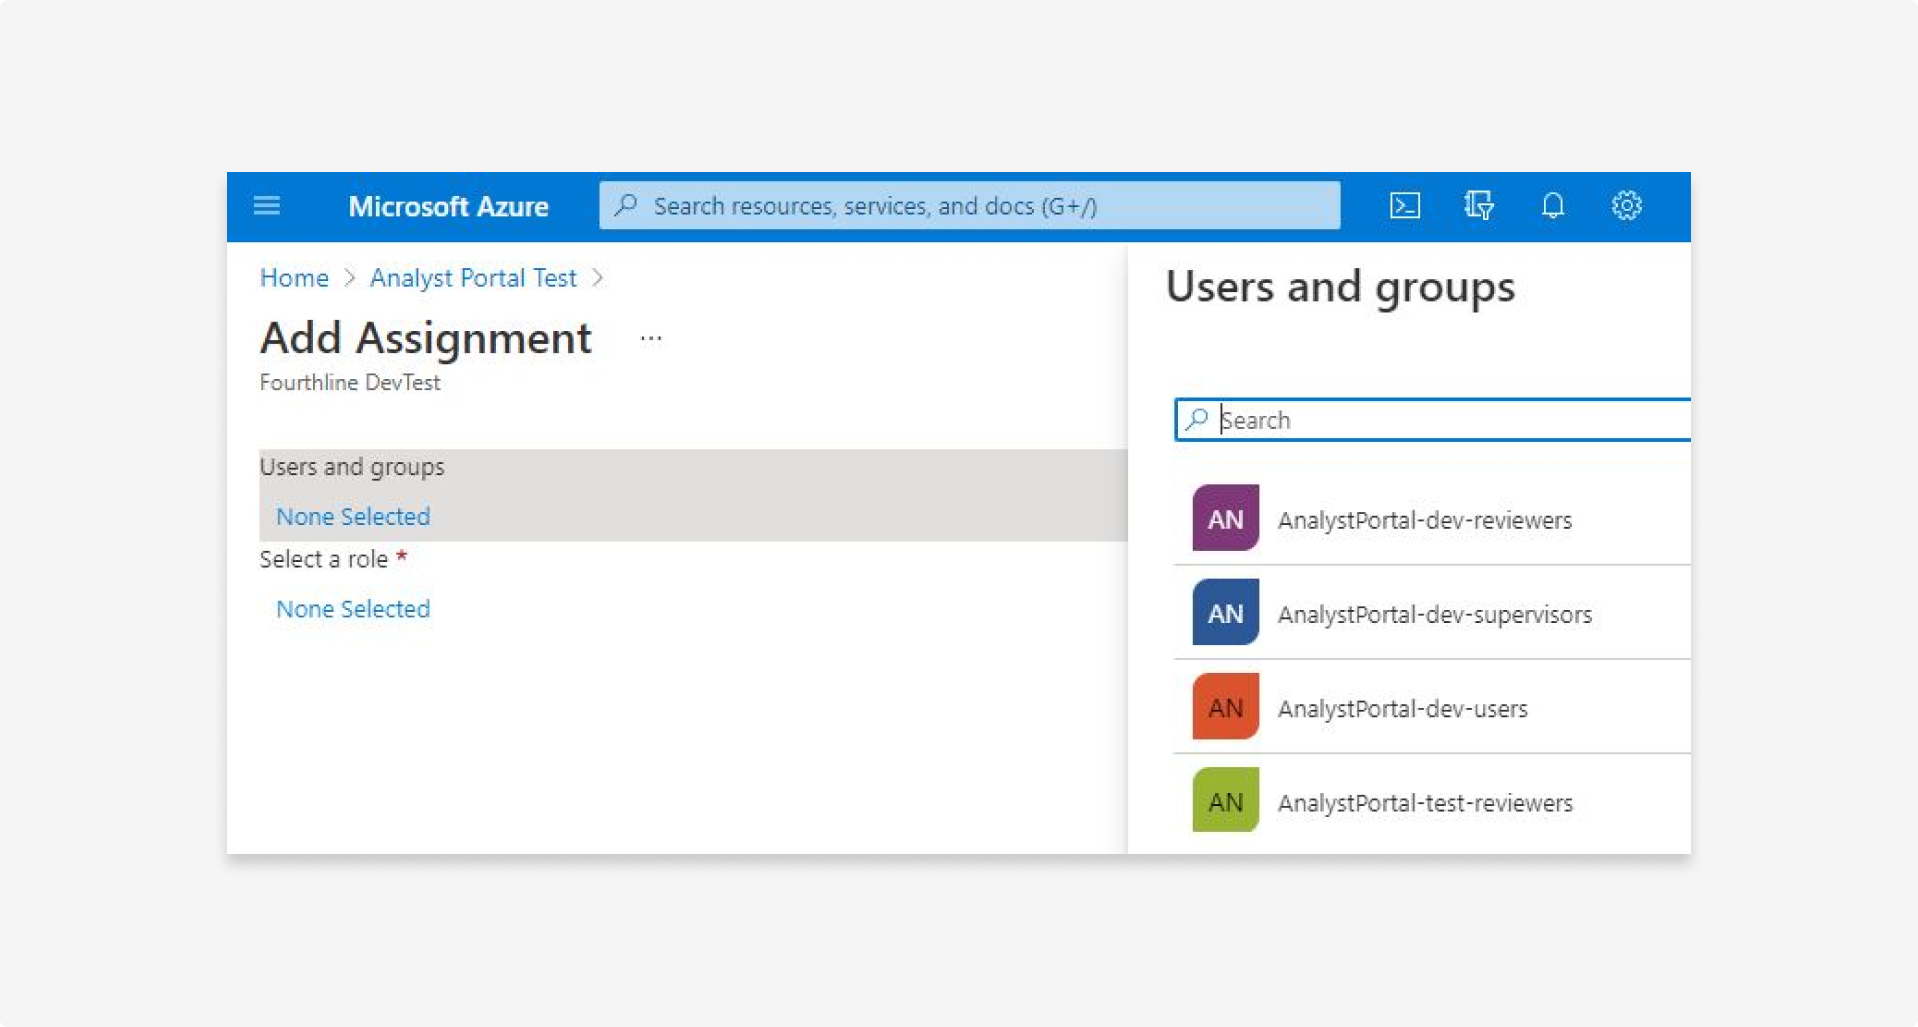
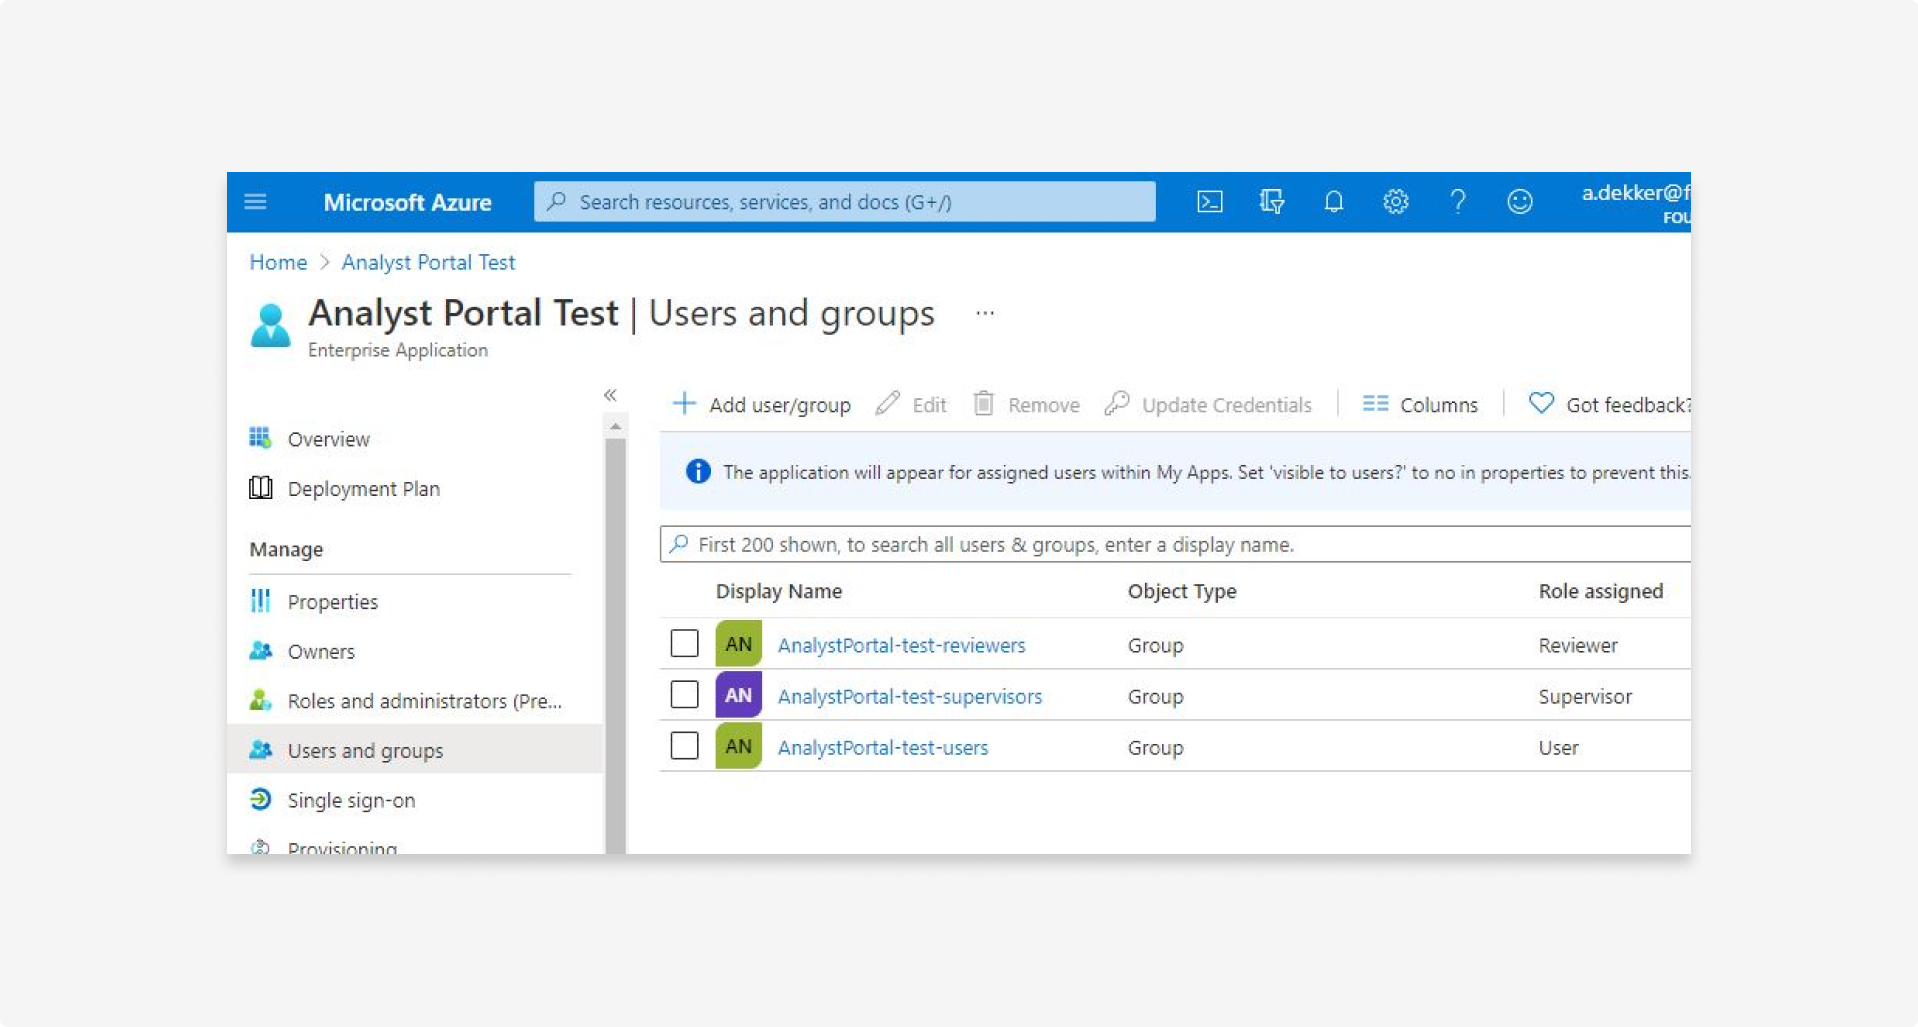
5.9 Select a group and the corresponding role, and then click Assign. You should have 1 group per role.
5.10 To add users to the groups:
- Go to the Overview page and click Groups.
- Click the group to add users to.
- In the left menu, click Members.
- In the top menu:
- To add one or more users manually, click Add members.
- To import multiple users with a .CSV file, click Bulk operations.
Updated 4 months ago